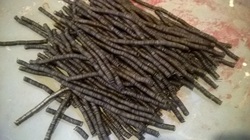
 20,000 rings coiled and ready to cut.
This article will give step-by-step guidance on how to successfully produce and assemble riveted maille. I want to stress that if you do not have a firm grasp on how to produce a maille garment that you should continue honing your skills with butted maille prior to attempting riveted maille. I would also stress that making riveted maille is not for the faint of heart. I believe that anyone can make riveted maille. However, I also think that most people will not be willing/able to dedicate the time and resources necessary to do so. Riveted maille, unlike butted maille, is not something you can do over a weekend or in a college dormitory.
For those who are willing to take that first step into a larger world of maille-making, I want to offer this tutorial as first step. However, if you find yourself faltering, getting stuck, unsure of what to do, or otherwise in need of help, I encourage you to contact me and see if we can troubleshoot the problem. One of the things I was most struck by in learning to make riveted maille is that the process itself is not difficult – but it is one that requires experience. Traditionally, this experience would have been passed down by a master to his apprentice. Today, we are largely teaching ourselves and using other’s work as a guide.
General Advice:
As a matter of general advice, the following is a non-exhaustive list of things that seemed to help me/things I wish I would have known sooner.
Make Small Batches: Making riveted maille requires a considerable amount of troubleshooting, I would therefore advise you to start with small batches. Play around with how much overlap you need, how much to flatten the overlap, whether you want to flatten the whole ring or not, and so on. Once you have a better feel for what you are going for, you will then need to work at duplicating those results over and over again – something easier said than done.
If stuck, walk away for a while: There were a few times that I felt completely stuck. I was ruining too many rings and not getting good results on the rings that did survive. What I wish I would have done a few times was just walk away. Instead of doing the same thing wrong over and over, sometimes you need to walk away and re-assess. That leads into my next point.
If something isn’t working, stop doing it: Rather than ruining 50 rings doing the same thing incorrectly, re-assess and try to figure out what the root problem is. Is your overlap too small, your punch too big, or both? Don’t keep punching rings hoping it’ll eventually turn out right, try to figure out the underlying problem and fix it.
But don’t make any rash decisions: The above point having been made, I would caution you against filing your punch down to nothing in hopes of making it perfect. Much like shaving, it’s easy to try to even things up and end up overdoing it. In this same vein, you may find that you are ruining rings but not know if the problem is with the punch, the rivets, the overlap, or all of them. Don’t fix them all at once because you might over-correct the problem and end up needing to file down a new punch. Troubleshoot methodically, assessing the problem at each juncture before moving on to the next. If none of that seems to work, your problem might just be a lack of experience. Without an experienced hand next to you telling you how to improve your work, it might be hard to know this. However, over time you will find that you become more and more reliable and waste fewer rings.
Quality is Job one: Making riveted maille is a slow process, don’t try to zoom through and get it done. The way I see it, we are re-learning a lost trade, don’t expect your work to be perfect, but don’t make it any worse by rushing.
Do your research: I think this point is critical. Do your research, choose what type of armor you want to make, what era, region, and quality. If you want to make armor for a 14th century man-at-arms, the ring size, rivet type, and armor style will be different than an 11th century crusader’s armor. Do you want an attached hood and aventail? Do you want alternating riveted and solid rings? Is this armor meant to protect against hack-and-slash swords of the earlier medieval periods or a thrusting sword? Only you can answer these questions, but answer them before you start on a generalized medieval/fantasy hauberk. If you want to invest the time and resources into a riveted suit, make sure you do your research.
Don’t despair: If you make riveted maille, you will come to a point – I can promise you of this – where you will hit bottom. You’ll feel stuck, won’t know how to fix a problem, and have nowhere to turn. I was there. I hit it when I had made a small patch of about 15 rings and had a pile of 100-200 ruined rings laying in front of me. I knew the process, I knew I could make riveted maille, but I couldn’t do so reliably or on a large scale required to make a hauberk. I despaired that I would never figure it out. But then a chance encounter with an old undergrad professor renewed my hope. She encouraged me to keep trying and I eventually corrected my problems and started making rings much more reliably.
STEP 1: Coil Wire
This is pretty basic. I used a 7/16 Inch dowel for my 16 Gauge steel wire. As a note, all European riveted maille has a counterclockwise overlap from right-handed wrapping. Also not that you will need to use a larger dowel in order to account for overlapping. I use a 7/16” dowel to get a roughly 3/8” ring. If you want a 5/16” ring, I would use a 3/8” dowel.
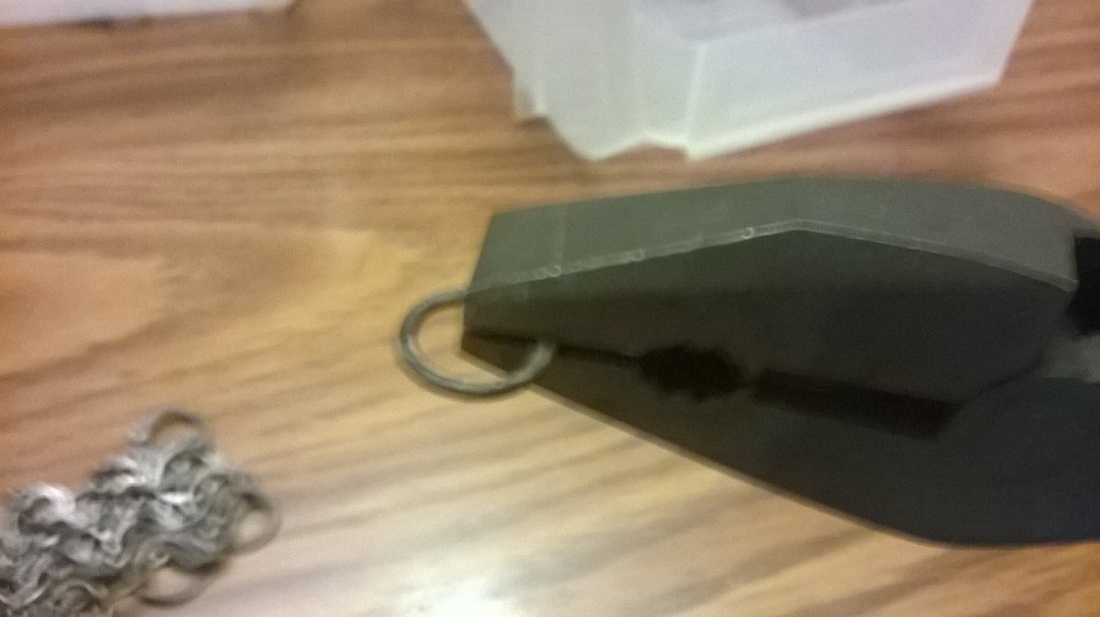
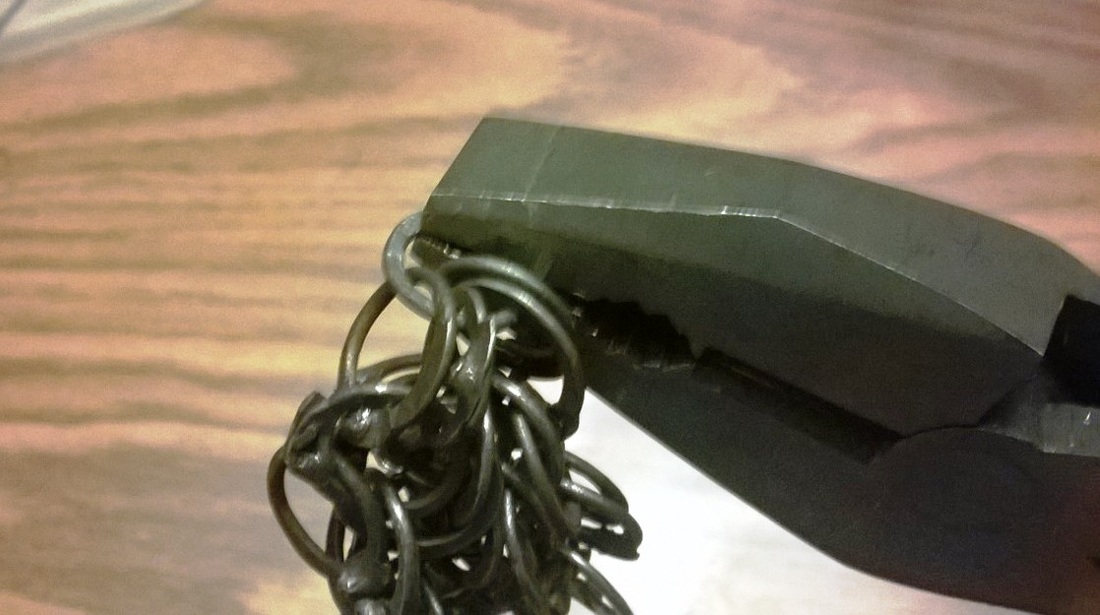
STEP 2: Cut Wire
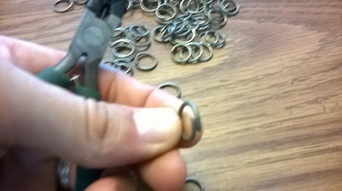
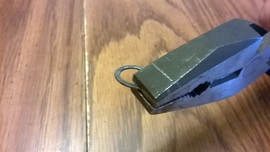
With butted maille, you want the least noticeable cut possible so that when you push the rings together, the gap is minimal and clean. With riveted maille, this is less of a concern. Therefore, I would recommend using a strong pair of side cutters or mini-bolt cutters. The extra material lost won't really affect the finished product and your wrists will thank you for using a stronger set of cutters.
With butted maille, you want the least noticeable cut possible so that when you push the rings together, the gap is minimal and clean. With riveted maille, this is less of a concern. Therefore, I would recommend using a strong pair of side cutters or mini-bolt cutters. The extra material lost won't really affect the finished product and your wrists will thank you for using a stronger set of cutters.
 Overlapping the rings. I typically overlap by about 1/16"
STEP 3: (optional): Overlap rings
I opted to manually overlap my rings rather than cutting them with the overlap built in. One reason for doing this was that I wanted to get a slight sideways cut to my rings so that when flattened, they would taper slightly and so that the overlaps would not jut out. I found that manual overlapping allowed this while modifying the pliers with a built in overlap did not.
The second reason stems from looking at period maille. Not just one suit, but dozens of them from many periods and from many parts of Europe. What you will notice is that no two suits are alike. Each armorer has their own style and method. Some make a larger overlap, some maker a smaller overlap. Some have large rivets, some make rivets so small they only just punch through the ring. However, one thing that you will notice remains the same throughout all period suits is that the rings are not uniform. Most of the rings are not perfectly round. Instead, they are obround, slightly flattened on the overlap side of the ring form a sort of “D” shape. By manually overlapping, I was able to take more control over the shape of the ring and thus provide a greater degree of realism.
In overlapping my rings, I tend to overlap by about 1/16” giving me a 3/8” ID ring prior to flattening. The flattening process itself slightly decreases the ID. Based on this, the rings end up being between 5/16" and 3/8".
If you want to avoid manually overlapping the rings, you can do this by notching your cutters to skip the first loop of wire and thus build an overlap into your cut.
STEP 4: Anneal the Rings
Annealing the rings is absolutely necessary in order to soften the wire enough to flatten later. You should not use galvanized wire for riveted maille because the zinc coating emits noxious fumes while it is heating that are dangerous.
To properly anneal steel, you need to heat it to its critical temperature – in this case, get it red hot. If you then let the steel air cool, you have normalized the metal. This will soften it, but not get it as soft as possible. To properly anneal, you need to heat the metal and then let it slowly cool in a heat source. You can read more about annealing, normalizing and other heat treating on the Metallurgy II: Annealing, Normalizing, and Tempering page.
I harp on this distinction because medieval armorers would have used wrought iron to produce their wire. Wrought iron is much softer and more ductile than even the lowest carbon mild steel today. The extra carbon content in steel makes it stronger than iron, but that extra strength makes flattening and punching the rings more difficult. Therefore, I urge you to truly anneal your wire rather than just normalizing it. If you do both, you will be able to feel the difference in how soft and pliable the wire is after annealing.
This is why I would not recommend using a blow torch to heat your rings. If you do that, the rings will get up to a red heat, but you will not have an effective way of letting them slowly cool. This will result in less ductile wire. Another reason I do not recommend a blow torch is based on a matter of scale. If you’re heat treating 200 rings, the blow torch is a quick and easy way to heat treat. However, if you are making a hauberk of 20,000 rings, using a blow torch will end up taking significantly more time and will burn through a lot of fuel.
My recommendation, therefore, is to heat your rings in a forge. Never fear, you don’t need a sophisticated blacksmith’s shop to do this, all you need is a sufficiently large steel bowl and a shopvac. The steel bowl can be an old brake drum, it can be a hibachi grill, or any other sufficiently large and sturdy steel vessel. I would caution you with regard to the hibachi because those are often lightweight and might warp under the extreme heat, but if you don’t mind ruining a cheapo hibachi, go for it.
In short, I went to a local surplus store and bought a steel bowl. You then fill the bowl up with charcoal and use the shopvac as your bellows. My final element is a standard hibachi grill where I put a few hot coals to get the grill hot but not as hot as the forge.
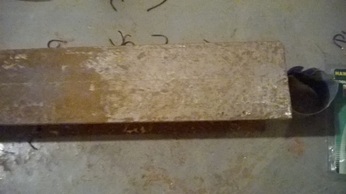 My I-Beam anvil.
Be careful not to just put the rings in loose. In my first attempt, I did this and melted most of my rings completely. Fortunately, I only melted about 50 rings. But it’s a good thing I didn’t do this with more. I found that you need to string the rings on wire and then put them in a few hundred at a time. By having them together, the rings seem to disperse the heat more evenly and resist melting. Also, in doing this, you will anneal both the wire for the rivets and the rings in one shot.
I found it was best to break up the charcoal into smaller pieces and put the rings slightly under the coals. The smaller charcoal allows for more even heating. Once the rings and coals are in place, you use the shop vac to supply plenty of oxygen to the fire and really get it going. You’ll start to see the rings turn a bright orange.
At this point, I then transfer the rings to the hibachi grill to let them cool slowly overnight.
This process may be more involved that using a blowtorch, but in the long run, it will save you time and give you a better result.
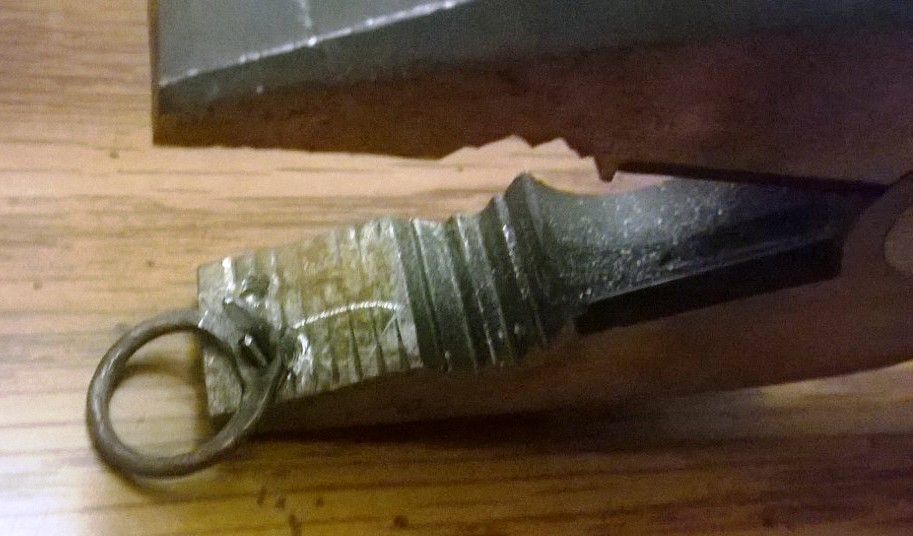
STEP 5: Flatten the Rings
To flatten the rings you will need hard, steel surface and a 2-3 pound hammer. Obviously an anvil will fit the bill, but I would recommend against using a cast iron anvil as these will chip and crack over time. I use a section of old I-beam. It’s a little bit rusty, but I’ve worked most of it off and restored a relatively smooth surface to the beam. I have also mounted the beam onto a relatively large log which adds stability and helps deaden the ring of the metal.
I found it was best to break up the charcoal into smaller pieces and put the rings slightly under the coals. The smaller charcoal allows for more even heating. Once the rings and coals are in place, you use the shop vac to supply plenty of oxygen to the fire and really get it going. You’ll start to see the rings turn a bright orange.
At this point, I then transfer the rings to the hibachi grill to let them cool slowly overnight.
This process may be more involved that using a blowtorch, but in the long run, it will save you time and give you a better result.
STEP 5: Flatten the Rings
To flatten the rings you will need hard, steel surface and a 2-3 pound hammer. Obviously an anvil will fit the bill, but I would recommend against using a cast iron anvil as these will chip and crack over time. I use a section of old I-beam. It’s a little bit rusty, but I’ve worked most of it off and restored a relatively smooth surface to the beam. I have also mounted the beam onto a relatively large log which adds stability and helps deaden the ring of the metal.
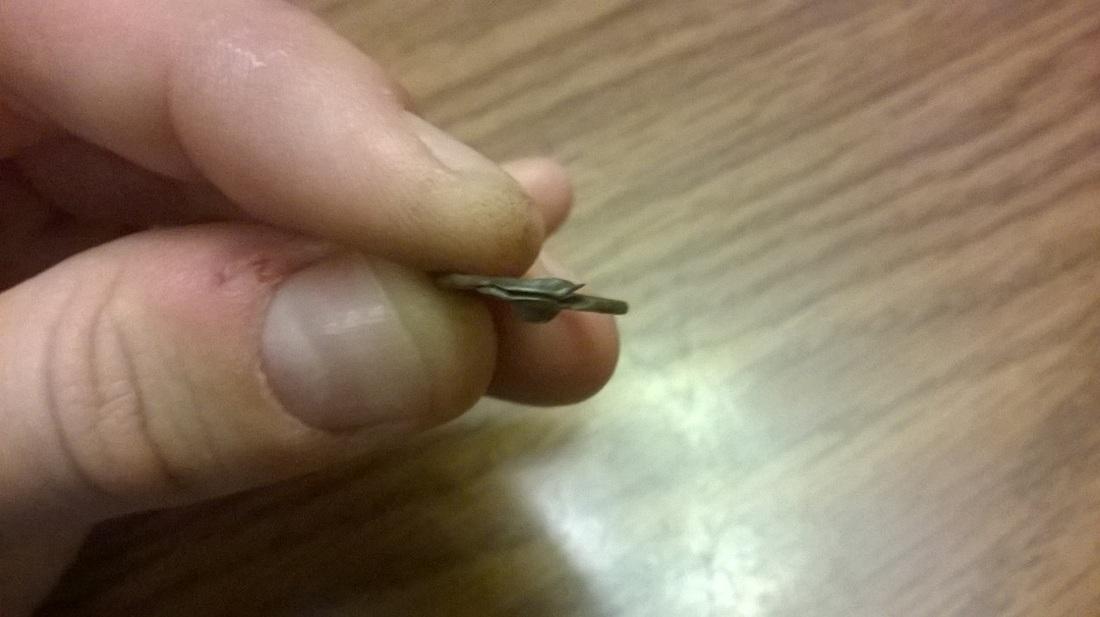
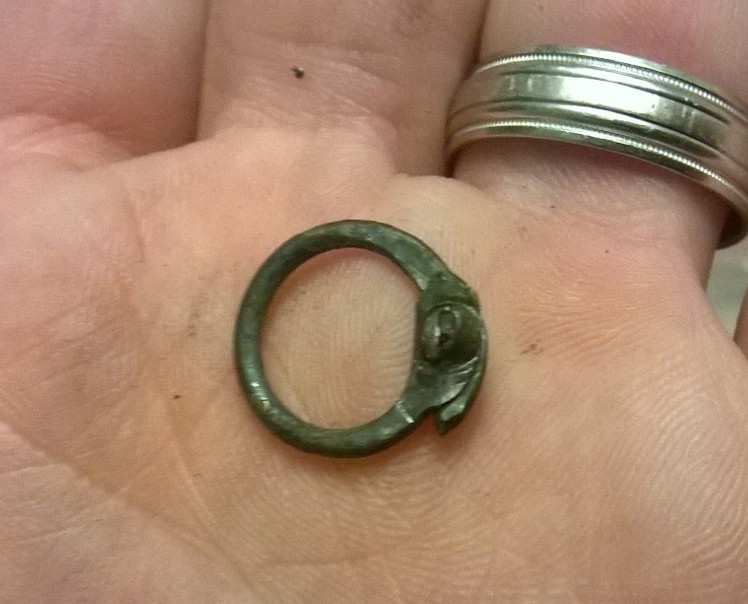
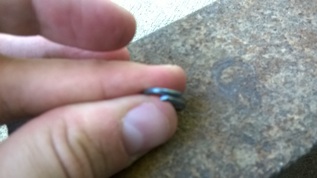 An overlapped ring ready to be hammered.
Along the same vein as an I-beam, an old section of railroad track would also work. Frankly, for purposes of making riveted maille, anything sufficiently large and heavy will suffice. A jeweler’s block is literally just a 2-3 pound block of steel and would probably work just fine. They cost about $20.00 on Amazon and can also be found at crafting stores.
With your anvil ready, flattening the rings is just a matter of striking hard and true and flattening the overlap of the rings. I try to flatten the overlap pretty significantly but not so, so much that the metal becomes thin and frail. Again, this is a matter of personal preference and experience.
There are many other ways to flatten and your approach may differ based on the period you are trying to emulate or on your preferred flattening process. It is possible to use a piston setup and flatten by dropping a heavy piston in a metal tube on the ring, however, I have not done this. Instead, I simply hammer the overlap to flatten the tab and then give a few lighter blows to the rest of the ring.
A few words of advice. If you find you are having difficulty flattening the rings it may be for a few reasons. If the overlap skips off and doesn’t smush properly, your problem might be insufficient softening through heat-treatment, a poor hammer stroke, or improperly aligned overlap. If the overlap is misaligned, too big, or too small, or you struck an errant blow, this is something that you will be able to adjust and fix with experience. If the ring still doesn’t smush and you think you’re doing everything else right, the problem might be your wire. As I stated earlier, you want the softest possible steel wire. If you have something that is a higher carbon content, even after annealing the ring it might be difficult to easily flatten the overlap.
Another troubleshooting strategy would be to practice on a softer metal. This will help isolate where your problem might be. If the overlap is skipping with a steel ring but not a copper ring, your problem might be that you’re not striking hard enough to flatten the steel wire.
If you are flattening the rings well but feel that it takes too much force to get them nice and flat, a heavier hammer might be a wise investment. Similarly, if you are getting exhausted by flattening or find that it is difficult to strike where you aim, you might be using a hammer that is too heavy. A hammer that is 2-3 pounds should be sufficient for your purposes. You should not feel like you have to swing it to make a hard enough hit. It should have enough weight behind it to move easily but strike with power.
Another issue is that hammer metal on metal is loud. You will NEED ear protection. Even a few swings without protection will leave a ringing in your ears for the rest of the night and give you a headache. It is because of this step that making riveted maille is highly impractical if you are living in an apartment or dorm.

STEP 6 (optional): Anneal Rings Again
This step is optional. It is not absolutely necessary to re-anneal the rings prior to punching, however, I do recommend it. First, after hammering a ring, pick it up. You will notice it is hot to the touch. It might even burn a little as you hold it. Indeed, I once caused a blister from holding a flattening ring. The ring is so hot because it has been forcibly smashed into a new shape and the rapid movement of the atoms creates intense friction which warms the highly heat conductive steel. This is a sure sign that you have a work hardened ring.
If you try to pry the ring open, you will find it very difficult to do. Why is this important? Because a work hardened ring will be more difficult to work with every step of the way. It will be harder to punch, it will wear out your punch more quickly, make it easier to snap the punch, it will make it harder to open and close the ring for assembly, and will make it harder to peen when riveting.
If you punch a copper or brass ring you will notice that it is much easier to pierce than a steel ring. This is because these are significantly softer metals. Again, you want your rings to be as soft as possible. Although you’ll never soften steel to be as soft as copper, the ease in which you can work copper illustrates the importance of keeping your rings soft. That is why I would recommend re-annealing the things prior to punching. You’ll find that you can punch them more easily and that the rings peen more readily when riveting.
STEP 7: Punch the Rings
Punching the rings is a matter of great personal preference and based on skill and experience. Unlike other steps, even the best instruction will still leave a gap that only experience and troubleshooting can fill. Be prepared to experiment until you find something that works well for you. A word of caution, of all the tools needed to make riveted maille, this is by far the most difficult tool to deal with. Moreover, I know of no commercially available tool specifically made for punching maille rings.
There are two basic types of rivets that you can make: Round rivets and wedge rivets. As a general rule, round rivets were used primarily until the 14th century in Europe and wedge rivets were used after this point. I urge caution in assuming that this was a universal rule because there are so few surviving maille examples from about 1000-1300 that it is difficult to say with certainty what, if any, general rules applied to maille from that period. What is known, is that wedge rivets are not typically seen in earlier shirts
The process is generally the same for either type, what differs is the type of hole in the ring and the shape of the rivet. I have found that it is easier to make wedge rivets than round and the outward appearance is much the same. The peened front of the ring has a rounded look to it regardless of the rivet shape. The only real difference appearance-wise is from the back, where you can see the shape of the rivet.
To make a round rivet, you need to have a punch that is round in shape and tapers like the head of a nail or pin. I had a hand punch with the proper taper, however, it broke and I have not bothered to replace it as I found that wedge rivets were easier and more reliably made. Therefore, I will only discuss wedge rivets from this point on. Maybe in the future I will add a round rivet tutorial.
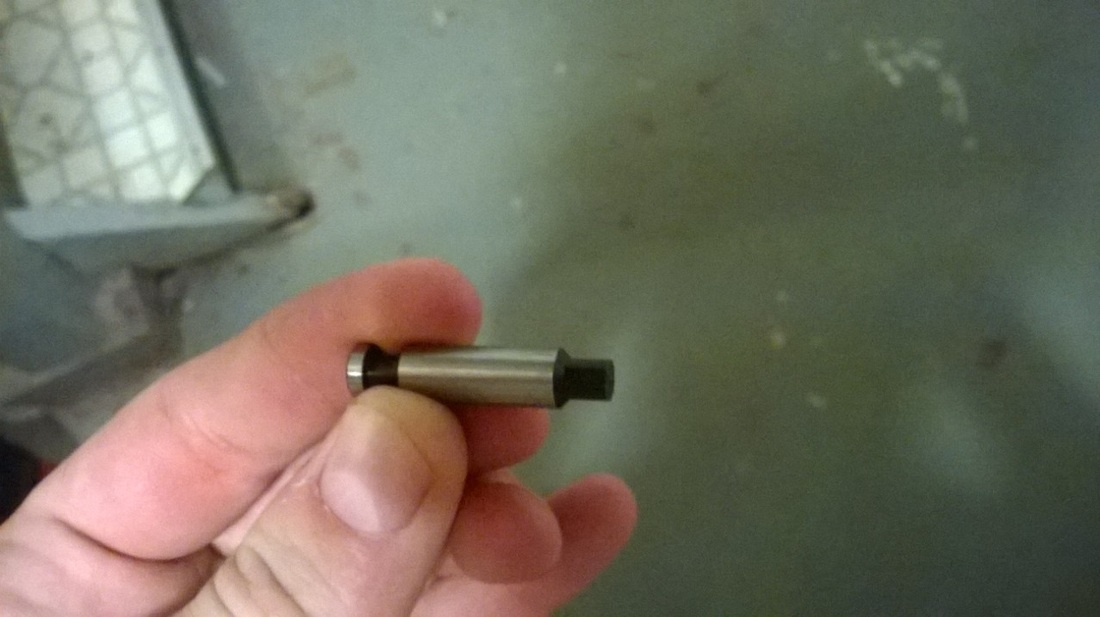
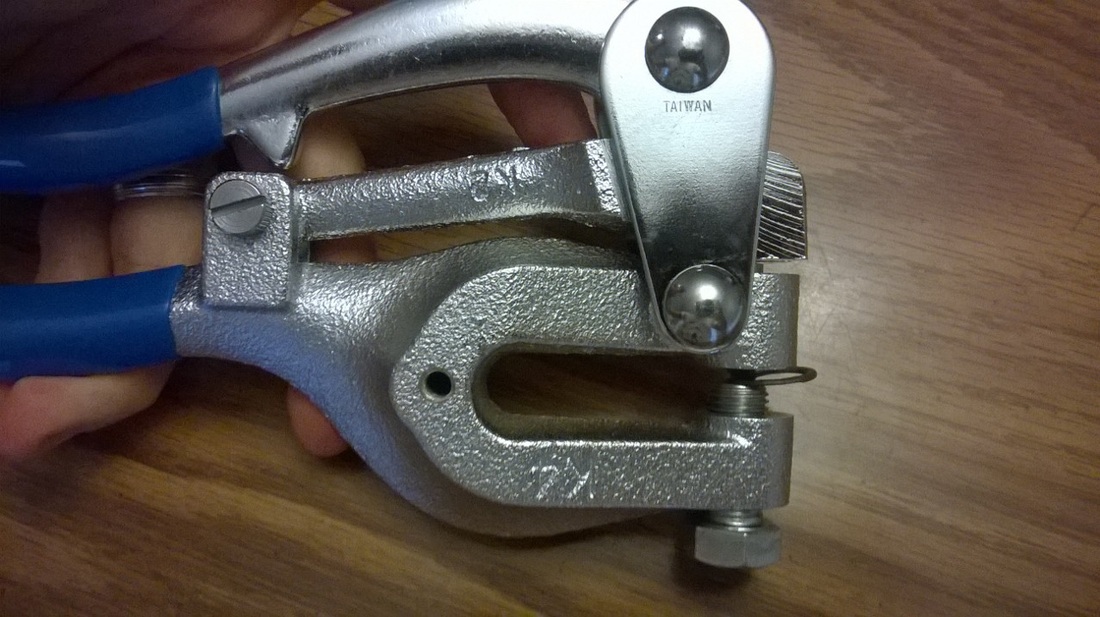
See the How to Make a Riveted Maille Pierce Punch page for more detailed instructions on the process of making the pierce punch. In short, what I did was buy a Neiko sheet metal punch from Amazon. This is a knock-off of the Roper-Whitney No. 5 Jr. style punch and has the exact same dimensions and punches. The punch is meant to make clean, round holes in sheet metal.
I used a dremel tool and grinding bit to grind a punch down to a suitable shape. In this case, you want something that is thin and that tapers down to a relatively fine point. The point is key, it enables the punch to slice into the ring without deforming the overlap.
You will also need to customize the die. The standard dies are made to allow a clean blank to be punched, much like a paper punch will spit out of little piece of paper. With riveted maille, you do not want a blank. The whole point of piercing the ring is to leave material in place but to create a hole just large enough to let a rivet pass through it. When you peen the rivet, you are closing the punched material from the ring over the rivet and smushing all the material together to keep it from reopening. Once this has happened, the only way to get the ring apart is to break the rivet or tear a hole where the ring was punched. In a well set ring, the ring will deform itself beyond use before the rivet pops out of the hole tear
This step is optional. It is not absolutely necessary to re-anneal the rings prior to punching, however, I do recommend it. First, after hammering a ring, pick it up. You will notice it is hot to the touch. It might even burn a little as you hold it. Indeed, I once caused a blister from holding a flattening ring. The ring is so hot because it has been forcibly smashed into a new shape and the rapid movement of the atoms creates intense friction which warms the highly heat conductive steel. This is a sure sign that you have a work hardened ring.
If you try to pry the ring open, you will find it very difficult to do. Why is this important? Because a work hardened ring will be more difficult to work with every step of the way. It will be harder to punch, it will wear out your punch more quickly, make it easier to snap the punch, it will make it harder to open and close the ring for assembly, and will make it harder to peen when riveting.
If you punch a copper or brass ring you will notice that it is much easier to pierce than a steel ring. This is because these are significantly softer metals. Again, you want your rings to be as soft as possible. Although you’ll never soften steel to be as soft as copper, the ease in which you can work copper illustrates the importance of keeping your rings soft. That is why I would recommend re-annealing the things prior to punching. You’ll find that you can punch them more easily and that the rings peen more readily when riveting.
STEP 7: Punch the Rings
Punching the rings is a matter of great personal preference and based on skill and experience. Unlike other steps, even the best instruction will still leave a gap that only experience and troubleshooting can fill. Be prepared to experiment until you find something that works well for you. A word of caution, of all the tools needed to make riveted maille, this is by far the most difficult tool to deal with. Moreover, I know of no commercially available tool specifically made for punching maille rings.
There are two basic types of rivets that you can make: Round rivets and wedge rivets. As a general rule, round rivets were used primarily until the 14th century in Europe and wedge rivets were used after this point. I urge caution in assuming that this was a universal rule because there are so few surviving maille examples from about 1000-1300 that it is difficult to say with certainty what, if any, general rules applied to maille from that period. What is known, is that wedge rivets are not typically seen in earlier shirts
The process is generally the same for either type, what differs is the type of hole in the ring and the shape of the rivet. I have found that it is easier to make wedge rivets than round and the outward appearance is much the same. The peened front of the ring has a rounded look to it regardless of the rivet shape. The only real difference appearance-wise is from the back, where you can see the shape of the rivet.
To make a round rivet, you need to have a punch that is round in shape and tapers like the head of a nail or pin. I had a hand punch with the proper taper, however, it broke and I have not bothered to replace it as I found that wedge rivets were easier and more reliably made. Therefore, I will only discuss wedge rivets from this point on. Maybe in the future I will add a round rivet tutorial.
See the How to Make a Riveted Maille Pierce Punch page for more detailed instructions on the process of making the pierce punch. In short, what I did was buy a Neiko sheet metal punch from Amazon. This is a knock-off of the Roper-Whitney No. 5 Jr. style punch and has the exact same dimensions and punches. The punch is meant to make clean, round holes in sheet metal.
I used a dremel tool and grinding bit to grind a punch down to a suitable shape. In this case, you want something that is thin and that tapers down to a relatively fine point. The point is key, it enables the punch to slice into the ring without deforming the overlap.
You will also need to customize the die. The standard dies are made to allow a clean blank to be punched, much like a paper punch will spit out of little piece of paper. With riveted maille, you do not want a blank. The whole point of piercing the ring is to leave material in place but to create a hole just large enough to let a rivet pass through it. When you peen the rivet, you are closing the punched material from the ring over the rivet and smushing all the material together to keep it from reopening. Once this has happened, the only way to get the ring apart is to break the rivet or tear a hole where the ring was punched. In a well set ring, the ring will deform itself beyond use before the rivet pops out of the hole tear
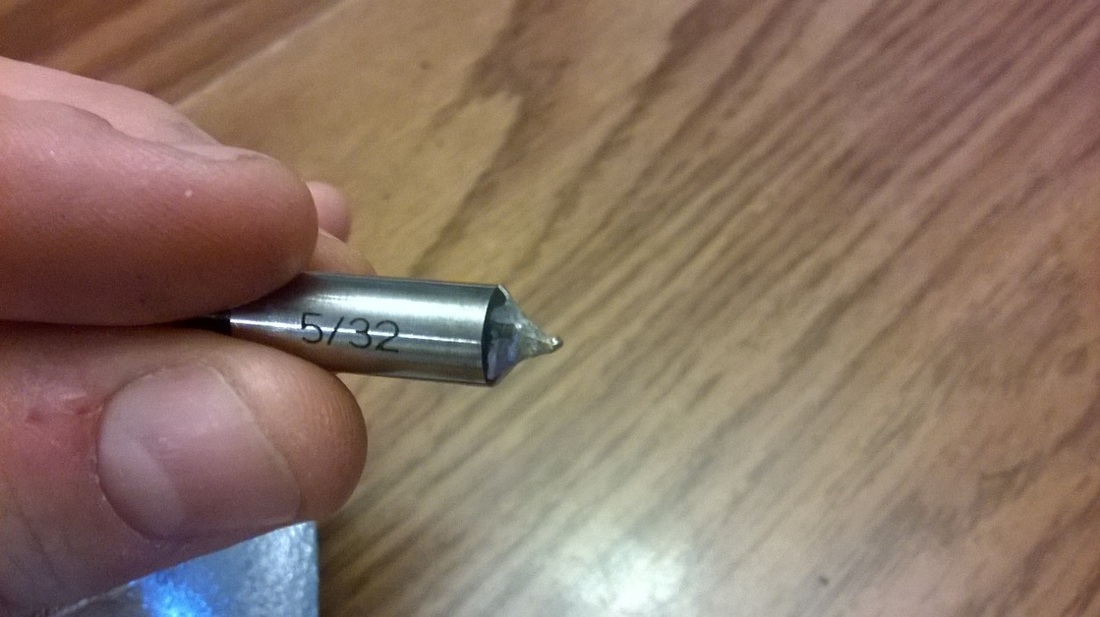

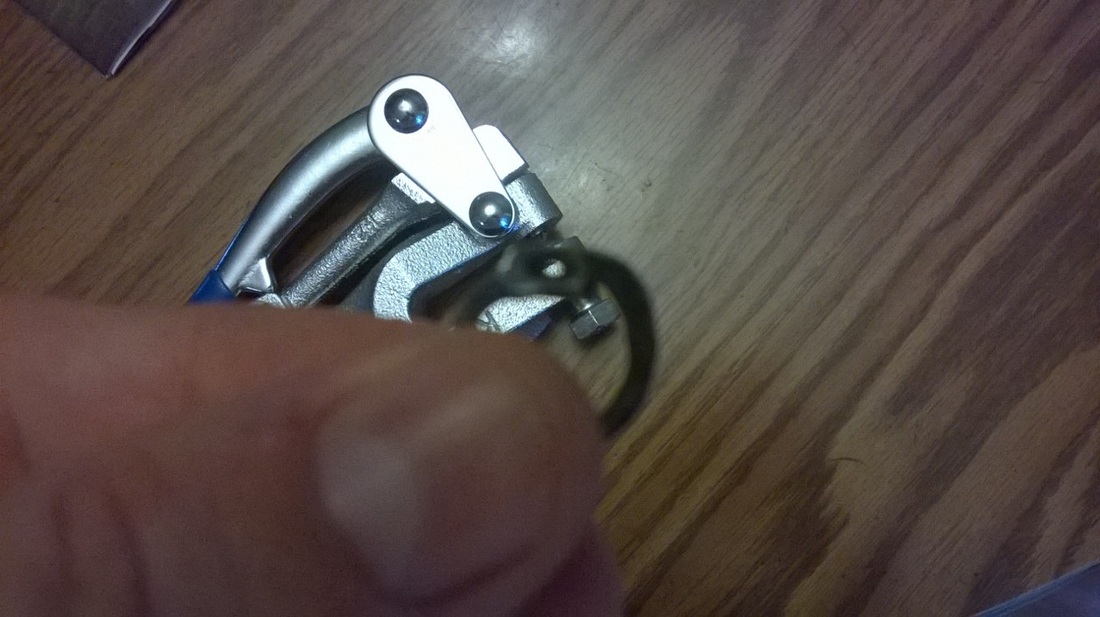
 A closer view of the punch as it pierces the ring.
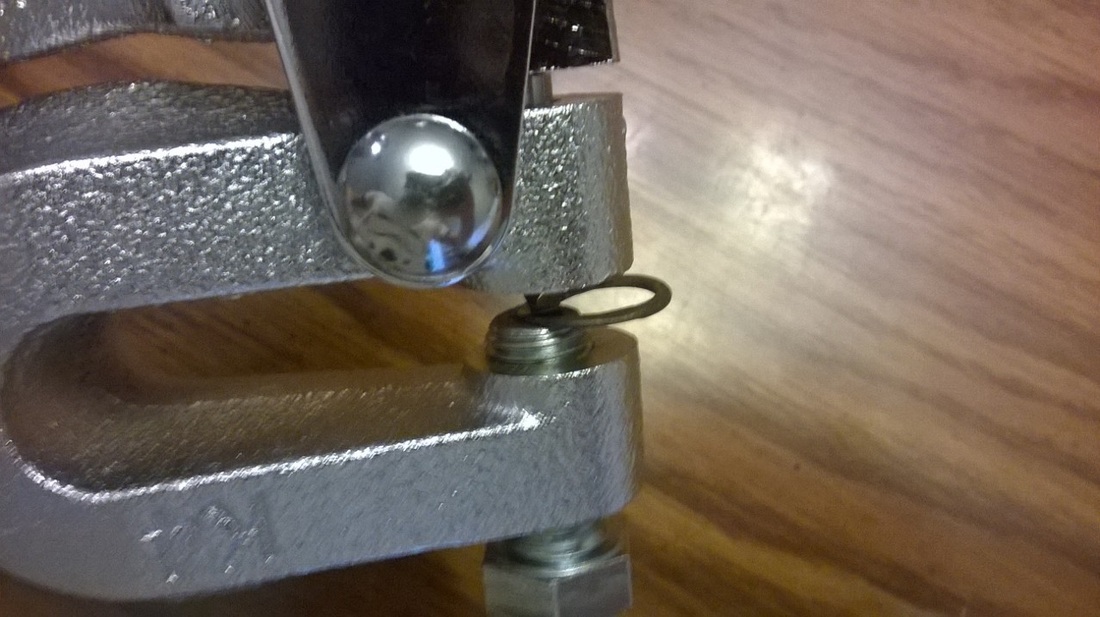
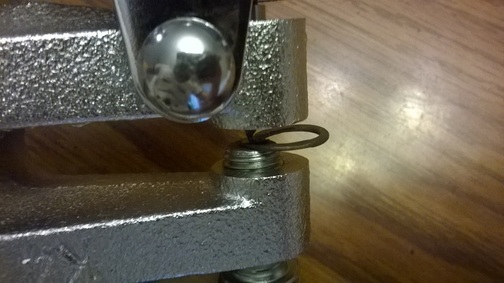
With all of this done, you can now punch a ring. If the punch and die are appropriately sized, you will then need to learn how to use the punch properly to pierce a ring. The punch is designed to be a hole punch, not a pierce punch. Because of this, the mechanism makes it difficult to eye exactly where you are going to be piercing the ring. What I’ve found, is that it is best to score the ring slightly with the bolt loosened away from the punch. Once you are sure you have the punch lined up properly, you can tighten the bolt upward toward the punch, feel for the indentation of where you scored previously and punch the ring. You will then likely need to loosen the bolt to allow clearance for the punched ring to be removed.
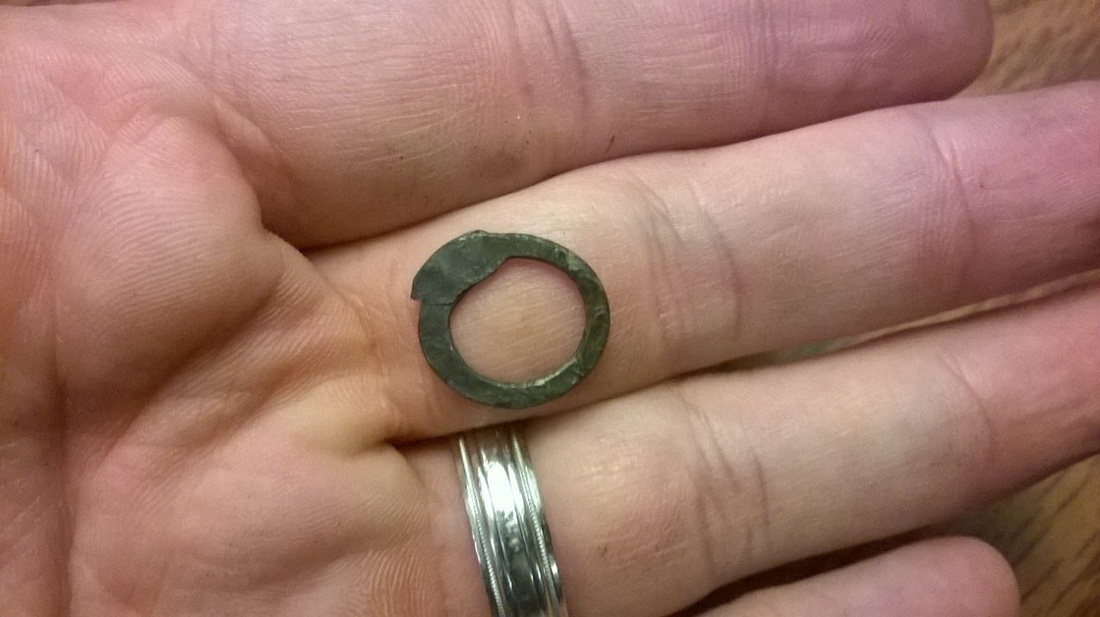
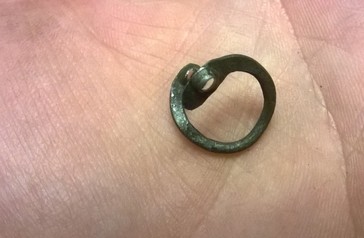
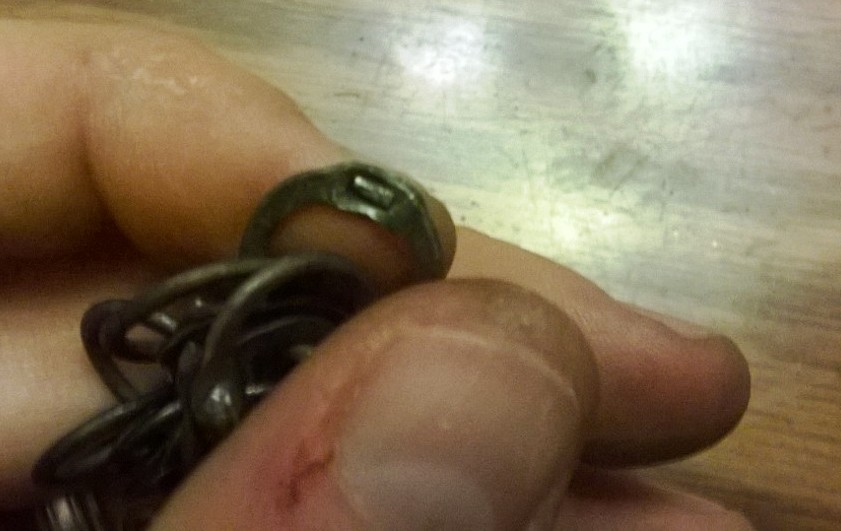
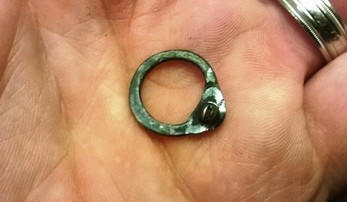 The front view of a pierced ring. the rivet will poke out from this direction.
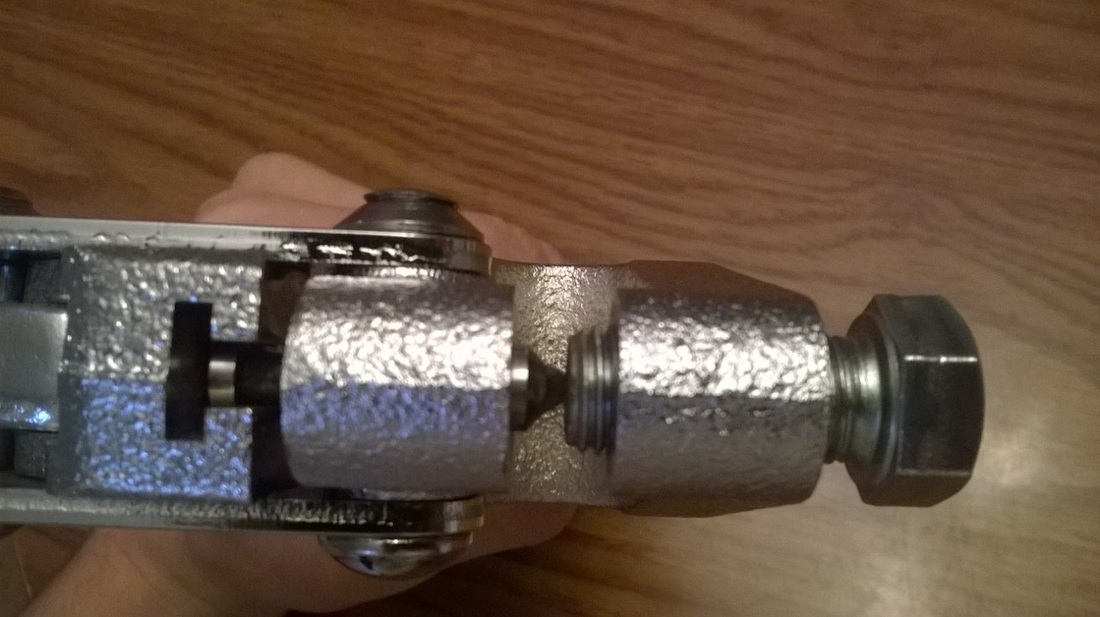
With this in mind, you need to make a die to allow the punch to push into the ring, but not remove any material. What I did was buy a 7/16” fine threaded bolt. This bolt will fit perfectly into the hand punch. I then ground down the face of the bolt with a dremel tool and grinding bit. After the head was face was, I used a diamond tipped dremel bit to bore a hole into the face of the bolt. I found that you need a deep hole that is just wide enough to receive the punch, but no wider. If the hole is too wide, the ring will deform too much. However, if the hole is too small, the ring will get stuck in it when you pierce it. The die also needs to be just about as thick at the bottom as it is at the top, this too will keep the ring from jamming.
As you can imagine, this process has a bit of a learning curve. The tool I use has some pros and cons for punching rings – it is certainly not perfect, but I do like it. The biggest pro is that the tool required very little modification and required no specialized tools or mechanical know how. Finally, the tool is built to punch steel and you can punch the rings with ease.
As you can imagine, this process has a bit of a learning curve. The tool I use has some pros and cons for punching rings – it is certainly not perfect, but I do like it. The biggest pro is that the tool required very little modification and required no specialized tools or mechanical know how. Finally, the tool is built to punch steel and you can punch the rings with ease.
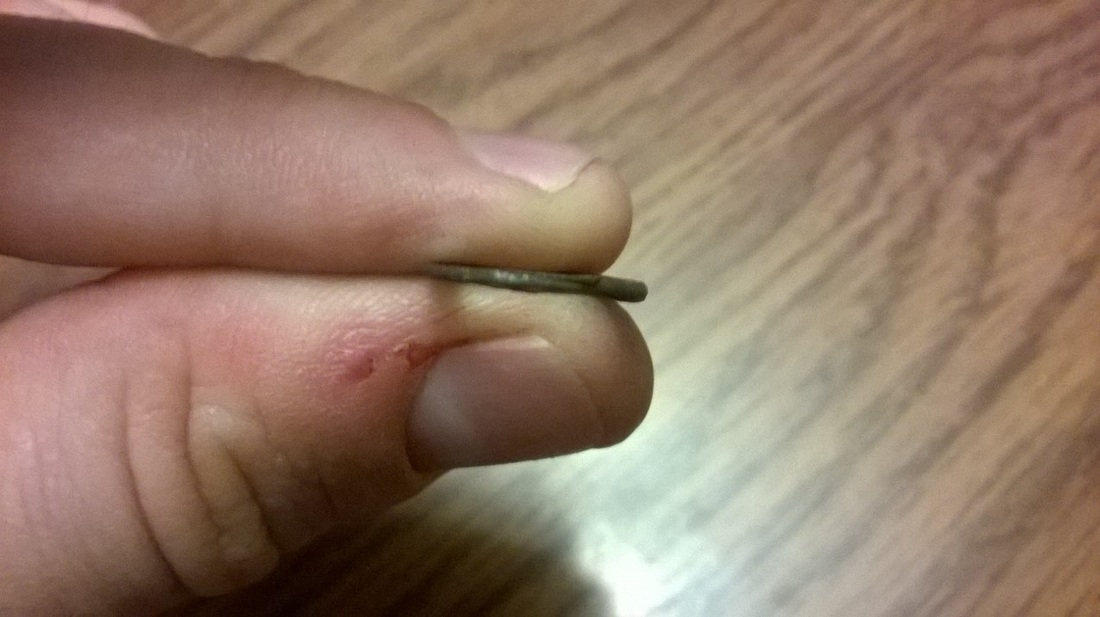
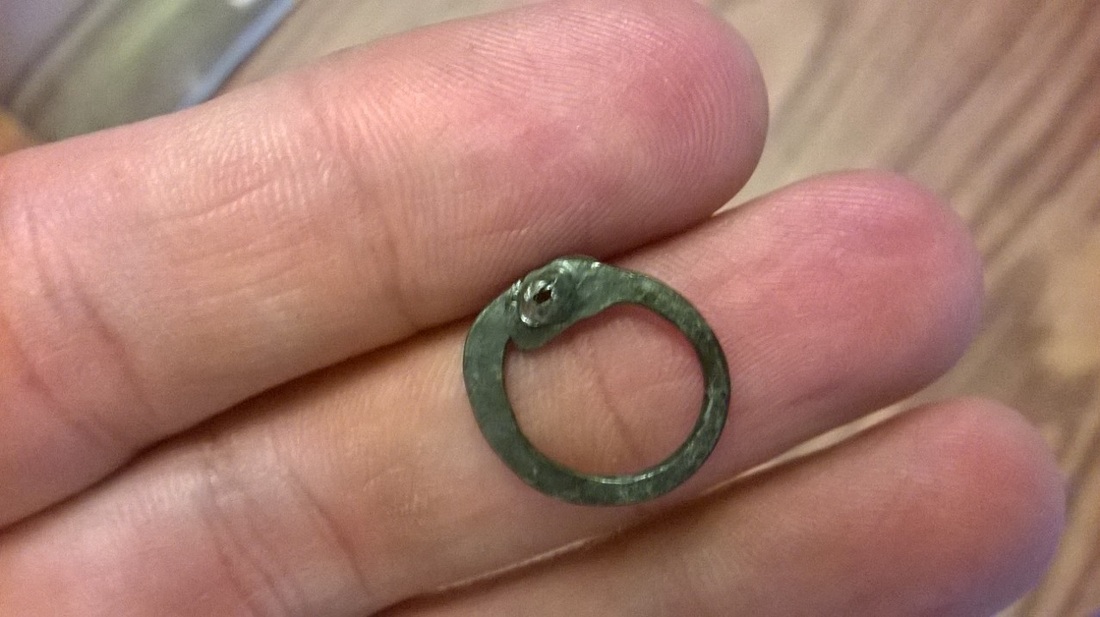
 The back of the pierced ring. This is where you will place the rivet.
However you choose to punch your rings, the ideal is to punch through just enough that there is a hole for the rivet to sit in but not so big that the rivet falls through. Some of my biggest problems came at this stage. If your overlap is too small your rings will just deform. This would typically happen on the bottom of the punched ring. Instead of piercing through, the ring would deform and push the edge out of the way. If there isn’t enough material on either side of the overlap, this will typically happen and ruin the ring. Another pitfall is making the top of the punch too thick.
Even if your punch is pushing through properly and making a nice pierce, if the top of the punch is too think, it will create a big gash at the top of the ring and make it difficult to set and peen the rivet. If the hole is too big, the rivet will tend to just fall out. A final problem I encountered was piercing the ring slightly but not enough for the rivet to slide in. If the rivet can’t slide into the pierce then the rivet will not set properly. With time and experience, you will come to know when you have a well pierced ring. As with so much else about riveted maille, it truly is a matter of re-learning a lost trade.
Even if your punch is pushing through properly and making a nice pierce, if the top of the punch is too think, it will create a big gash at the top of the ring and make it difficult to set and peen the rivet. If the hole is too big, the rivet will tend to just fall out. A final problem I encountered was piercing the ring slightly but not enough for the rivet to slide in. If the rivet can’t slide into the pierce then the rivet will not set properly. With time and experience, you will come to know when you have a well pierced ring. As with so much else about riveted maille, it truly is a matter of re-learning a lost trade.
 My setting tongs. There are three holes, one large for setting, one medium for peening, and a smaller hole for ensuring a proper peen.
STEP 8: Rivet the Rings
Riveting the rings is an odd combination of getting a feel for your punch, getting a feel for the specific ring, and learning how to select a specific rivet that will work well with that ring. Sometimes a rivet needs to be smaller, sometimes larger. It just depends.
The best way to make the rivets is to use the wire you used earlier to string the ring on during annealing. This wire should be soft and easy to flatten. Again, start in small batches and flatten a little wire at a time. You will come to have a feel for how thin you should flatten the wire.
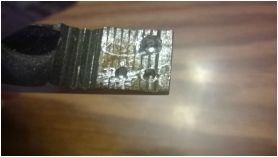
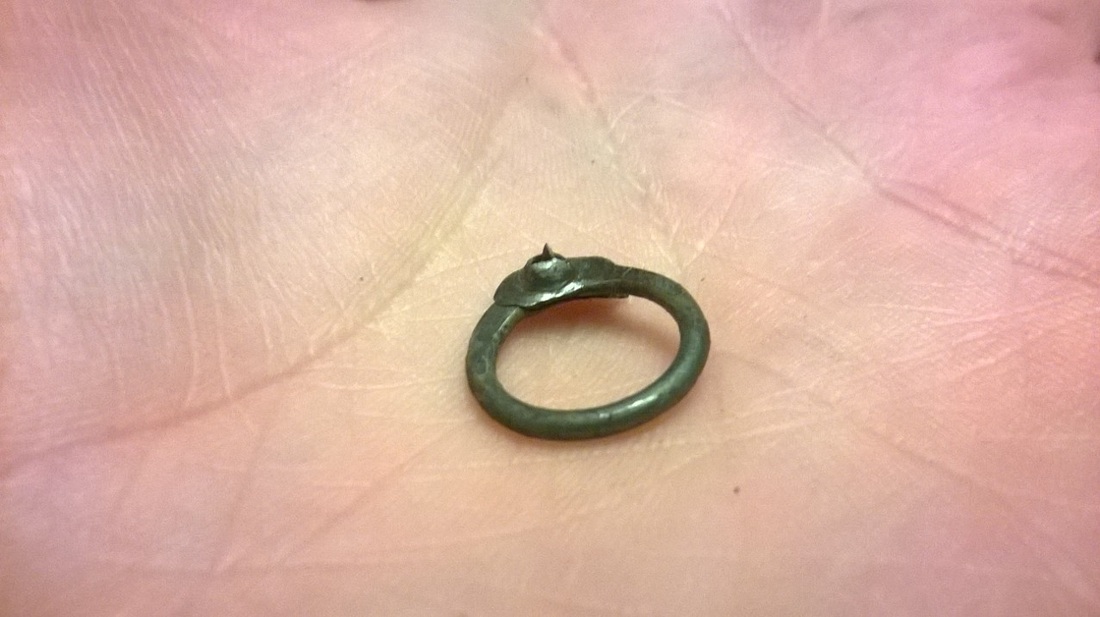
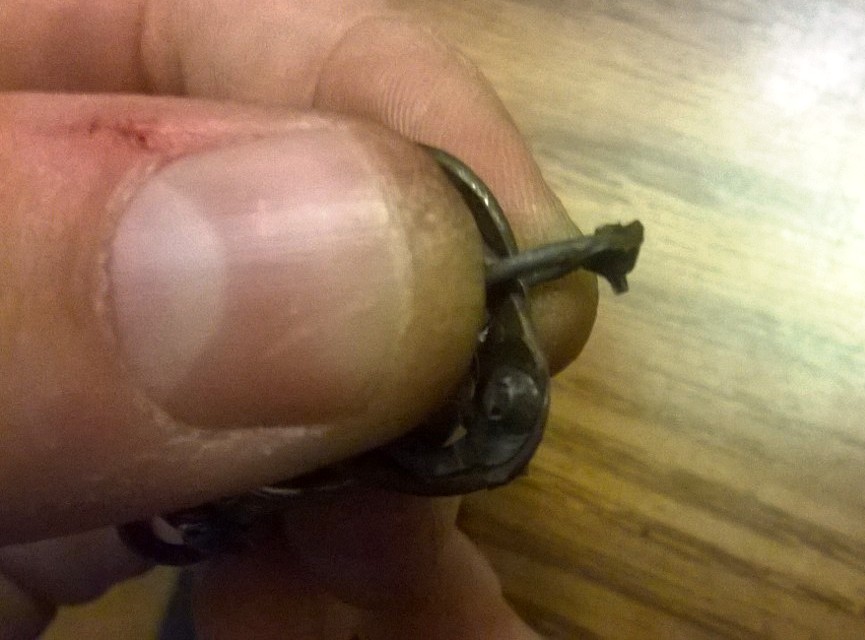
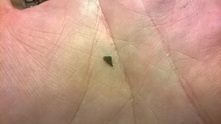 A wedge rivet. Made from cutting flattenind wire at a steep diagonal angle.
Next, cut the wire at a steep angle to make a wedge. Basically, you want a piece of wire taller than it is long, with a sharp edge to poke down through the hole in the ring. The best way to get this shape is to angel the cutter so that the wire is cut diagonally from the edge of the wire. The shape should look like this:
With the rivet in place in the ring, you then need to use a pair of setting tongs to firmly set the rivet in the ring. You can make a pair of setting tongs with linesman pliers and a dremel tool. It is essentially a pair of pliers with a deep hole bored into it. That hole must be deep enough to allow the rivet to push through without bottoming out and without distorting the shape of the pierce ring AT ALL. When setting the rivet, you are merely trying to push the rivet deep into the slot in the ring so that the pointed part slides beyond the hole in the ring. I cannot stress enough how important it is that the rivet push down visibly below the ring.
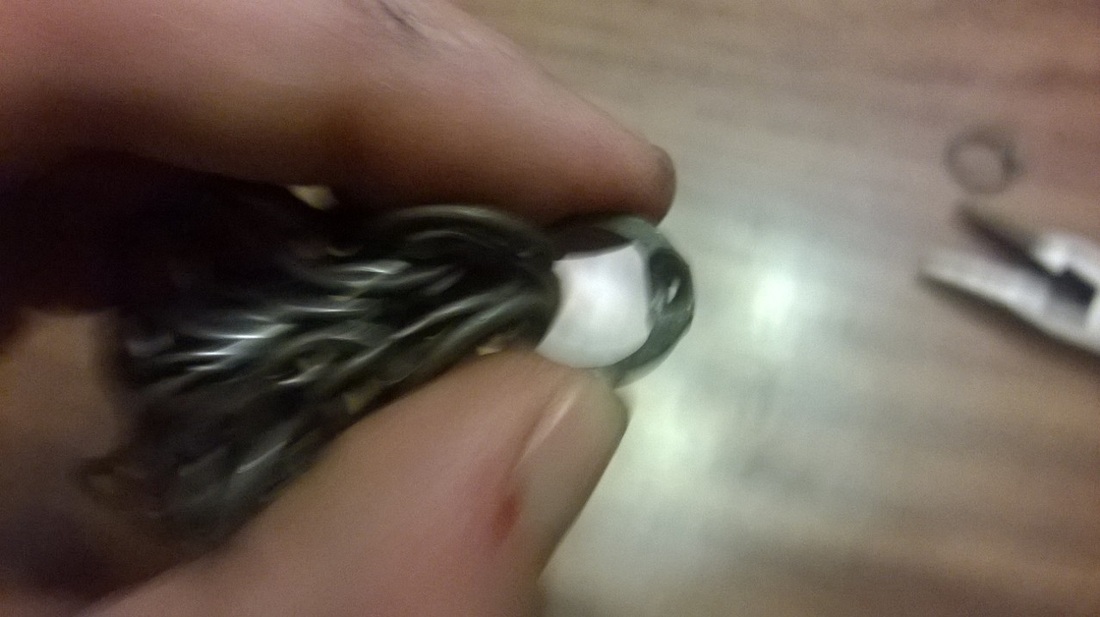
 Peening the rivet in the smaller concavity.
If the rivet does not do this, you will find that the ring does not peen properly and that the rivet only smushes into the top part of the ring. If this happens, the ring will easily pop open.
With the rivet firmly set in place, you can now peen the rivet. Think of this step like using a stapler. The bottom plate of a stapler has the shape that the staple will take when it presses down against it. This is what closes the staple around the paper. In this case, you want a small indentation in your pliers to allow the rivet and the punched material in the ring to smush together. The idea is to force the top and bottom portion of the ring and the rivet to be closed into each other by the indentation in the setting tongs.
You will want a hole that is small enough that the rivet and pierced ring are forced closed. However, if the indentation in the pliers is too small you run the risk of over flattening the rivet. If you do this you might force the rivet to pop out the back of the ring or force it to the side causing a tear in the pierced ring.
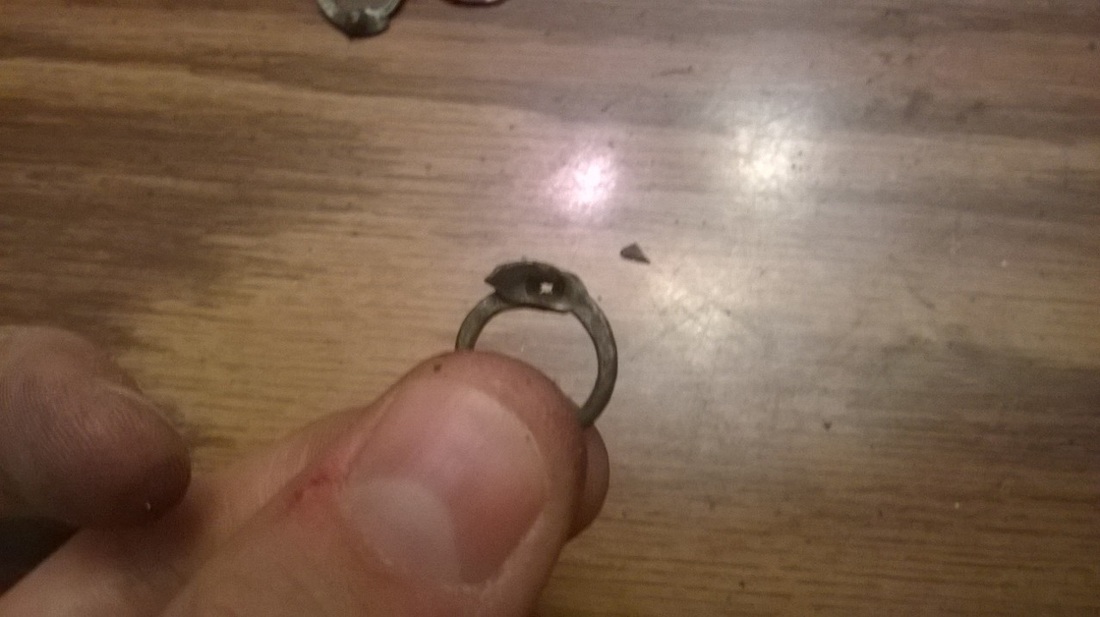
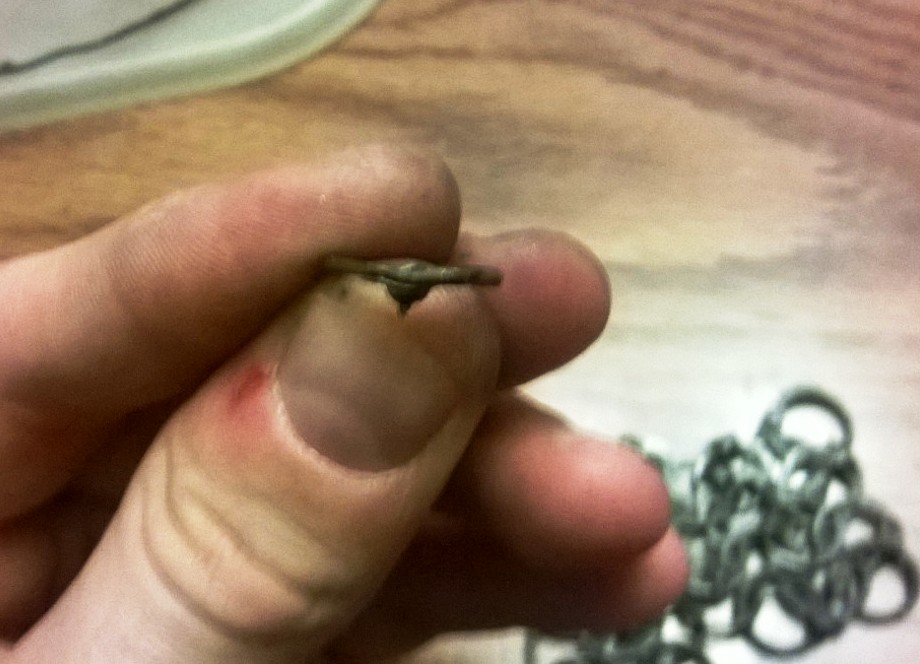
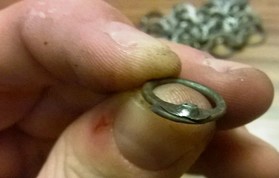 A picture of the peened ring. Note how the rivet has smushed into the pierced material from the ring. This indicates a well executed closed rivet.
Another common problem is having rivets that are the wrong size for the hole. If the rivet is too small for the hole, it will likely fall out without peening properly. Worse yet, if the rivet is just a little too small, it will peen o the top overlap but not the bottom. If this happens, congratulations, you just ruined a ring because you won’t be able to get the rivet out without also ruining the ring. On the other hand, if the rivet is too big, it either won’t fit in the pierced ring at all (usually because it is too wide), or it will fit but won’t set properly without bending in half. If you have rivets that are frequently bending or collapsing in half, it’s likely that either your large setting divot is too small or your rivets are too tall. Like everything else, you will learn with time what works and what doesn’t.
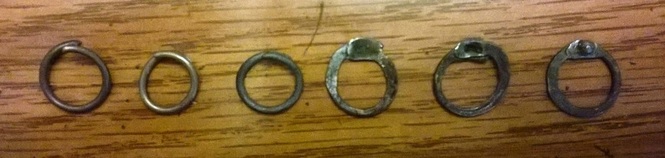
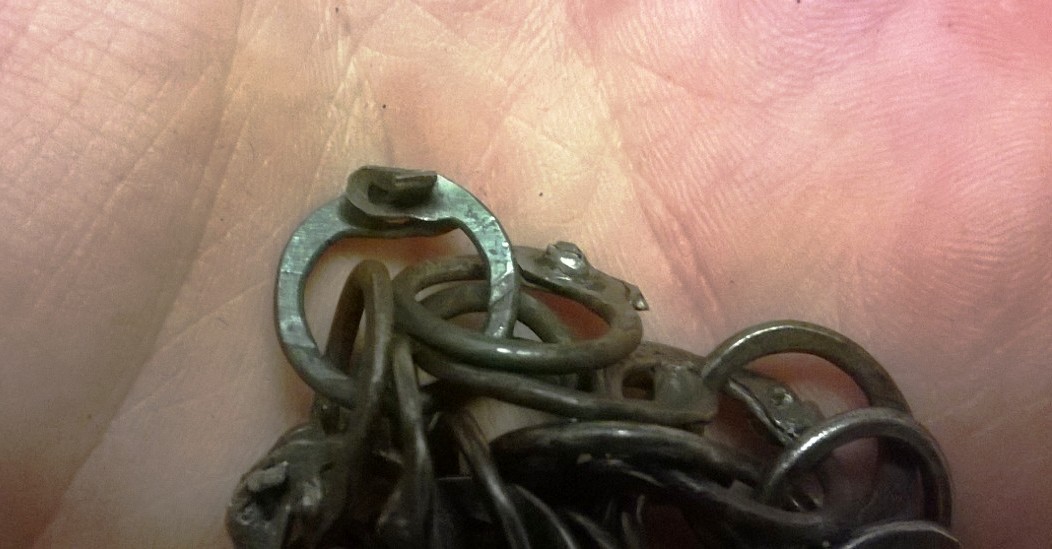
From left to right, a cut ring, overlapped ring, annealed ring, flattened ring, punched ring, and fully riveted ring.
At this juncture, you now know what you need to do for each step to rivet a ring. It's been a long journey for the ring. The only thing left to do is weave the rings.
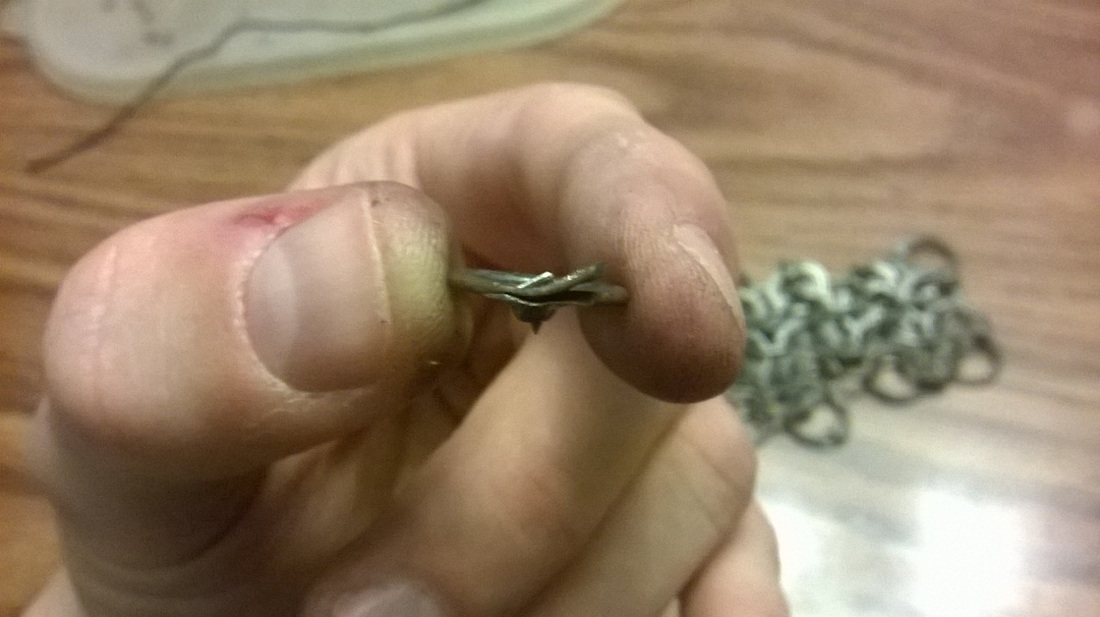
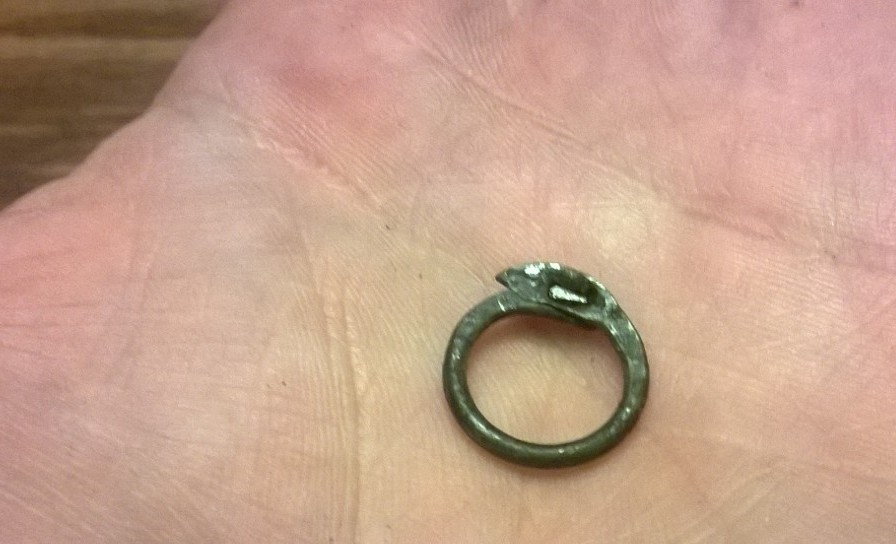
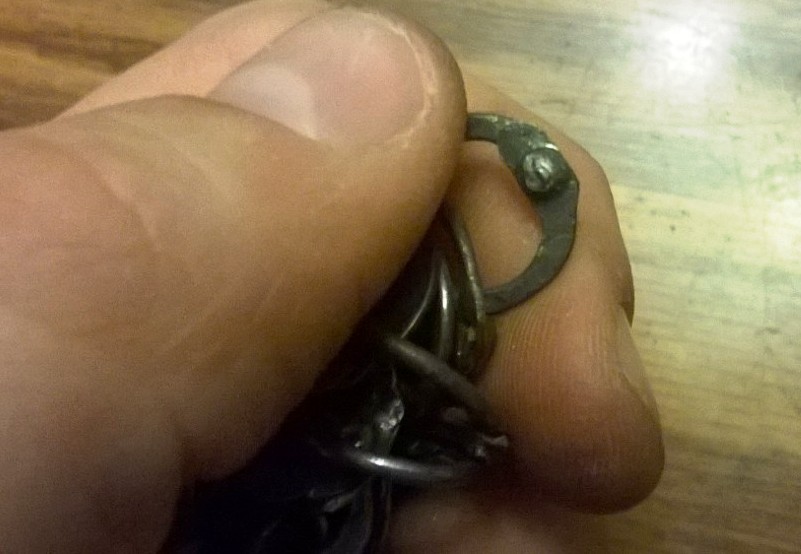
 An punched ring opened and ready to weave.
STEP 9: Weave the Rings
As you may have already figured out, weaving riveted rings is a little different than weaving butted maille. The first, and most important, difference is that you must pay careful attention to which side of the ring is facing up. The peened side with the bump should face outward. This will require you to pay attention when weaving the ring to make sure you don’t put it on backwards.
The second difference is that with riveted maille, you should almost always be weaving two rows at a time – so called speed-weaving. That is to say, you close half of the rings prior to weaving, and then weave the open ring through the top assembled row and through two loose rings at the same time.
Take an unriveted ring and gently open it. You need to be careful to to bend, twist, or damage the punched portion of the ring. If this happens, you will have a diffcult time properly closing the ring back up and setting the rivet.
Next, you need to weave it into the patch.
 An opened ring weaved into a lager patch and ready to be closed and riveted. Note how the ring lays and how all the rivets face upward.
As you weave the ring, be careful to ensure all the rings are facing in the same direction. Depending on your AR, you might find it difficult to work with the open ring with four other rings already attached. Depending on the AR you may not be able to speed-weave because there won’t be enough room to work with the ring. If this is the case, you will have to weave one row at a time and will not be able to use pre-closed rings. See the Methods of Medieval Maille Weaving for a more detailed discussion of why and when you would choose to assembly one row at a time. The short answer is that later shirts tended to be more tightly woven to better protect against thrusting weapons.
Most shirts up to and including the 15th century were made with half riveted and half solid rings. I would recommend practicing with an all riveted piece to get a feel for weaving and making the rings. However, if you want to make a full hauberk, there are a few places online where you can buy pre-made washers at any size imaginable. The Maille supplies page lists some of the cheapest sources I was able to find. For 20,000 rings, you‘d likely be looking at a cost of $0.014 per hundred washers -- $280 dollars plus shipping. That’s not cheap, but is less expensive than buying the sheet metal yourself and hand punching the rings.
Other than this, the method of weaving riveted maille is essentially the same as weaving butted maille. I know that everyone has a preferred method of weaving but personally, I think it is most efficient to weave a row of fivelets, then add to that two rows at a time through speed weaving until you have a sizable patch. I would then use that patch to start my front chest piece and repeat the process for the back chest piece. I then expand the front patch to include shoulders and connect it to the back patch. From there, it’s just a matter of filling in the shoulders, neck, and arms and going from there.
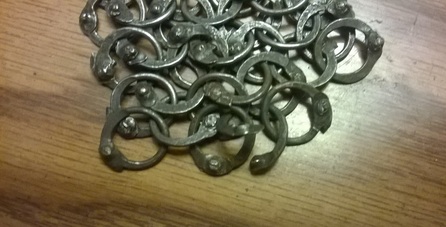
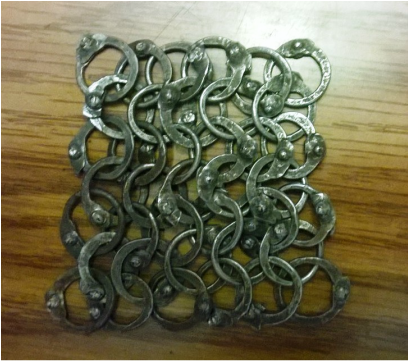 A small patch of all riveted maille.
I do not recommend making a row of fivelets, connecting that to another row of fivelets and doing so ad nauseam until you have a patch for a few reasons. One is that I feel that it is easier to work with larger patches of maille and it is best to get a piece going and add to the piece only. By doing patchwork construction, you are constantly starting a new piece. New pieces are harder to work with because the maille doesn’t lay properly until it is sufficiently large. The second reason I don’t recommend patchwork construction is that it makes it difficult to get a good sense of where to put expansions and contractions. It is better to know exactly where you want a contraction and add it as you go than to make a patch and realize you needed a contraction and have to re-do your work.
With the above in mind, you should be on your way to weaving riveted maille. As I said, it is not something you will immediately get. There were a few times when I was learning that I wanted to give up. However, I believe that if you stick with it you will eventually get it.
If you are an avid historical re-creationist, even if you don’t plan on making a full hauberk, I would still recommend trying your hand. There is something eminently satisfying with working in a lost trade like maille making. As with anything else in life, the greater the challenge, the greater the sense of accomplishment when you finally overcome the challenge. I can guarantee that making riveted maille will give you a new-found appreciation for the medieval maille maker and for how highly skilled this craft was. More than that, you will gain and appreciate the sophistication of the tools used and realize that the tools they used then were perfectly suited to the task. As I said earlier, we are all students trying to learn a skilled trade with no master.
Trying to make riveted maille will give you an immense appreciation for the difference between knowing a process and mastering the skill. This tutorial will help you to learn the process. Only you can teach yourself the skill. I certainly am no master, but if you find yourself in need of help, please feel free to contact me. Hopefully we can both learn something and figure out how to fix the problem. I have the utmost respect for those masters of history who passed down their skill and I hope to do the same in some small way.
