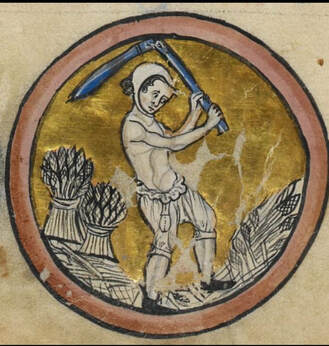
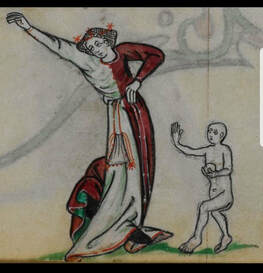
A field worker with only braies and a linen pouch
This article will describe how to make two different kinds of pouches seen in medieval artwork. Although there are a wide variety seen, the descriptions here should at least give you some inspiration into making your own bags or making bags similar to these.
Money Pouch
The Item:
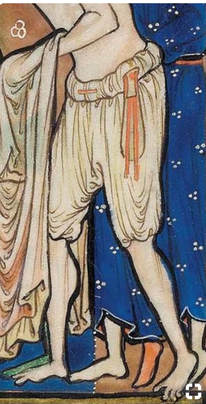
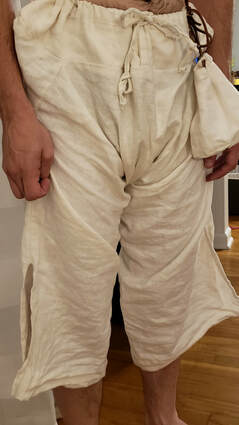
Medieval pouches and bags were used by both men and women and were worn on the body for a variety of purposes. One common use for a pouch was to wear it attached to the braies and to hang from the breech girdle where the legs would be pointed. This type of bag was usually simple and often constructed of the same linen as the braies. It appears fairly regularly in artwork of men working in fields or in various states of dress.
Because it was won so close to the body and was usually concealed underneath other articles of clothing, this was a safe place to store money and other small valuables. It could not easily be accessed without lifting up two or even three layers of clothing and therefore could not be picked or quickly cut off and stolen.
Money Pouch
The Item:
Medieval pouches and bags were used by both men and women and were worn on the body for a variety of purposes. One common use for a pouch was to wear it attached to the braies and to hang from the breech girdle where the legs would be pointed. This type of bag was usually simple and often constructed of the same linen as the braies. It appears fairly regularly in artwork of men working in fields or in various states of dress.
Because it was won so close to the body and was usually concealed underneath other articles of clothing, this was a safe place to store money and other small valuables. It could not easily be accessed without lifting up two or even three layers of clothing and therefore could not be picked or quickly cut off and stolen.
Making up:
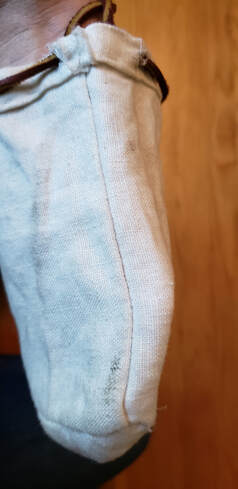
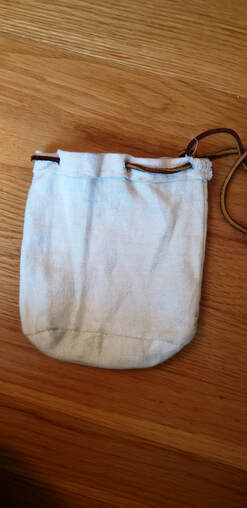
This piece is extremely simple in construction and easy to make. I cut a rectangular piece of fabric that that was the proper height I desired for the bag and was wide enough to fold over and provide a sufficiently wide bag. I folded the rectangular piece over and sewed it up. After completing this stage, I cut a round piece of fabric to match the circumference of the opening of the sewn up piece. I then sewed the two pieces together. This is the major part of this garment.
After this I folded the top over to create a hem on the top. I just did a simple running stitch along the top of the bag but you can fold that to the inside and use a hemming stitch. You want this top portion to be relatively wide as you will need to run leather or cord through holes in the top of the pouch to cinch it up. With the top portion sewn and finished, I then used a leather punch to punch a series of small holes along the top and cleaned them up with scissors to a uniformly round shape. After this, I used an overcastting stitch around the holes to prevent fraying or tearing.
|
|
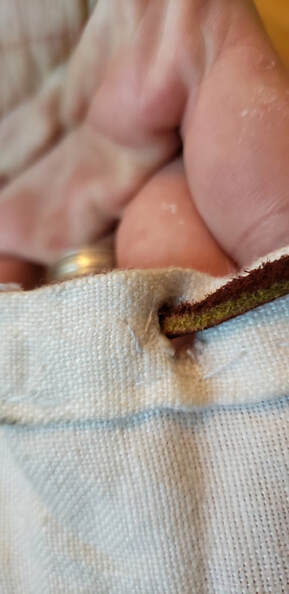
I then used some thin leather thong that I have and wove it through the holes on the top. You can use a second thong and attach it to the pouch to use for tying the pouch to your braies or you can use the same thong and attach it to the braies with the same thong that cinches them. This is what I initially did, but I was a little unhappy with it because it was very hard to un-cinch the pouch when I was wearing it – especially when items were in the pouch. I found it easier to un-cinch when it was attached and hanging from a separate thong. That said, its hard to tell from artwork how the pouch was attached and it seems that people used both – and maybe other – methods.
|
|
Concluding Impressions:
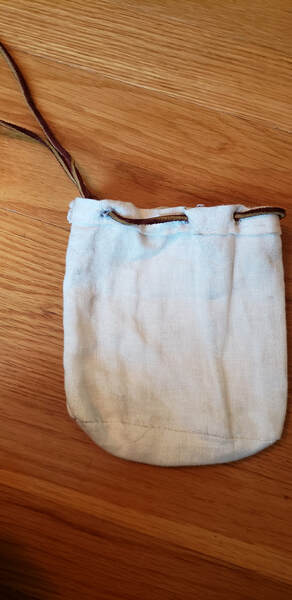
Honestly, there is not much to say about this pouch. It is a small linen pouch with a leather tie. It turned out well and serves its function. I think it is definitely something you should make for your outfit though because of how often such bags are depicted in artwork. It will be an easy to make piece that will add a little extra detail to your outfit and if you’ve made braies, and undershirt, and a coif, you should already have the fabric to do it.
Honestly, there is not much to say about this pouch. It is a small linen pouch with a leather tie. It turned out well and serves its function. I think it is definitely something you should make for your outfit though because of how often such bags are depicted in artwork. It will be an easy to make piece that will add a little extra detail to your outfit and if you’ve made braies, and undershirt, and a coif, you should already have the fabric to do it.
Belt Pouch
The item:
Belt pouches of either fabric or leather are often seen in period artwork and can be found in a variety of styles and sizes with many different types of closures. Another common thing seen depicted in artwork is the use of tassels, often in threes, and the use of embroidery to enhance the styling of the item. To be frank, I wanted to make a belt pouch that would fit my phone so I could carry it while in costume without it being seen stored away somewhere funny or asking other people to hold it for me. Therefore, my vision was shaped by that goal.
The Pattern:
I followed a pattern on a tutorial page called “How to sew a button-closure pouch.” Although I modified the pattern slightly, this gave me everything I needed to know to make a well finished lined pouch.
One thing that I did do differently than the pattern was add an underlining to the pouch. In other words, I have three layers of fabric: the outer fabric, the lining on the inside, and between the two, a layer of underlining. This middle layer provides additional structure and sturdiness to the pouch. The gabardine wool I used on the outside is relatively thin and lightweight although the linen on the lining is slightly heavier, still the two would not have had the structure that I wanted. Since I knew it would be holding a relatively heavy phone, I wanted to make sure it didn’t sag or bulge in a weird way. The underlining would be optional depending on the fabric you use and the purpose of the pouch.
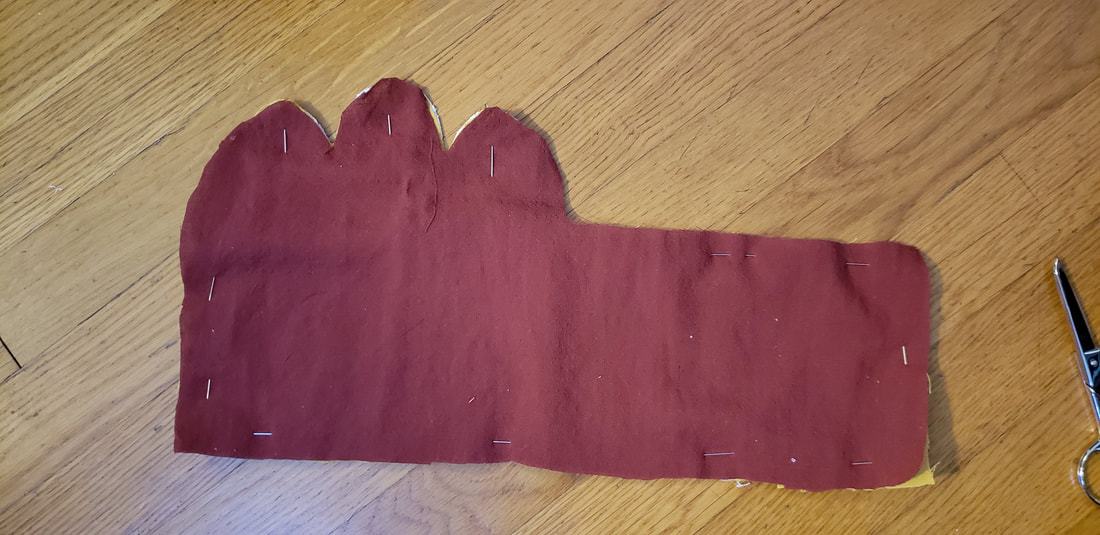
My first step was to make a pattern. I made the length and width of the pouch larger than my phone and with enough extra to accommodate seam allowances. I then made a second rectangle next to the first which will be the back of the pouch. I then made a scalloped closure to pull over the top of one half of the rectangle.
I cut the same shape for the outer, lining, and underlining fabric.
The item:
Belt pouches of either fabric or leather are often seen in period artwork and can be found in a variety of styles and sizes with many different types of closures. Another common thing seen depicted in artwork is the use of tassels, often in threes, and the use of embroidery to enhance the styling of the item. To be frank, I wanted to make a belt pouch that would fit my phone so I could carry it while in costume without it being seen stored away somewhere funny or asking other people to hold it for me. Therefore, my vision was shaped by that goal.
The Pattern:
I followed a pattern on a tutorial page called “How to sew a button-closure pouch.” Although I modified the pattern slightly, this gave me everything I needed to know to make a well finished lined pouch.
One thing that I did do differently than the pattern was add an underlining to the pouch. In other words, I have three layers of fabric: the outer fabric, the lining on the inside, and between the two, a layer of underlining. This middle layer provides additional structure and sturdiness to the pouch. The gabardine wool I used on the outside is relatively thin and lightweight although the linen on the lining is slightly heavier, still the two would not have had the structure that I wanted. Since I knew it would be holding a relatively heavy phone, I wanted to make sure it didn’t sag or bulge in a weird way. The underlining would be optional depending on the fabric you use and the purpose of the pouch.
My first step was to make a pattern. I made the length and width of the pouch larger than my phone and with enough extra to accommodate seam allowances. I then made a second rectangle next to the first which will be the back of the pouch. I then made a scalloped closure to pull over the top of one half of the rectangle.
I cut the same shape for the outer, lining, and underlining fabric.
|
|

|
Making up:
The next step is to sew the underlining to the lining fabric with a running or back stitch.
You will now treat the lining and underlining as one piece. The two have now essentially become a lining fabric with a right and wrong side and nothing else.
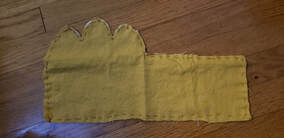
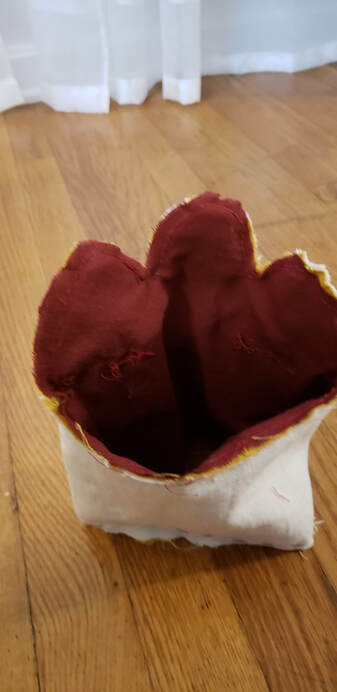
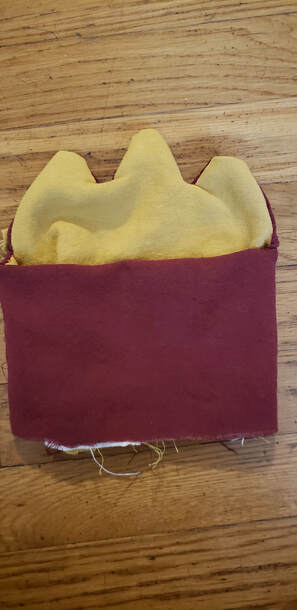
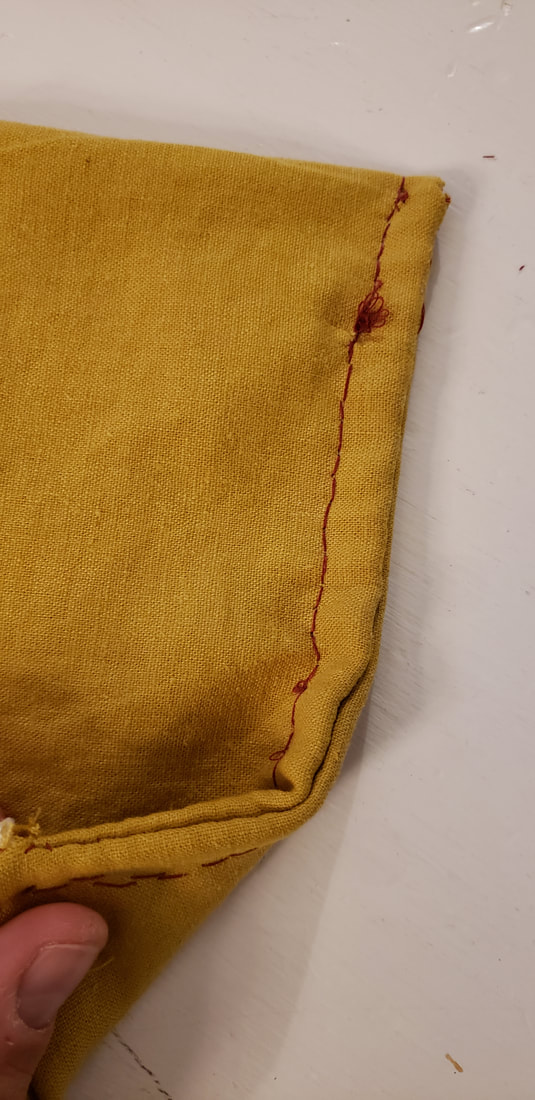
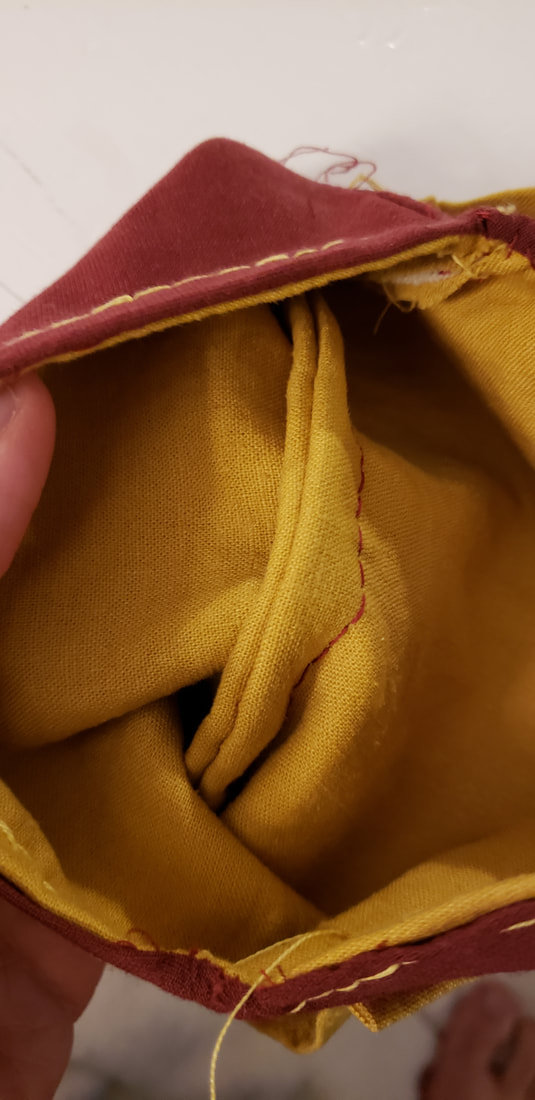
Next, fold the rectangle over to sew it shut from the side and do the same thing with the outer fabric. You will now have two pieces that look like a pouch with a hole in the bottom.
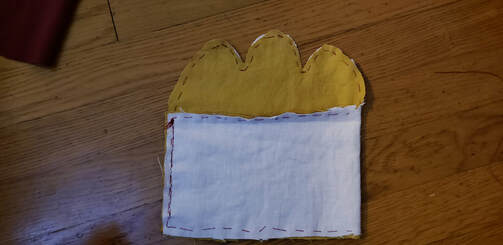
This is where it will get tricky, take the outer fabric and flip it right side out and then take the lining fabric and flip it wrong side out. If you are doing an underlining, the lining fabric should be in the middle touching the outer fabric as pictured.
The next step is to sew the underlining to the lining fabric with a running or back stitch.
You will now treat the lining and underlining as one piece. The two have now essentially become a lining fabric with a right and wrong side and nothing else.
Next, fold the rectangle over to sew it shut from the side and do the same thing with the outer fabric. You will now have two pieces that look like a pouch with a hole in the bottom.
This is where it will get tricky, take the outer fabric and flip it right side out and then take the lining fabric and flip it wrong side out. If you are doing an underlining, the lining fabric should be in the middle touching the outer fabric as pictured.
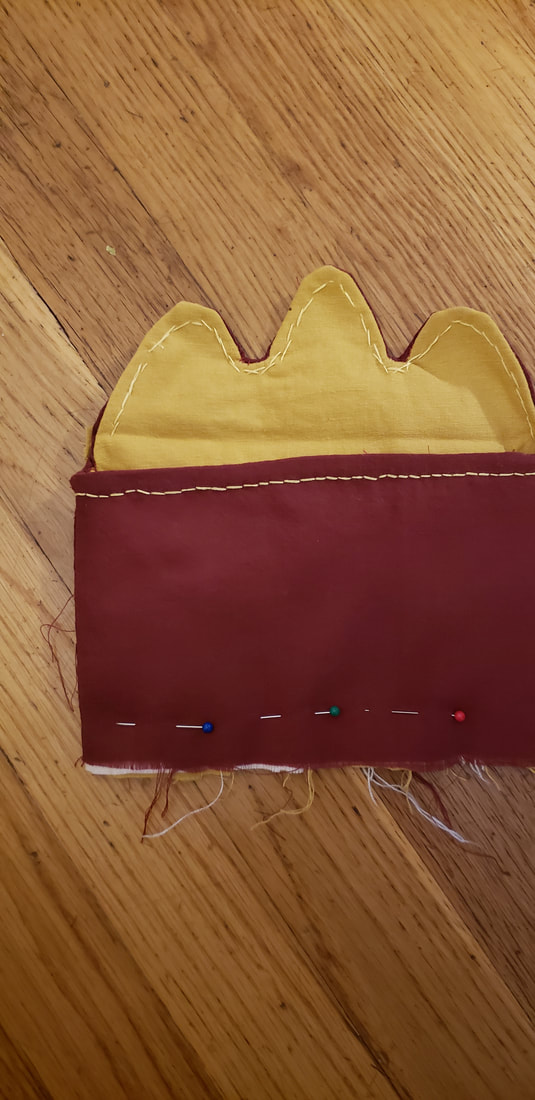
You will now pin along the top portion of the bag and the flap. You will back stitch all the way around the top portion and the flap. If you have done this correctly, flip the bag so the outer fabric is on the outside and the lining is on the inside. The interlining will be completely hidden between the two. Assuming you have done this step correctly, you might want to clip the edges of the seam allowance for the top of the bag to reduce bulk, especially around the flap. Next do a running top stitch or anchor stitch along the edges of the top and the flap to secure the lining and outer fabric and prevent future movement or shifting.
I did my anchor stitch as a back stitch with gold embroidery floss because I wanted to do some further work which would utilize that stitching.
I did my anchor stitch as a back stitch with gold embroidery floss because I wanted to do some further work which would utilize that stitching.
|
|
|
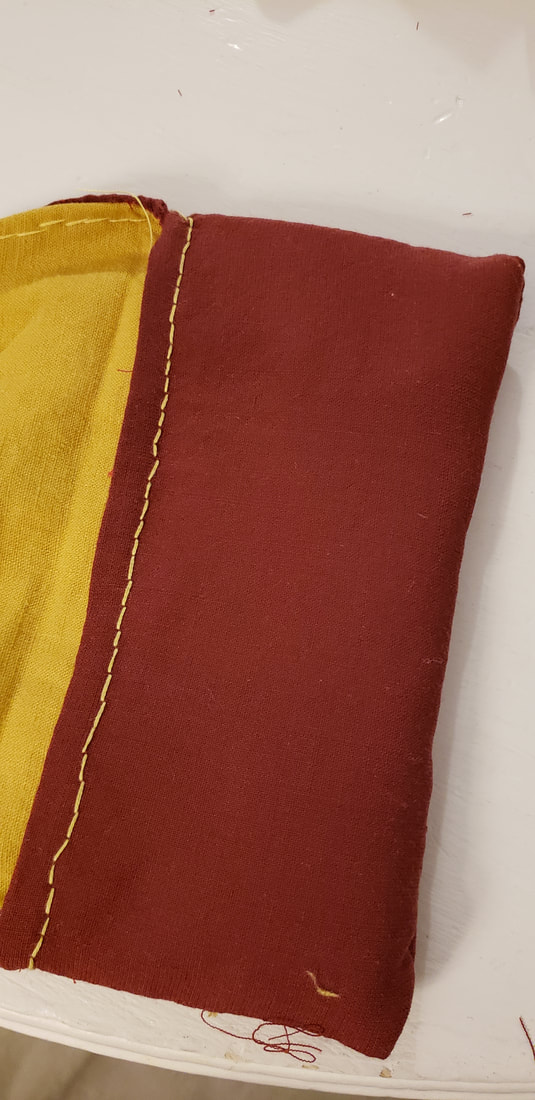
 The clipped back stitch along the bottom of the pouch for the French Seam.
The next step will be to make a French seam along the bottom. This will be pretty neat (at least I thought so). To do a french seam, simply sew a back stitch across the bottom of the bag. At first, this will seem stupid, but the next step is to trim the bottom just under the stitching as close as you can get without damaging the stitching. Now flip the bag inside out and sew along the bottom of the bag, just above the first line of stitching. You have essentially encased that first row of bottom stitching in the second row of stitches. When you turn the bag right side out you will see that the seam on the bottom of the bag looks professional and clean with no visible stitching. This stitch is particularly helpful for the bottom of a pouch because it ensures a very sturdy bottom seam and will keep anything from easily tearing the bottom stitching.
The french seam stitch on the lining just above the first clipped stitching
|
The finished stitch from the inside.
|
The french Seam from the outside
|
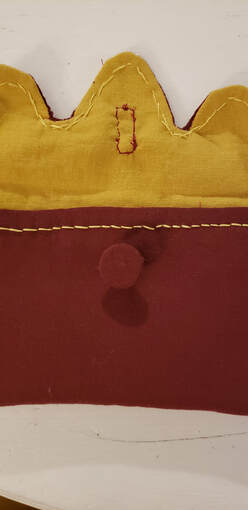
As to how you want to close your bag, the options are quite varied. If you follow my plan, you will need to cut a buttonhole in the flap and the sew a button onto the pouch. I used some of the same fabric from the pouch and covered a small button with it and sewed it up. I then sewed that button onto the pouch and lined up the buttonhole to match the button. I figure that it is best to put the button on first and then line up the buttonhole because you can always take a button off pretty easily but you can’t fix a buttonhole.
To make a buttonhole, you will sew in a back stitch as a border for where you want to place the button. I used a ¾ inch button and made the button hole almost in inch from top to bottom and this size worked well. After making the border, take scissors or a sharp crafting knife and carefully open up the hole. Clean out as much excess fabric and then do an overcast stitch knotting off ever stitch as you go around the button hole. This will prevent fraying and damage to the button hole over time. You should now be able to close your pouch.
To make a buttonhole, you will sew in a back stitch as a border for where you want to place the button. I used a ¾ inch button and made the button hole almost in inch from top to bottom and this size worked well. After making the border, take scissors or a sharp crafting knife and carefully open up the hole. Clean out as much excess fabric and then do an overcast stitch knotting off ever stitch as you go around the button hole. This will prevent fraying and damage to the button hole over time. You should now be able to close your pouch.

I wanted to attach this pouch to my belt so I also needed to add belt loops. If I had been thinking ahead, I would have added the belt loops to the pouch before doing the lining, but I didn’t think ahead, so the stitching of the belt loops is visible from the inside of the pouch.
Another thing in retrospect I would have done differently is to let the pouch hang down from my belt rather than sit right on the belt. If the belt loops had been bigger, I could have let the pouch dangle from the belt. This would have been nice because the pouch is just a little too wide and it is slightly obtrusive at times when I move around.
The next thing I did was to embroider along the border of the top of the pouch. I used gold embroidery floss and did a simple back stitch all the way around the top of the pouch and the flap. I then did what’s called a whipped back stitch. It was very easy to do and took very little time to finish. The stitch doesn’t even require putting the second thread through the fabric. For the whipping stitch portion I used a red that went well with the fabric of the pouch and you run the needle under the gold embroidery pull it up and over the next stitch and then run it back under the next stitch. It kind of creates a barber pole effect in the stitching.
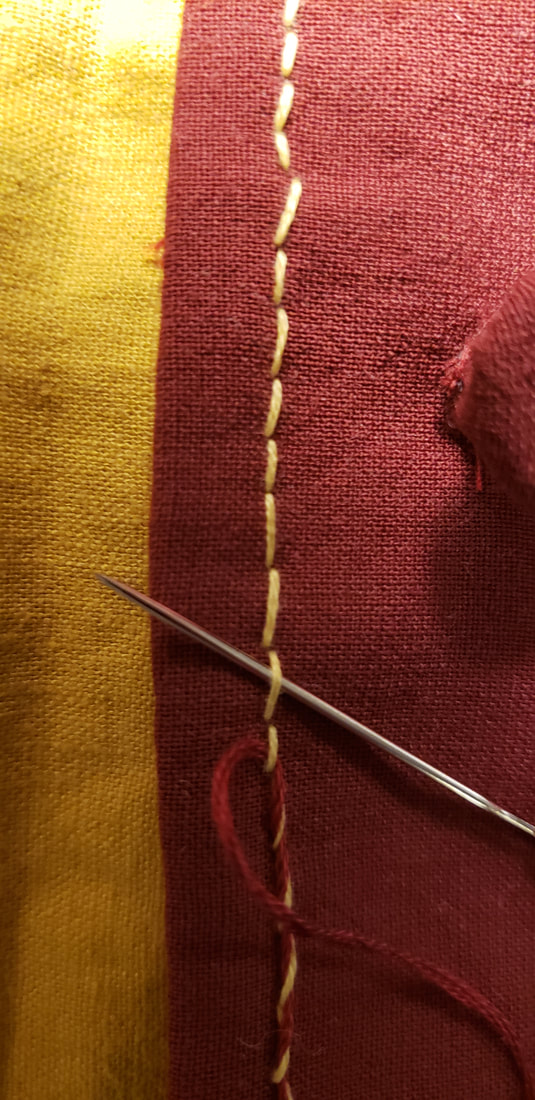
the second color embroidery floss gets threaded under each stitch and then wraps over.
|
Every stitch ris worked from the same side of the thread and then gets wrapped over and repeated.
|
 wrapping the embroidery floss around the cardboard.
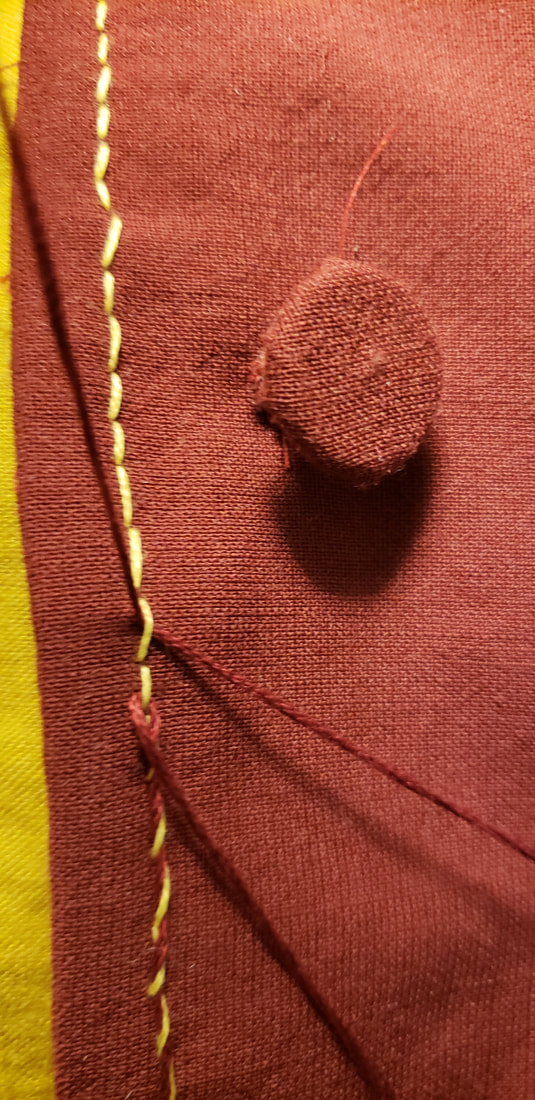
Finally, I decided to make three tassels to attach to the bottom of the pouch. I used embroidery floss for my tassels. I would not recommend using standard fabric thread as it will not have the fullness and stiffness that embroidery floss does. To make the tassels I used the same red embroidery floss and cut out of piece of cardboard which was the length I wanted to make the tassels, about an inch long. I then took the floss and ran it horizontally across the top of the cardboard and left a few inches of free thread. With the floss on top of the cardboard, I started wrapping the floss around the cardboard from top to bottom. I kept doing this until I had a reasonable amount of thread built up and I carefully removed the cardboard and tied off a knot on the top portion and wrapped extra thread around the top and created a stronger knot to prevent slippage of the thread. You can now cut the looped floss at the bottom and you should have a tassel ready to attach to your pouch. I then sewed the tassels into the bottom of the pouch on either side and in the middle.
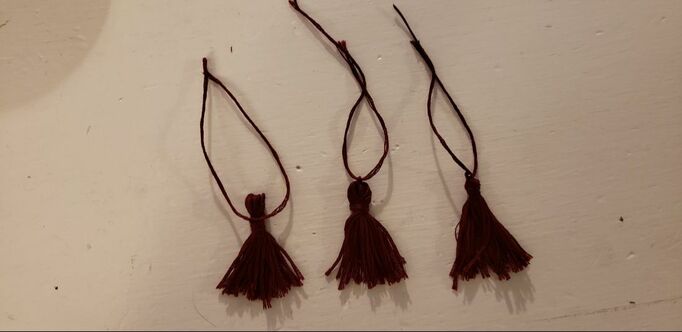
three finished tassels
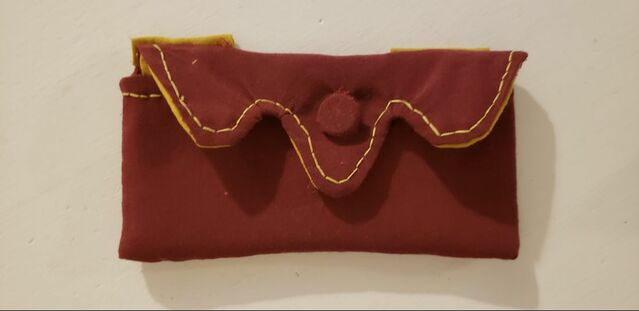
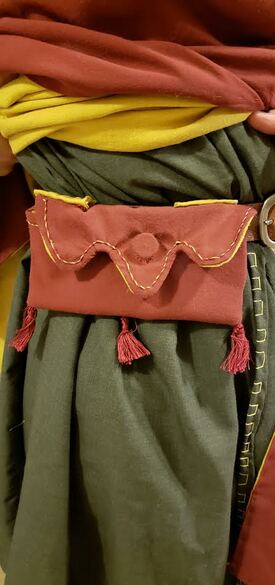 Finished pouch on my belt. The phone is not in the pouch because the phone is taking the picture.
Concluding Impressions:
I started out by wanting to make a garment specifically to hold my phone while in costume. This item accomplishes that goal and does it with style and in a completely period appropriate way. Although there are a few issues with how it hangs on my belt, I could alter this fairly easily but I just haven’t been motivated to do so. Also, as I said above, there were a few minor issues such as forgetting to apply the belt loops before I lined the pouch. This would have made the finished product more professional and would have made the belt loops easier to apply. Although you can’t see them when the pouch is on, the stitching looks very wonky and unprofessional in this section.
However, overall, this was actually a pretty technically involved project and consumed quite a bit of time for how small it is. Between making the button, doing the embroidery and making the tassels, I sank quite a few hours into an otherwise small item. However, I feel it was worth the time for a few reasons. One is that I was able to practice some embroidery work which I am not that experienced at and I felt it turned out well, even though it may not be perfect. Second, I practiced my button making skills which later came in handy when I made my cloak. Finally, this pouch is meant to be a bit of a style piece that coordinates with my surcote and hood. I used the same fabric and added the extra touches to make sure that my outfit came together as a whole. With the three matching pieces, I feel that my outfit portrays a well to-do and fashion conscious individual who would want to show off a little, so I opted for the extra touches.
