How to Make a Bycocket Hat

The Garment:
The bycocket hat, also known as the “Robin Hood” hat, is instantly recognizable and an instant conversation piece.
The bycocket came into popularity in the 14th century and remained popular into the 15th century. It was worn by men and women of all walks of life and social standing. While it is often seen on huntsman and people engaged in outdoor activity, there are pictures of people wearing bycokets in cities as well as the country.
The bycocket hat also had incredible variety in style and shape. The hat could be the traditional pointed front with rounded top but could also be more boat shaped all around. The crown might be very tall with a point, very tall and rounded, short with a wide brim. The brim itself might roll up and curve like a wing on the sides. Look at period artwork to get a sense of what style you want to make.
|
|
|
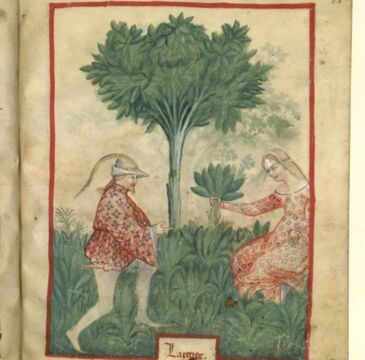
 The Effects of Good Government on the Countryside
Another unique aspect of the hat was the decoration and lining. The hat could be lined or unlined. Sometimes it appears that the crown is lined in silk while the brim is the exposed wool, but usually, it appears that the lining is on the brim. The hat could also be embroidered on the brim, the crown, or both. Artwork often shows ties or streamers on the bottom of the hat. I hesitate to call them straps because I haven’t seen examples of them under the chin, but I get the sense that it is a possible use. Another common decoration was to put a peacock or bird of prey feather (or feathers) into the crown of the hat.
It was also common to see pilgrim badges worn on the bycocket hat such as the shell for St. James de Compostela.
Like much of the fashion of the 14th century, the bycocket is often a garment of excess and garishness meant to draw attention and showcase the flamboyance of the wearer. However, don’t assume that all bycockets were garish and flamboyant. They could also be a simple felted wool hat used for keeping the sun out of the eyes and the rain off the head.
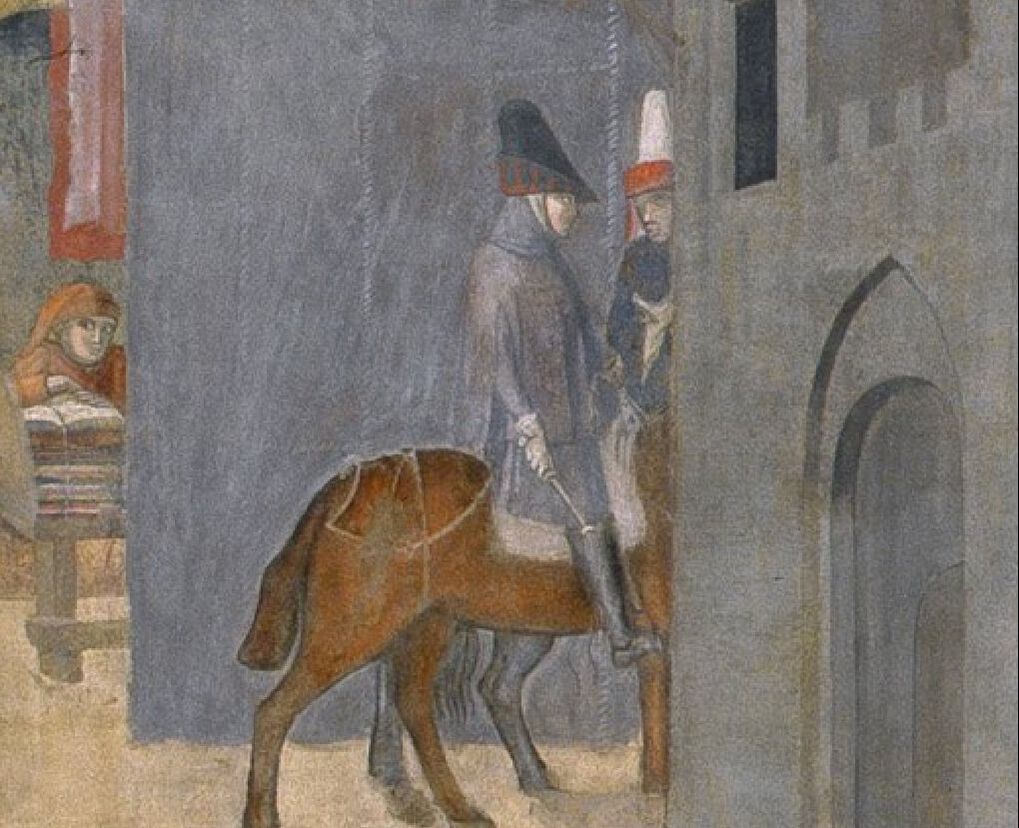
The Effects of Good Government on the City
|
|
Making a Hat Block:
The bycocket hat is made out of thick felted wool. When the wool becomes wet, the fibers can be rearranged and shaped. As the hat dries it will retain the shape. Therefore, the best way to form the hat is to make a hat block. Traditionally, these were made out of wood and the milliner would have unique hat forms to make distinct crown shapes.
I’m assuming that you will not be making a wooden hat block and want something a little easier to fabricate.
Before making the block, measure your head and determine the circumference. You will want to determine where on the block you have achieved that circumference and mark that point as where you will flip the brim up and make the bottom of your hat.
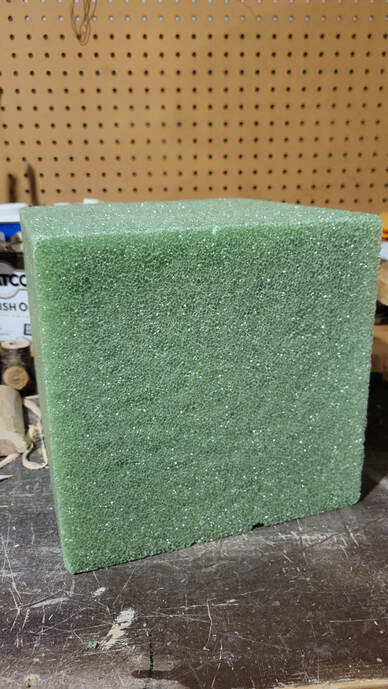
To make my block, I used a green cube of craft foam that was 20cm cubed. I got it for about $12 at Hobby Lobby. You may be able to find a more solid and sturdy foam somewhere else, but this worked. The size was still a little too short for my needs and I had to sit the block on top of a upside down bowl to get the block off the table. Other than that, the craft foam worked well.
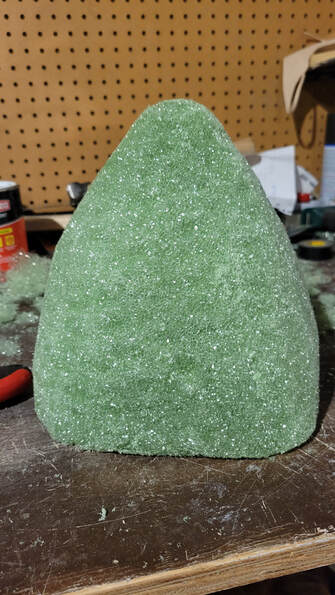
I started with a cube, and slowly trimmed and carved away material to shape the cube into a rounded cone. I made it a cone shape to form the crown around it. Therefore, make the shape of the hat form into the form that you want the crown to take. If you want a very angular crown, form your block accordingly. If you want a dome shape, make the block dome shaped. However, bear in mind that the bycocket will taper to a point in the front. The block does not need to match that point as you will be stretching the hat blank away from the block and into a point.
I wrapped my block in a plastic bag so the little bits of the foam wouldn’t get on the hat.
The bycocket hat is made out of thick felted wool. When the wool becomes wet, the fibers can be rearranged and shaped. As the hat dries it will retain the shape. Therefore, the best way to form the hat is to make a hat block. Traditionally, these were made out of wood and the milliner would have unique hat forms to make distinct crown shapes.
I’m assuming that you will not be making a wooden hat block and want something a little easier to fabricate.
Before making the block, measure your head and determine the circumference. You will want to determine where on the block you have achieved that circumference and mark that point as where you will flip the brim up and make the bottom of your hat.
To make my block, I used a green cube of craft foam that was 20cm cubed. I got it for about $12 at Hobby Lobby. You may be able to find a more solid and sturdy foam somewhere else, but this worked. The size was still a little too short for my needs and I had to sit the block on top of a upside down bowl to get the block off the table. Other than that, the craft foam worked well.
I started with a cube, and slowly trimmed and carved away material to shape the cube into a rounded cone. I made it a cone shape to form the crown around it. Therefore, make the shape of the hat form into the form that you want the crown to take. If you want a very angular crown, form your block accordingly. If you want a dome shape, make the block dome shaped. However, bear in mind that the bycocket will taper to a point in the front. The block does not need to match that point as you will be stretching the hat blank away from the block and into a point.
I wrapped my block in a plastic bag so the little bits of the foam wouldn’t get on the hat.

|
|
|
|
|
Materials:
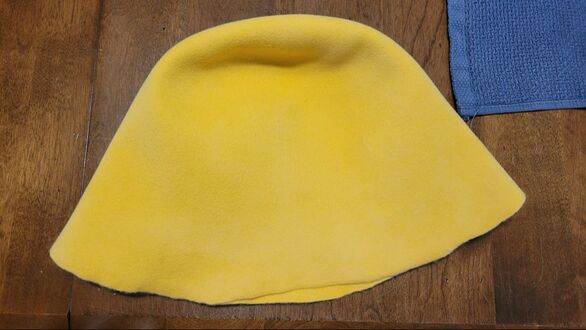
To follow the method I used, you will need to be a wool felt hat cone or cloche hood blank. These are available on Etsy, Ebay, and Amazon in a variety of colors. I bought two for about $15 each. If you line the hat, you will need lining material, but if you leave it unlined, you actually will only need the hat block and the wool hat blank.
To follow the method I used, you will need to be a wool felt hat cone or cloche hood blank. These are available on Etsy, Ebay, and Amazon in a variety of colors. I bought two for about $15 each. If you line the hat, you will need lining material, but if you leave it unlined, you actually will only need the hat block and the wool hat blank.
Making Up:
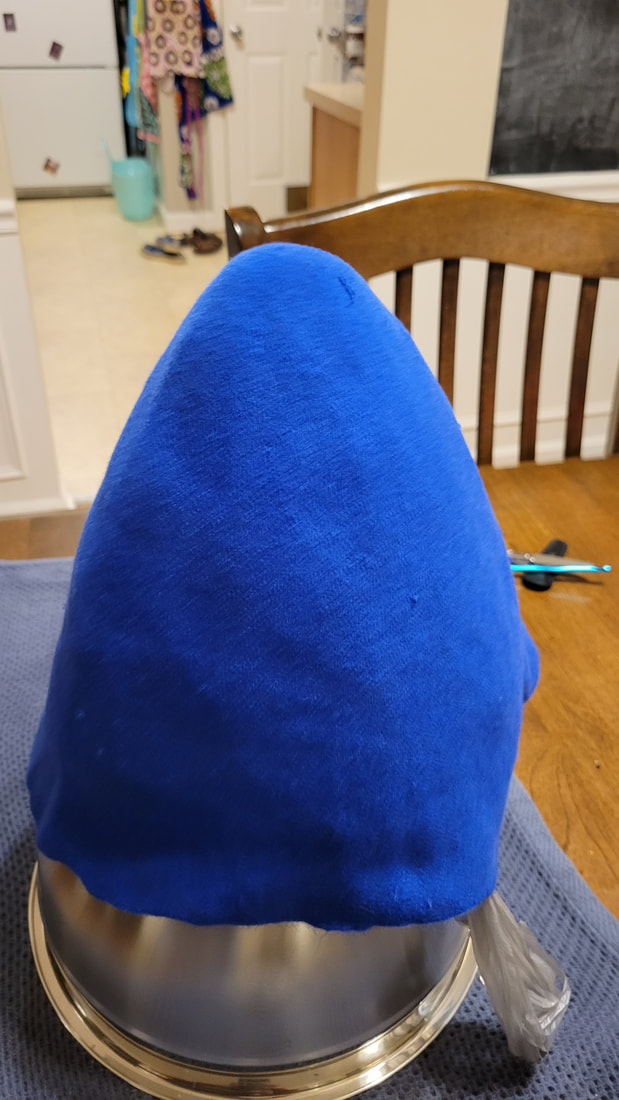
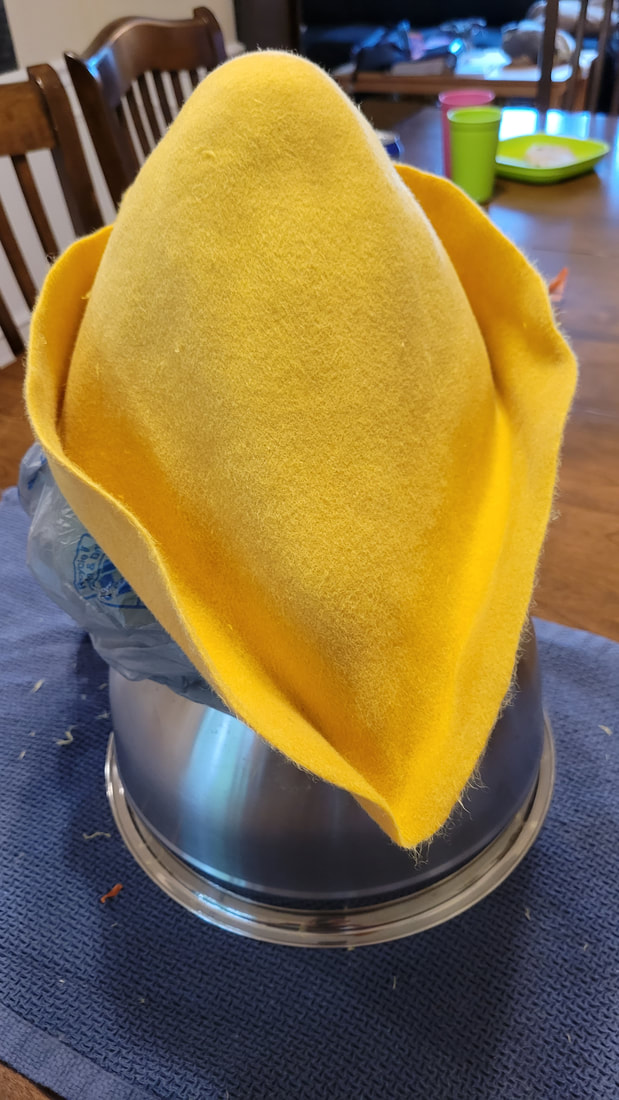
Start by running the hat under hot water until it is soaked through. Wool is water resistant, so you will need to soak it for a while. Once it is wet throughout, gently squeeze out the excess water without twisting or wrenching the hat. Try not to agitate it very much in the hot water as this may cause the felt to shrink.
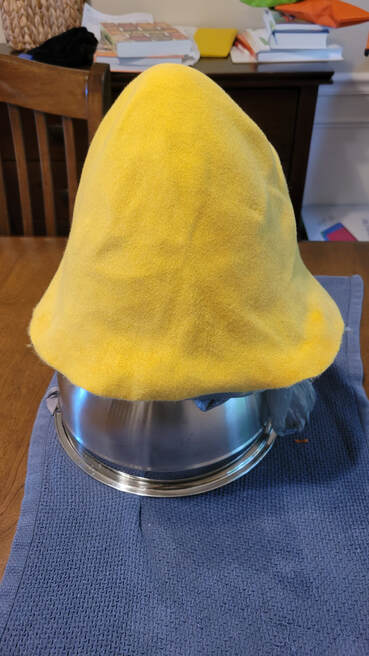
With the wet hat, begin to form it on the hat block. Start at the top and push and press down to smooth it over the block. Try to always work from the top down as your stretch the hat form over the block and begin to shape the crown.
As you form the hat over the block, you will then determine when the crown is tall enough and then flip the brim up at the point on the block that you marked for your head circumference.
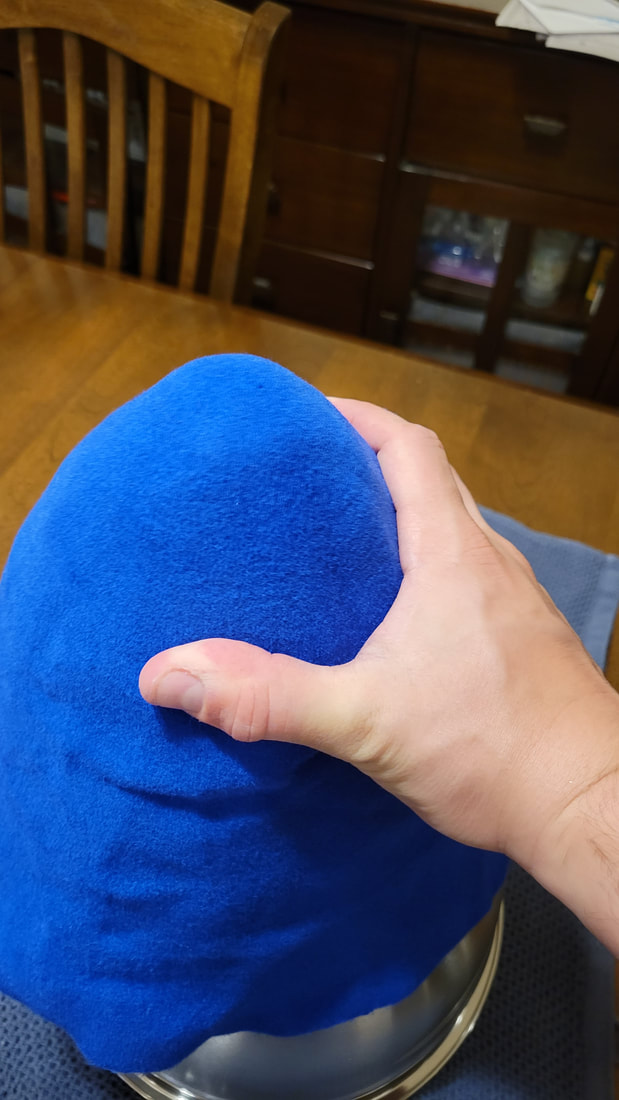
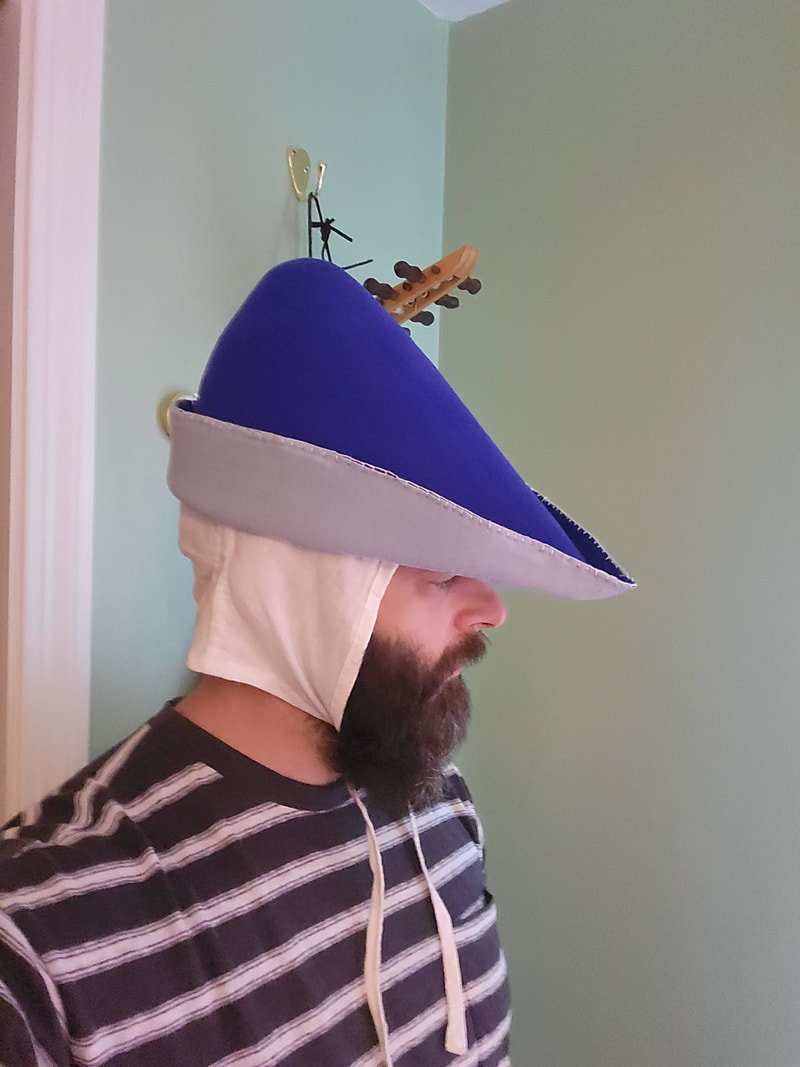
With the brim flipped up, begin by shaping the front of the hat into a point. Continue to pull and to shape the crown so that it tapers from the crown into the front tip. This will involve folding the brim up, using your fingers to stretch the crown forward into the tip, and stretching the front tip outward.
The hat may still be relatively wet, but I’d try it on just to get a feel for the fit.
Start by running the hat under hot water until it is soaked through. Wool is water resistant, so you will need to soak it for a while. Once it is wet throughout, gently squeeze out the excess water without twisting or wrenching the hat. Try not to agitate it very much in the hot water as this may cause the felt to shrink.
With the wet hat, begin to form it on the hat block. Start at the top and push and press down to smooth it over the block. Try to always work from the top down as your stretch the hat form over the block and begin to shape the crown.
As you form the hat over the block, you will then determine when the crown is tall enough and then flip the brim up at the point on the block that you marked for your head circumference.
With the brim flipped up, begin by shaping the front of the hat into a point. Continue to pull and to shape the crown so that it tapers from the crown into the front tip. This will involve folding the brim up, using your fingers to stretch the crown forward into the tip, and stretching the front tip outward.
The hat may still be relatively wet, but I’d try it on just to get a feel for the fit.
|
|
|
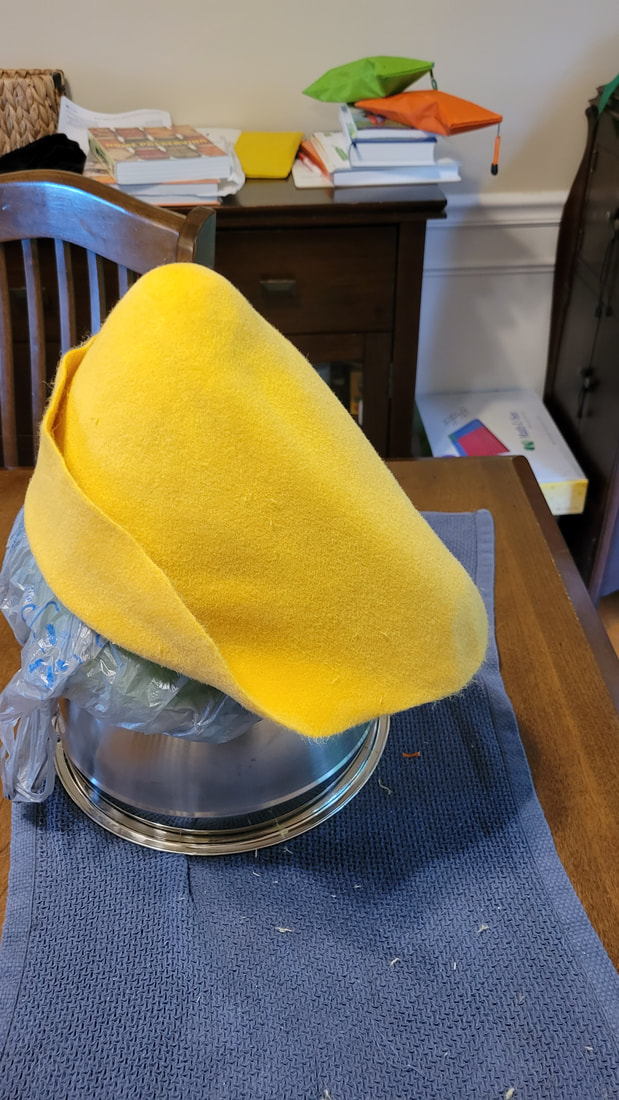
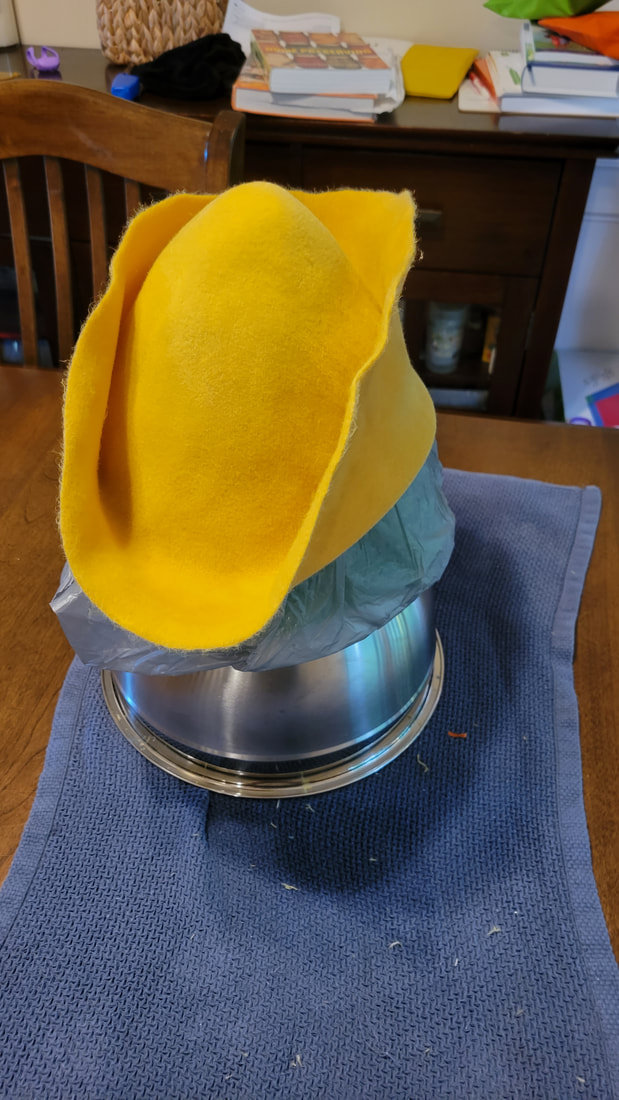
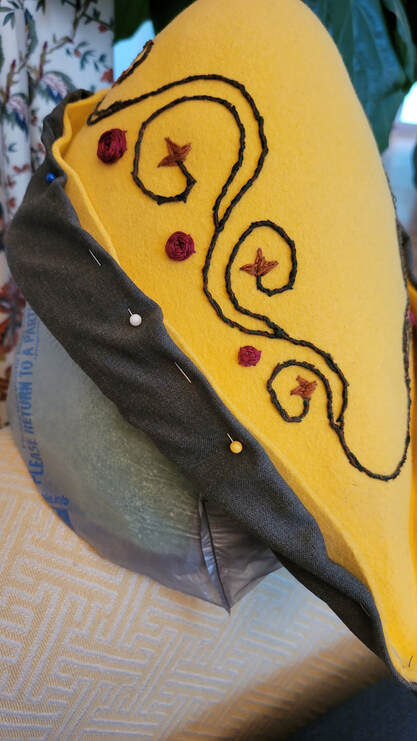
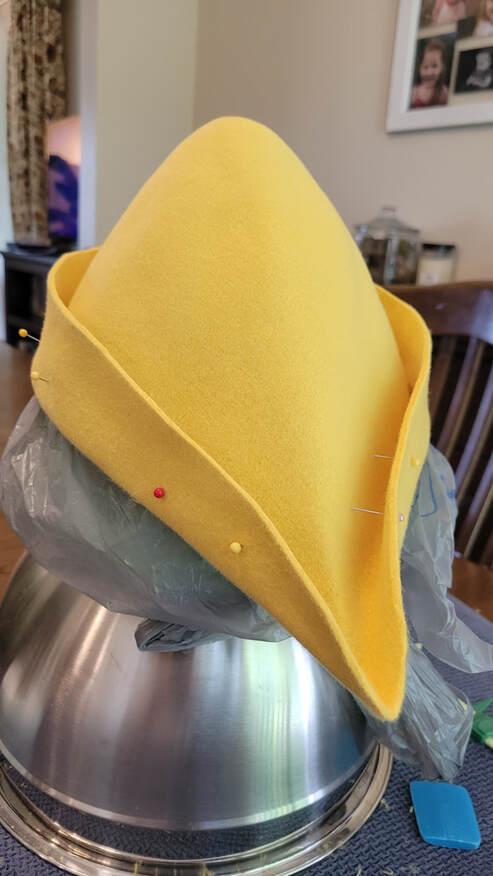 The hat on the block with pins in help the brim keep its shape. This is after trimming the brim.
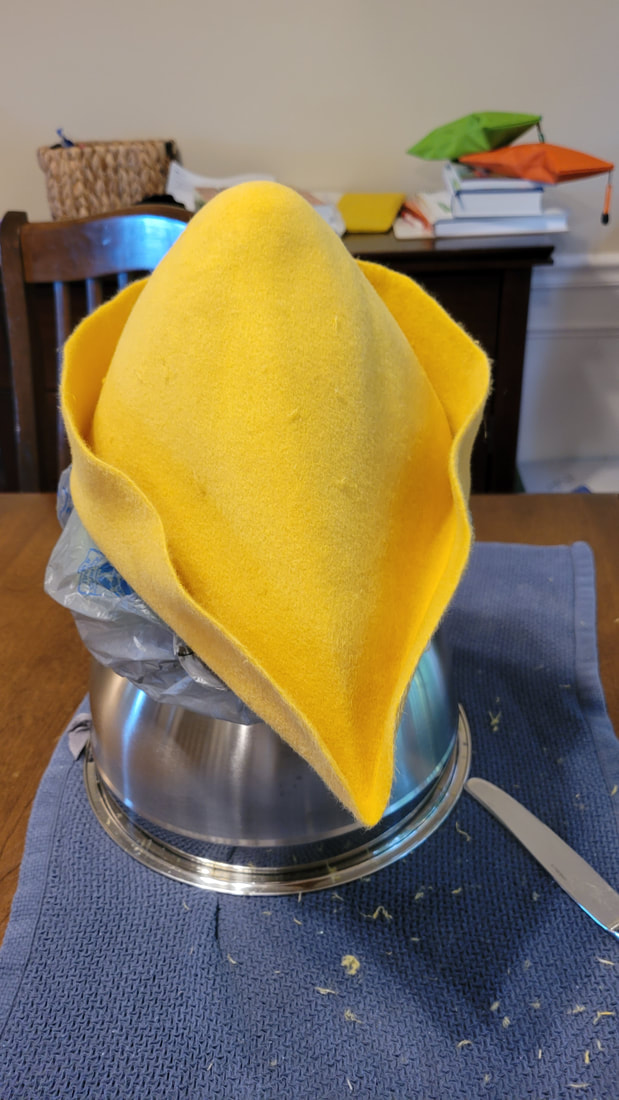
If things look and feel good, you will begin the fine-tuning process by continuing to shape the brim and the crown. I used a knitting needle to run across the brim fold and to try to flatten it out. I also ran it along the inside of the fold to make it crisp and tight.
The brim may be wavy at this point. Do your best to even it out so that it is smooth from back to front. You may find that when you fix the back, the front gets worse and vice versa. Continue to tinker until things are relatively even and smooth.
You will also notice that the edge of the brim is not even. This is fine for now, just leave it until the hat has dried a bit more.
Stick sewing pins directly through the brim and into the crown all around the brim. As the hat dries, these pins will help to stabilize the brim and keep it smooth and even. You are essentially using the pins as temporary tensioners on the brim to keep the brim in shape while it dries.
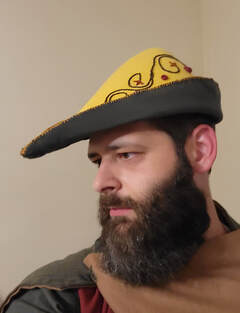
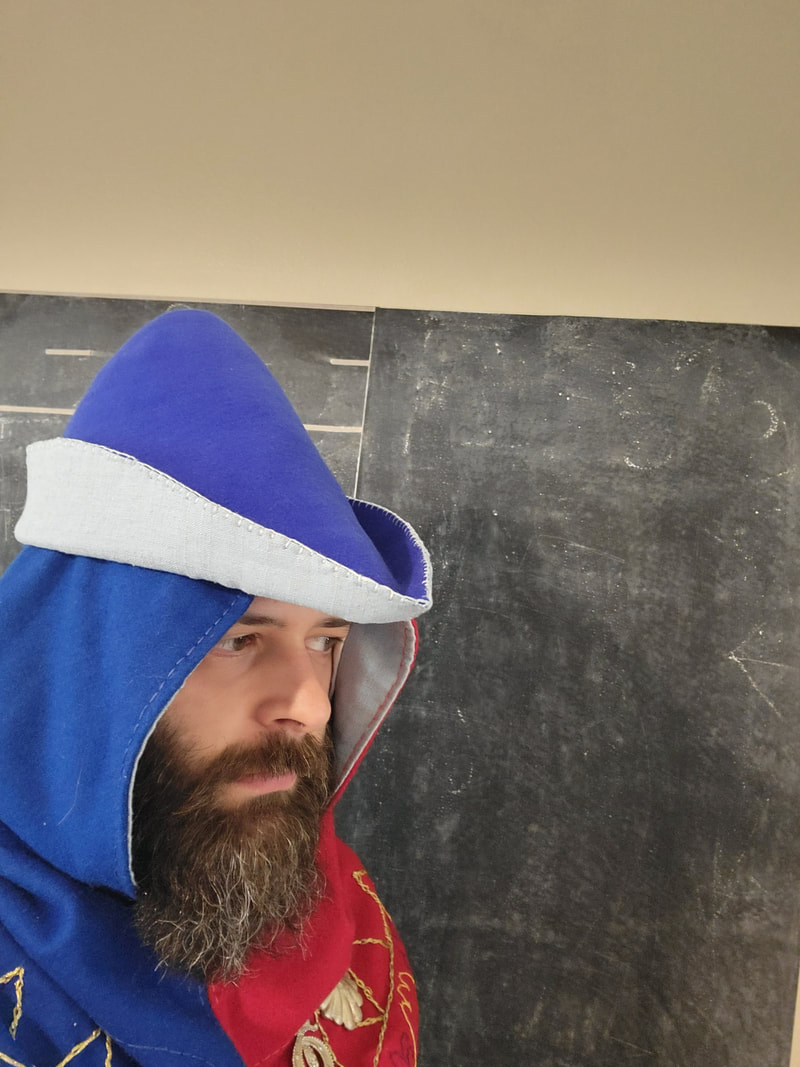
After a few hours or overnight, you can take the pins out. The hat will still be wet, but dry enough to work with and do some final touch ups. Now is a good time to even out the brim and trim the edges so they are even and level. Take as little or as much as you want for your brim shape but start slow so you don’t regret your decision. My blue hat has a bigger brim than my yellow hat and both look good in my opinion. With he hat still damp, it is easy to reform it to the desired shape without ending up with weird bends in the hat.
The brim may be wavy at this point. Do your best to even it out so that it is smooth from back to front. You may find that when you fix the back, the front gets worse and vice versa. Continue to tinker until things are relatively even and smooth.
You will also notice that the edge of the brim is not even. This is fine for now, just leave it until the hat has dried a bit more.
Stick sewing pins directly through the brim and into the crown all around the brim. As the hat dries, these pins will help to stabilize the brim and keep it smooth and even. You are essentially using the pins as temporary tensioners on the brim to keep the brim in shape while it dries.
After a few hours or overnight, you can take the pins out. The hat will still be wet, but dry enough to work with and do some final touch ups. Now is a good time to even out the brim and trim the edges so they are even and level. Take as little or as much as you want for your brim shape but start slow so you don’t regret your decision. My blue hat has a bigger brim than my yellow hat and both look good in my opinion. With he hat still damp, it is easy to reform it to the desired shape without ending up with weird bends in the hat.
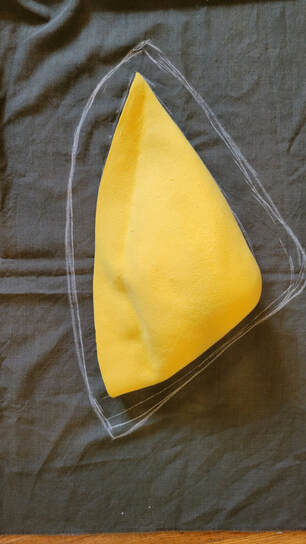
If you are lining the hat, now is also a good time to make the lining pattern. Unfold the brim and lay the hat on top of a piece of folded over fabric. Mark around the edge of the hat with ample allowance. This will give you an approximate lining shape, but it will need to be tweaked from this point. I tried to do the lining three different ways. One of them didn’t work at all, one was too complicated and still didn’t turn out great, and this third way seemed to work the best with the least fuss.
With the lining cut out, reshape the brim, and let the hat completely dry. It will probably take about two days for the hat to completely dry. I then used hair spray on the inside of the hat to help it keep its stiffness. They also sell hat stiffeners specifically for this purpose.
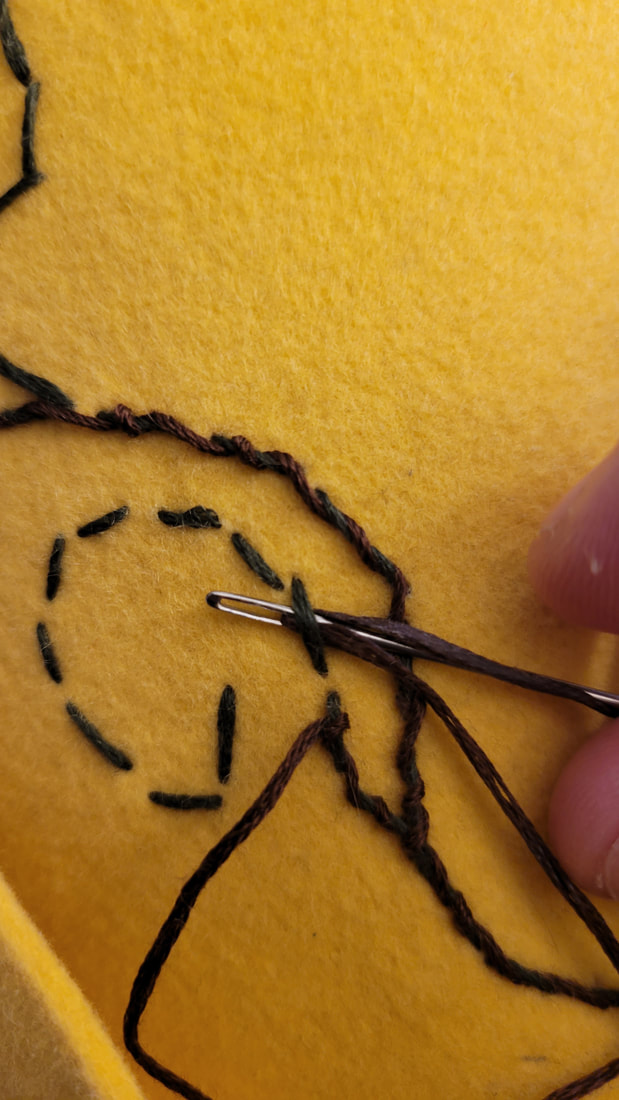
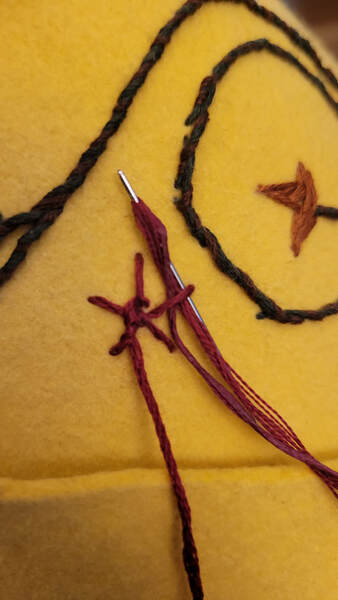
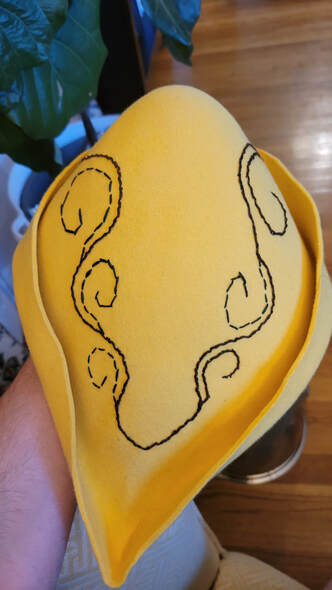
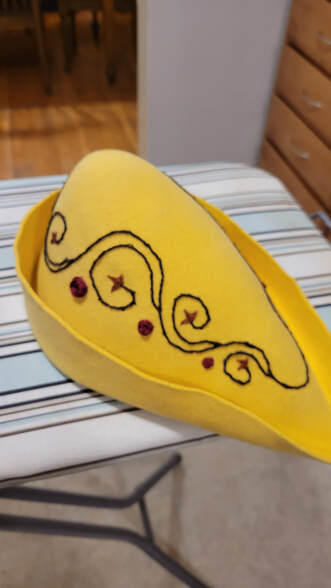
If you are embroidering the crown, you will do that now. I used a medieval floral motif. I made vines which swirled out into a leaf and then made pinwheel style roses.
To do the vines, I did a back stitch in green of the course of the vine. Next, I whip stitched in a brown and then did a final whip stitch in green. I made the leaves with an orangey brown. The roses are pinwheel or spoke roses.
With the lining cut out, reshape the brim, and let the hat completely dry. It will probably take about two days for the hat to completely dry. I then used hair spray on the inside of the hat to help it keep its stiffness. They also sell hat stiffeners specifically for this purpose.
If you are embroidering the crown, you will do that now. I used a medieval floral motif. I made vines which swirled out into a leaf and then made pinwheel style roses.
To do the vines, I did a back stitch in green of the course of the vine. Next, I whip stitched in a brown and then did a final whip stitch in green. I made the leaves with an orangey brown. The roses are pinwheel or spoke roses.
|
|
After embroidering the crown, you can work on the lining. I actually did a test fitting for the lining before dong the embroidery.
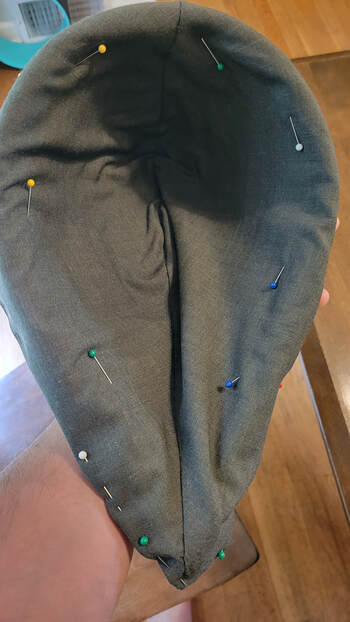
Sew your two lining halves together and do a test fit with the wrong side on the inside of the hat. Make sure that the lining lays inside the hat completely and that it reaches all the way to the tip of the crown. Work to smooth the lining evenly over the inside of the hat.
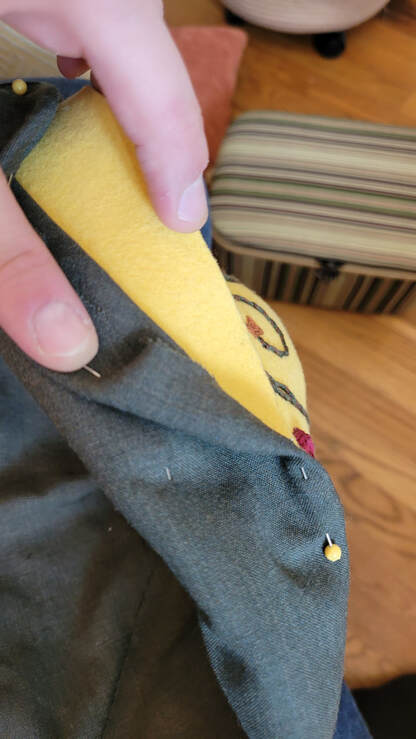
Now, before fitting the lining to the brim, pin the lining to the inside of the hat. You need to do this so you don’t begin to pull the inside around while working on the brim. Now try to fold the lining under so it can be pinned to the edge of the brim with no raw edges. If you line the hat with a felted fabric, you will not need to worry about a raw edge and it may make this step easier. You can simply make the lining meet the edge of the brim, pin it in place, and then blanket stitch it.
This step will take a considerable bit of time and work to get it right.
I struggled for a while to reduce the wrinkles and folds from the lining. I would advise to make several passes and tweaking the fit on each pass. Start at the back, get it to fit and then start at the front and refine the fit on each side until it meets well in the back. You can trim excess fabric from the lining if you have too much in certain areas. You may also need to trim the tip so it fits well.
Again, be prepared to spend some time on this tinkering.
If you want to have a streamer or strap on your hat, I would tack it to the lining and position it just before stitching the lining in place.
Once you feel good with the lining’s fit, do a tacking stitch on the inside of the crown to secure the lining to the hat. The felt should be pretty thick and offer enough fabric to bite into without going all the way through.
Sew your two lining halves together and do a test fit with the wrong side on the inside of the hat. Make sure that the lining lays inside the hat completely and that it reaches all the way to the tip of the crown. Work to smooth the lining evenly over the inside of the hat.
Now, before fitting the lining to the brim, pin the lining to the inside of the hat. You need to do this so you don’t begin to pull the inside around while working on the brim. Now try to fold the lining under so it can be pinned to the edge of the brim with no raw edges. If you line the hat with a felted fabric, you will not need to worry about a raw edge and it may make this step easier. You can simply make the lining meet the edge of the brim, pin it in place, and then blanket stitch it.
This step will take a considerable bit of time and work to get it right.
I struggled for a while to reduce the wrinkles and folds from the lining. I would advise to make several passes and tweaking the fit on each pass. Start at the back, get it to fit and then start at the front and refine the fit on each side until it meets well in the back. You can trim excess fabric from the lining if you have too much in certain areas. You may also need to trim the tip so it fits well.
Again, be prepared to spend some time on this tinkering.
If you want to have a streamer or strap on your hat, I would tack it to the lining and position it just before stitching the lining in place.
Once you feel good with the lining’s fit, do a tacking stitch on the inside of the crown to secure the lining to the hat. The felt should be pretty thick and offer enough fabric to bite into without going all the way through.
|
|
If you want to embroider the lining fabric on the brim, I would do it at this stage. You’ll essentially be embroidering the lining before it is fully attached and the tricky part will be making sure you position everything perfectly and then secure the lining.
Finally, use cotton embroidery floss to do a blanket or oversew stitch on the brim.
Finally, use cotton embroidery floss to do a blanket or oversew stitch on the brim.
Concluding Impressions:
I was pleased with how my first hat turned out and learned a few tricks in forming the hat and lining it that helped me later on. It was a simple hat and never meant to be more than that. On my second hat, I felt I had a better grasp of the process and wanted to make it really special. I am so glad I did. I’m thrilled with how it turned out and I fell like it is one of the high points of my entire collection.
The bycocket is relatively easy to make, but the lining did give me some trouble both times. An unlined bycocket is very commonly seen in artwork, so if you don’t feel up to that challenge, I’d still take a swing at making this iconic hat.
Having learned how to make the bycocket, I am also curious about trying out other shaped wool felt hats or making a taller version.
|
|
