How to Make Fourteenth Century Hose
The Garment:
Hose in the mid-14th century began to change in cut and became longer and extended more fully to cover the back of the upper thigh to the buttock. The hose rose to meet up with the doublet and pointed to the doublet in fashionable styles by the 1340s. The fashionable hose of the 1340s onward no longer tie to the braies.
The hose would have sets of eyelets that allowed pointing around the top edge of the hose and could be pointed in the front, back, and sides of the hose. Sometimes there would be two courses on the front, side, and back each.
It was not uncommon for men to untie certain points when engaged in vigorous activity because the hose would pull on the doublet and make bending and other movements difficult if the hose were attached all around the leg. However, when attached, it would give a very smooth effect. In addition, the hose attaching to the doublet would not only keep the hose up, but would help keep the doublet down. This was important as the doublet was often used as a foundational garment to give the wearer the stylish outline of the day.
For women, the hose did not change in form in the 14th century. They continued to be worn to the upper calf and kept in place with a garter of leather, ribbon, or cord.
|
|
|
The Fabric:
The fabric for hose can be a little tricky. Linen can work, but it will never have as much stretch as wool. I recommend using wool in a twill weave. Felted wools will not have the right drape.
It is also important that you find fabric with bias stretch. Denver Fabrics has been a good source for this because they sell affordable wool fabric and they note whether it has a bias stretch or not. I have ordered from them a few times and always been pleased.
The Pattern:
You will need to make your own pattern by making a toile. Making the hose requires the use of a toile, which is a draft version of the garment made of thin, cheap fabric. I have always used old bedsheets for my toiles. By making your own toile, you ensure a great fit and hose that follow the contours of your leg without sagging or bagginess.
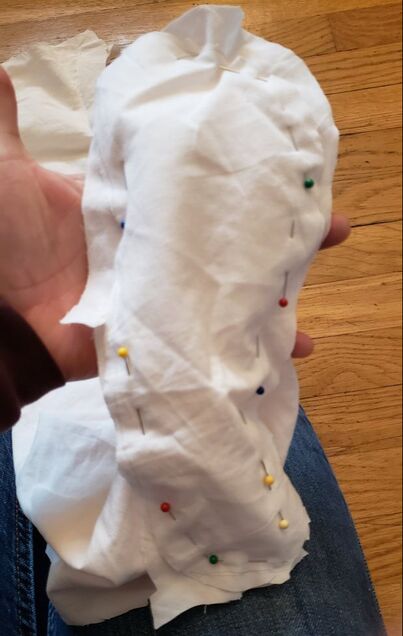
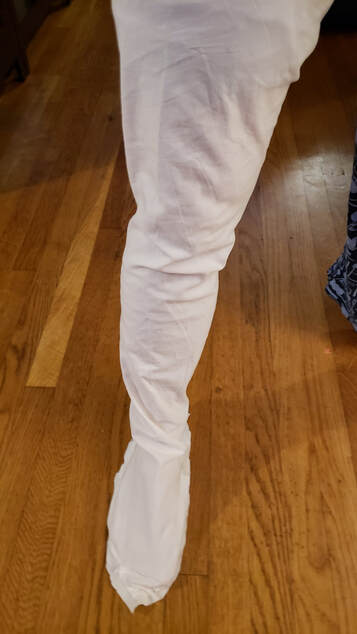
 The fitted toile prior to making the sole.
Making a toile:
You will probably need an assistant for this step to help pin the toile in place. To make a toile for your hose, cut the sheeting on the bias. This means cutting it along the diagonal rather than with or across the grain of the fabric. Cut the sheeting in a rectangle that reaches from your hip bone to drape over your foot and that you can easily wrap around your leg with some excess.
Pin the toile to your underwear or a thin pair of athletic shorts for this process to keep it securely in place during the fitting.
Next, with your assistant behind you, start just above the knee and pull the fabric around the leg so the fabric joins behind the leg in the middle. Pin the fabric in place and continue to do this up the thigh. Try to place a pin every few inches, following the contours of the leg as your assistant pins up the leg. Make sure you can flex and bend your leg with the pins in. If you can’t, it will be too tight.
Put the pins in parallel to the fabric and facing up. You will need to pull the tile off, and it will be easier to do without getting stuck by the pins that way.
You don’t need to get the thighs perfect at this stage, just generally pin the contours of the leg in place.
As you pin up the leg, you will need to pin the toile around the side of the leg and up to the buttock. If you are making the hose to point to a doublet, they will need to come up to the hip bone around the front, side and back of the leg, you can also work to get the toile to follow the inseam of the leg, but it won’t point to anything there. This will make the inside of the toile shorter than the outside of the leg.
Next start pinning down the knee and work toward the calf. The calf and ankle can be tricky because slipping the foot in and out will actually be the largest part of your body that needs to slip through. Therefore, don’t get too tight around the ankle especially. This may take some testing and trial and error to get just right.
Once the calf and ankle are pinned in place, let the remaining fabric fall over the foot. Gather some under the heel and mark where the fabric meets the ground. Over the ankles, cut a slash from the ground to the ankle
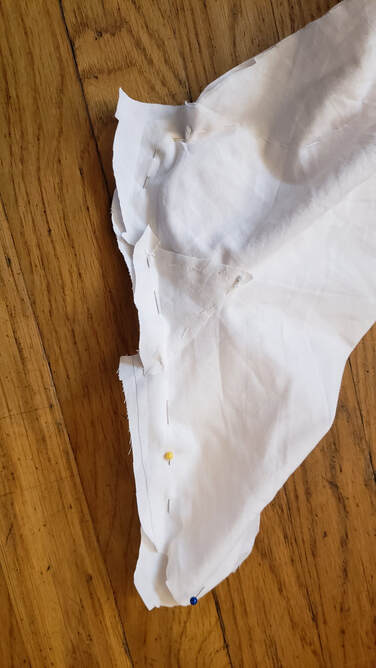 The triangle gore and the sole pinned in place.
Pinning the sole in place on the toile for fitting.
|
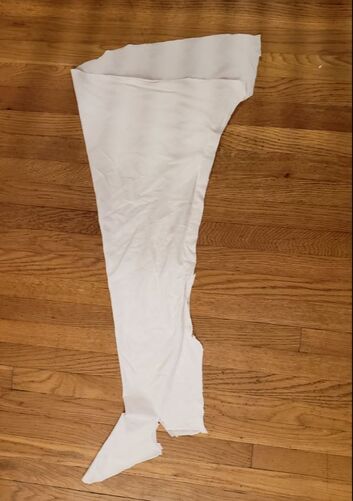
The toile after fitting to my leg and making all needed adjustments.
|
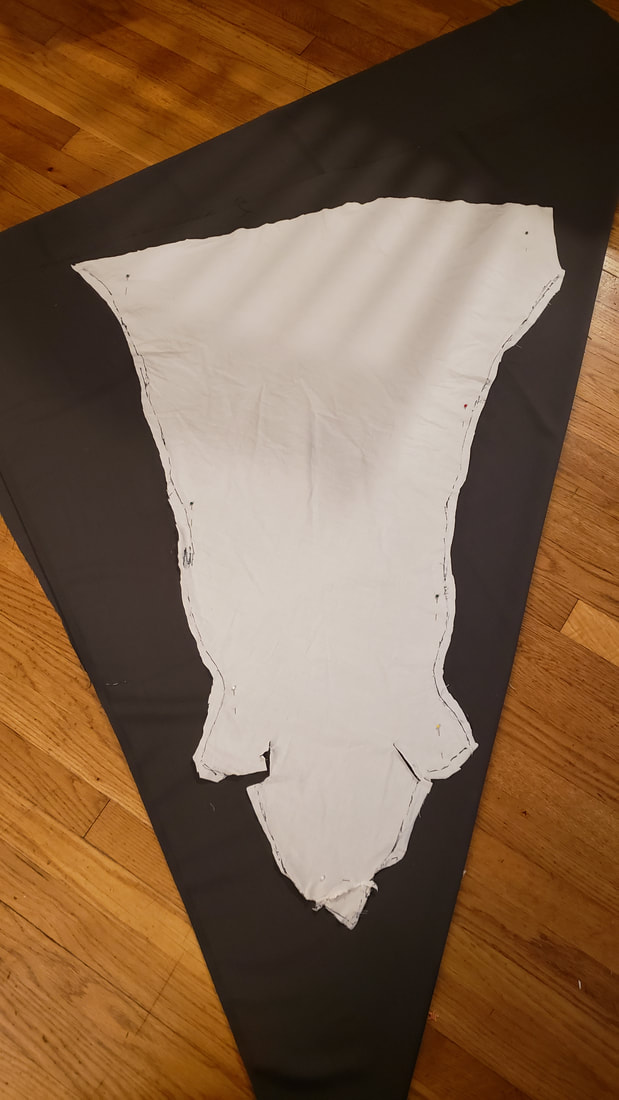
The fabric is folded over and ready to be cut on the bias.
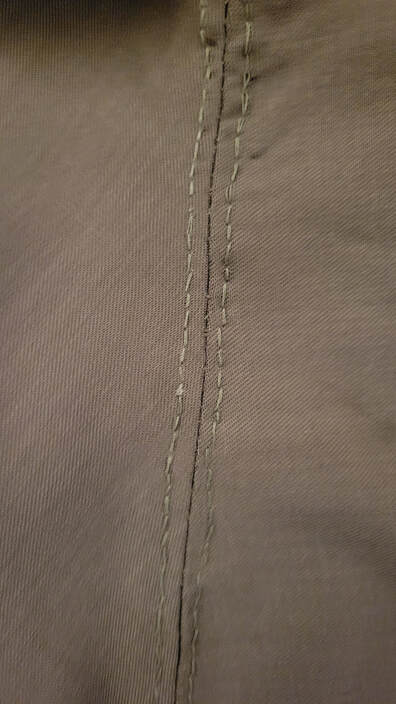 Triple run seam up the center seam of the hose.
Making Up:
The First Thing to do is to make sure you are cutting along the bias of your fabric. I folded mine over diagonally and cut both layers at the same time. That is why the layout above looks so odd.
After that, making up is fairly easy. You sew up the center line of the hose, set in the gores and sew the sole on. Use a triple run seam to hold the center seam down and keep it flat. This is needed to keep an even and clean seam on the back of the leg. You can use a fell seam on the feet and gores to finish the internal seams on the foot. Obviously, you’ll need to hem the top of the hose down.
If you need to, attach the extension strip to the back of the hose. Like I said, I didn’t think to do this until the very end and had to add it with a weird patch. If I did it again, I would use a seaming stitch to attach the strip of fabric directly to the top of the hose.
I bought two brass rings from Tractor Supply and sewed them to the top of the strip. You can also use a buttonhole on the strip and put a button on the doublet back. I tried this method but couldn't get a fit that I liked, so I abandoned it in favor of the ring.
Determine how many points the hose will have for the doublet. It is best if you have a doublet that you can tie and fit to the hose before finishing and finalizing this step. Don’t guess and hope a theoretical future doublet will fit.
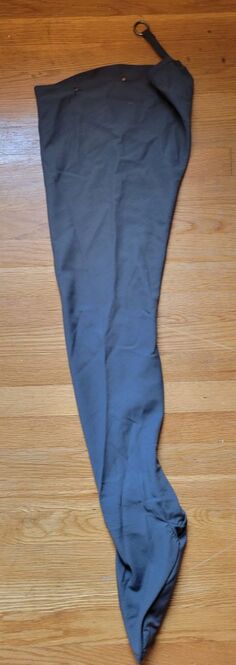
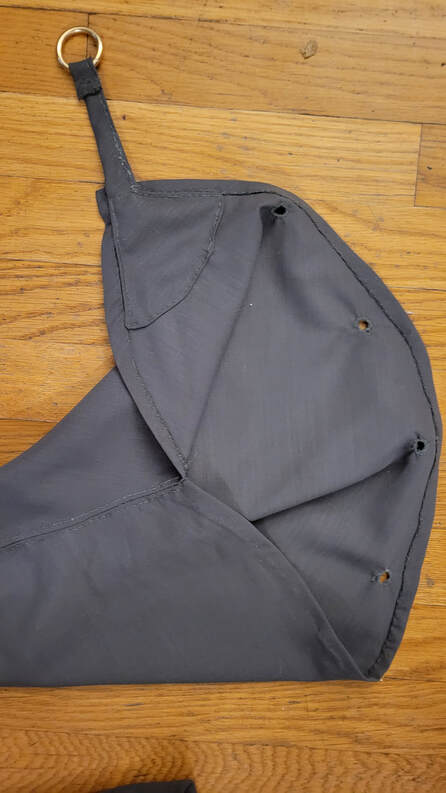 A view of the hose with eyelets and extension strip and ring.
I have a doublet with five points on each side to attach to the hose. Two in the front, one on each side, and two in the back. This is a total of ten points. The last point on the back is placed higher than the rest and ties to the brass ring.
Make eyelets for each set of points and make sure that they will line up with the points on the doublet. I made one eyelet for each point, but I have seen people make two eyelets for each point. The key thing here for fit is that the hose and the bottom of the doublet just meet. The points will hag down from the doublet and give enough slack to tie to the hose and get them tightly in place.
There is a bit of finesse to figuring out how to best point the hose because if you tie it in too tight, it won’t have any give for ease of movement. If it is too loose, things will fall down and won’t fit right.
Concluding Impressions:
I am amazed at how well these hose fit and work with the doublet. They have a nice clean look and fit my legs well. They don’t fall down or sag at all, even after all day wear. I can sit, drive my car, run, and do any ordinary activity with no issue. With the back ring tied in place, there is a slight constriction of movement when bending down. However, this seems to be normal and expected based on period illuminations. Best of all, I don’t need a calf garter to hold them in place. This excellent fit was mostly due to working at getting the toile to fit as intended. I knew that the toile fit well and that the bias stretch in the wool would make things perfect.
The only complaint if have is that the ring I sewed on needed a goofy patch because I didn’t think to do that until later. I had initially just planned on longer lacing in the back to tie in place, but I was having problems with the fitting and tried this instead.
