Making a Medieval Lantern
 Ape with wooden lantern.
Voeux du paon (PML G.24 fol. 30v) c. 1350
Ape with wooden lantern.
Voeux du paon (PML G.24 fol. 30v) c. 1350
The Object:
This project is a simple wood frame lantern. Lanterns like this are often depicted in artwork and used in various settings. You can carry the lantern in hand or hang it up by the straps when not in use. There are many different ways to make this item and a variety of styles and sizes seen in artwork. I have seen square, round, short, tall, simple, and ornate. The beauty of this lantern is the vellum/parchment windscreen which gives off a very warm and inviting glow. I have also seen lanterns which have slots for tiles of horn to slide into. If the horn is thin enough, it can be used as a windscreen, much in the way that thin vellum was used.
My lantern is a middle of the road rounded lantern with simple aesthetics and a vellum windscreen.
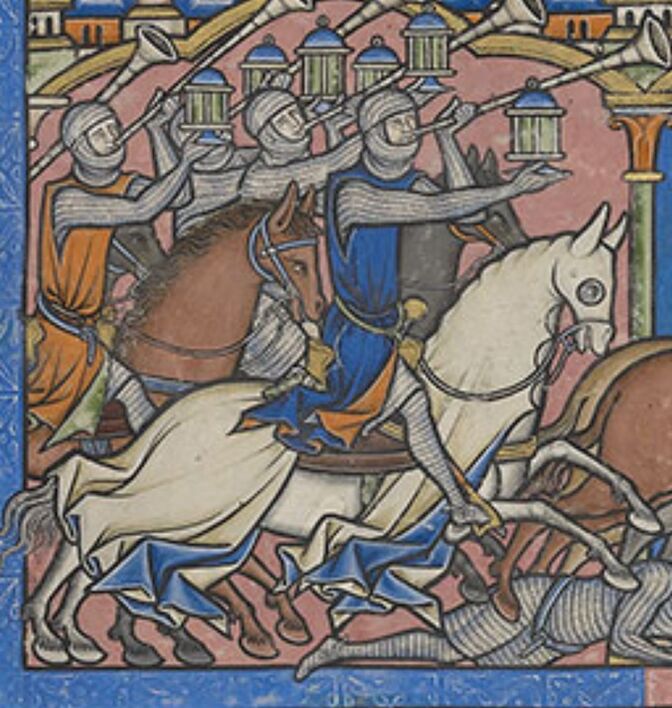
Gideon with lantern and trumpets. Maciejowski Bible (PML M. 638, fol. 13r) c. 1250
|
|
|
|
|
Materials:
Base: I made the base pieces out of two pieces of pine wood boards I had laying around. They weren’t the greatest quality and if I were to do the project again, I would get nicer wood.
Dowels: The lantern dowels were made from branches of a cherry tree that I cut down. You can also just buy pre-made dowels from the store which would be a lot easier and hardly even noticeable because the dowels will be covered by the windscreen anyway. I just wanted to have some fun making things with the tree I cut down.
Strap: I used leather thong for the handle/strap.
Windscreen: I bought a bag of vellum offcuts from an Esty seller in England. The parchment is slightly translucent and emits a nice glow. It took about two months to get here, but I was happy with the purchase. If you don’t want to spend the money or don’t have access to leather vellum/parchment, You might consider using parchment paper from the grocery store. This was my plan B, and I even considered whether the parchment paper could be stained to look more like leather by dampening it with tea colored water. If you try this and it works, let me know.
Candle: You can use a tapered beeswax candle for authenticity or if needed, you can always put a small artificial candle inside to prevent fires and allow you to leave the lantern unattended.
Tools needed:
I only own hand tools and a battery powered drill. You can certainly benefit from more tools, but they aren’t necessary.
Drill and Drill bits
Hole saw drill bit
Hand saw
Pocket Knife/utility knife
Wood glue
Leather sewing supplies
linseed/teak oil
How I Made it:
The dimensions for my lantern are roughly eight inches tall and the base pieces are approximately 5 inches in diameter.
This is far from a definite guide to making wooden lanterns. In general, my woodworking skills are about as good as my tools, and I already said I don’t own very much. I will simply explain how I made mine.
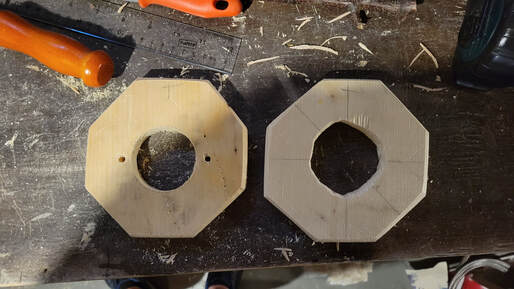
First, I marked two pieces of pine board to make octagons and cut them with my hand saw. For the first piece, I tried to use a keyhole saw to cut the circle, but it made really jagged edges and didn’t allow for a clean circular cut, so I wouldn’t recommend that. On the second center hole, I used a hole saw drill bit in my power drill. That worked much better and the disc from the hole was still a usable shape to serve as the candle base.
I then drilled two small holes on either side of the bottom base piece and then drilled eight holes on the edge of the bottom and top base piece for the dowels.
The dimensions for my lantern are roughly eight inches tall and the base pieces are approximately 5 inches in diameter.
This is far from a definite guide to making wooden lanterns. In general, my woodworking skills are about as good as my tools, and I already said I don’t own very much. I will simply explain how I made mine.
First, I marked two pieces of pine board to make octagons and cut them with my hand saw. For the first piece, I tried to use a keyhole saw to cut the circle, but it made really jagged edges and didn’t allow for a clean circular cut, so I wouldn’t recommend that. On the second center hole, I used a hole saw drill bit in my power drill. That worked much better and the disc from the hole was still a usable shape to serve as the candle base.
I then drilled two small holes on either side of the bottom base piece and then drilled eight holes on the edge of the bottom and top base piece for the dowels.
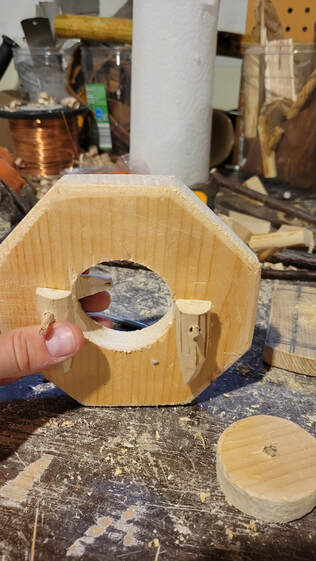
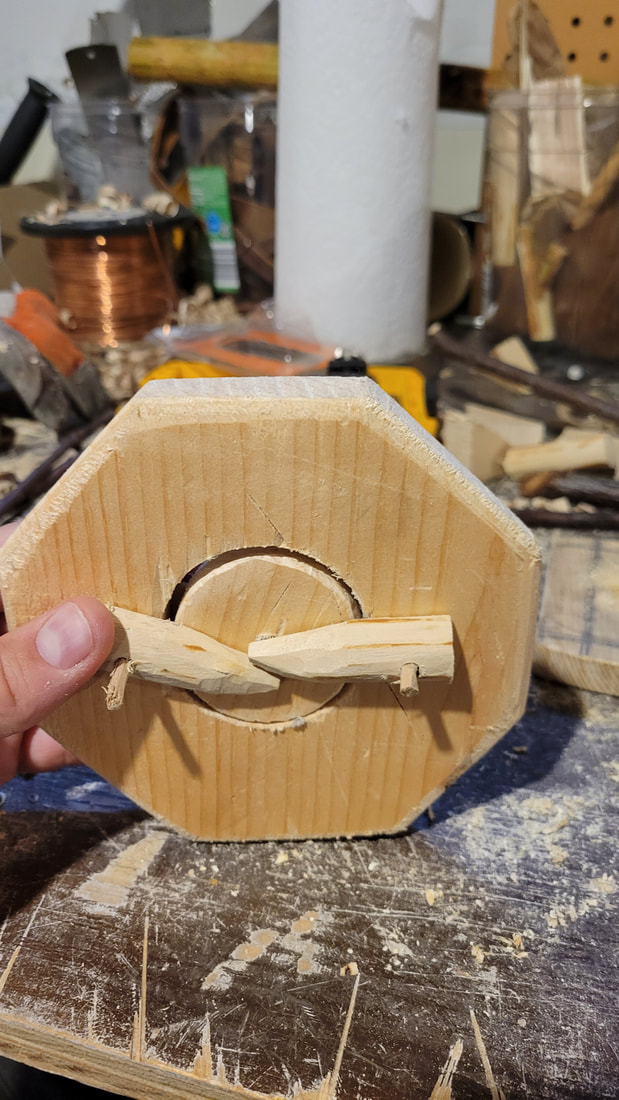
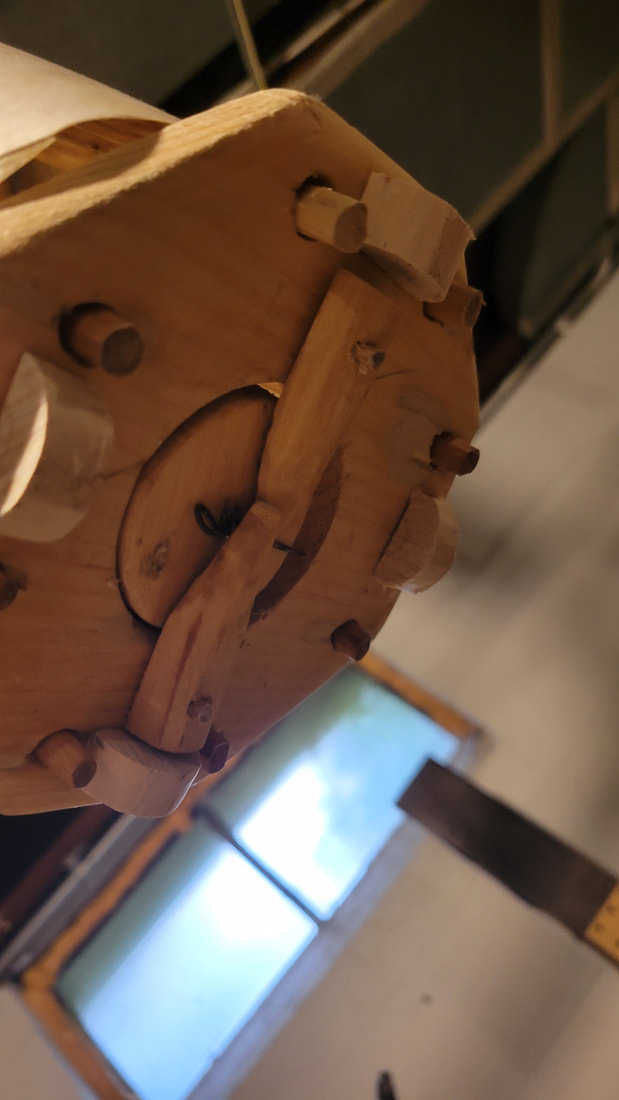
Next, I worked on making the candle holder base piece and the retention mechanism. I used small twigs and whittled them down to fit the small holes next the opening in the bottom base piece. I then cut a branch piece in half lengthwise and whittled “tabs” to hold the round insert piece in place. I put tabs on the top and bottom so the insert wouldn’t jostle out of place with the candle on it. I also whittled a small twig to a sharp point and glued it into the candle holder insert. I glued the bottom tabs onto the dowel in the base, let it dry, and then glued the top tabs onto the dowel. They were able to spin so that they could hold the insert in place or spin out of the way for easy removal.
If I do this again, I would make a third tab holder, because the two aren’t quite as stable as I hoped they would be. I overcame this by using a tiny steel pin to keep the tabs secure, but maybe do better than me.
If I do this again, I would make a third tab holder, because the two aren’t quite as stable as I hoped they would be. I overcame this by using a tiny steel pin to keep the tabs secure, but maybe do better than me.
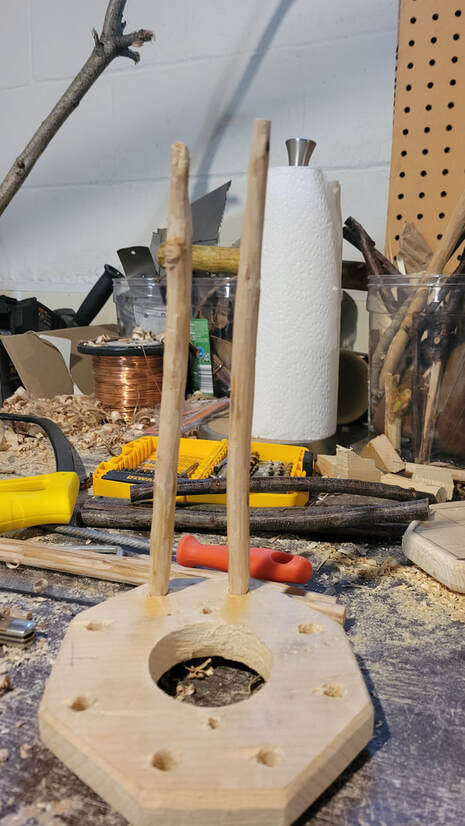
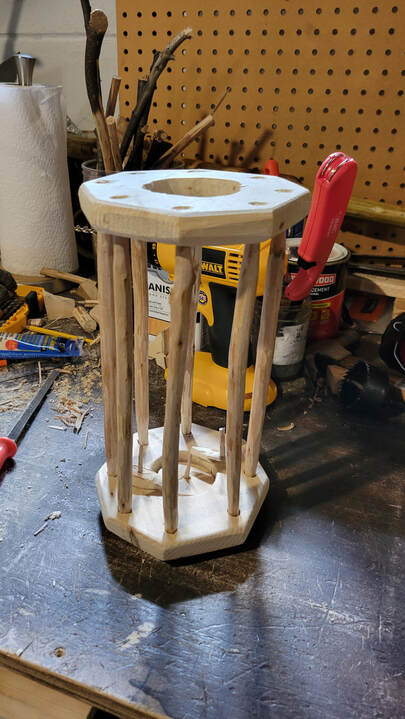
Then I whittled my branches/dowels to fit snuggly into the drilled holes and then I did a dry fit of everything put together. It all lined up well, and I glued the dowels in place so they wouldn’t fall out.
I should mention, that before I glued anything in place, I finished the wood with two coats teak oil and let it dry.
Here’s another area where I made a mistake. Earlier I mentioned that the vellum took about two months to arrive. In the meantime, I figured I’d work on the lantern and get it to the last step before putting the windscreen on. I wish I would have waited to glue the top base piece on. It would have been infinitely easier to fit the windscreen on with the top off.
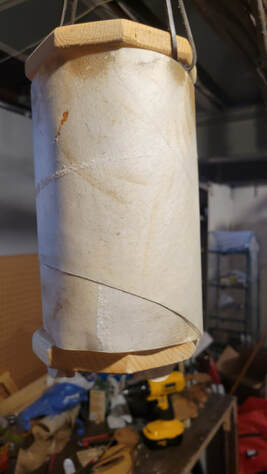
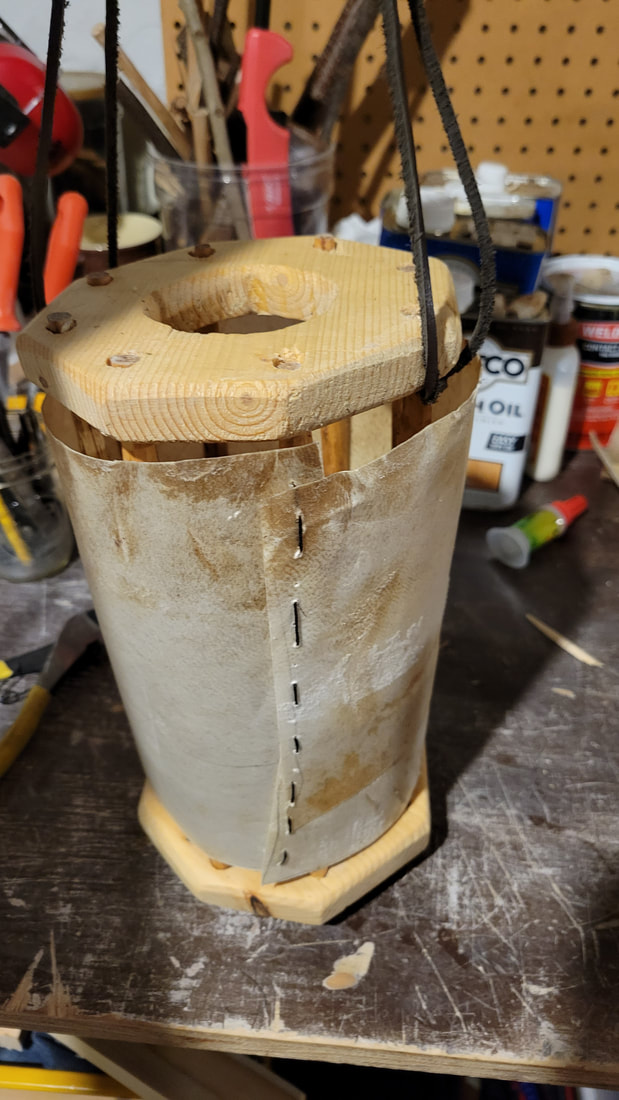
Anyway, my next step was to put the windscreen on. I bought vellum offcuts, which were generally the right size, but I needed to glue a few pieces together to make the right shape and size piece to wrap around.
Once the vellum was the right size to wrap around the frame, I used a running stitch and some waxed thread for leatherworking to stitch the vellum closed around the frame.
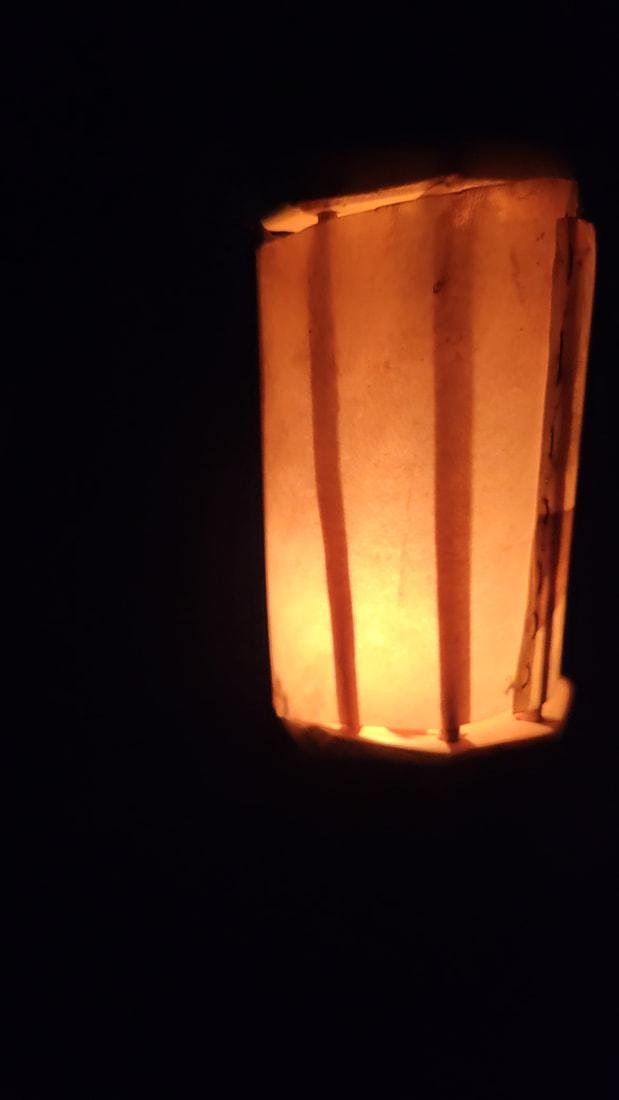
A tapered beeswax candle can now be stuck onto the insert piece, lit, and placed into the base piece. I was surprised by how much light this gave off.
I also used leather thong to make straps and tied them to the dowels.
A final thing I did was to make four "feet" for the base piece so the lantern would be stable when set on the ground.
I should mention, that before I glued anything in place, I finished the wood with two coats teak oil and let it dry.
Here’s another area where I made a mistake. Earlier I mentioned that the vellum took about two months to arrive. In the meantime, I figured I’d work on the lantern and get it to the last step before putting the windscreen on. I wish I would have waited to glue the top base piece on. It would have been infinitely easier to fit the windscreen on with the top off.
Anyway, my next step was to put the windscreen on. I bought vellum offcuts, which were generally the right size, but I needed to glue a few pieces together to make the right shape and size piece to wrap around.
Once the vellum was the right size to wrap around the frame, I used a running stitch and some waxed thread for leatherworking to stitch the vellum closed around the frame.
A tapered beeswax candle can now be stuck onto the insert piece, lit, and placed into the base piece. I was surprised by how much light this gave off.
I also used leather thong to make straps and tied them to the dowels.
A final thing I did was to make four "feet" for the base piece so the lantern would be stable when set on the ground.
|
|
|
|
|
|
Concluding Impressions:
This is a fun project and a cool item to have. It’s also a bit of a necessity at late night events – not that I’ve gone to any recently, but still. The windscreen is an off white, and this light color helps to actually reflect the light which helps make even a small candle produce a good amount of illumination. It’s not as bright as a single flame would be, but the reflection from the windscreen make it illuminate more, if that makes sense.
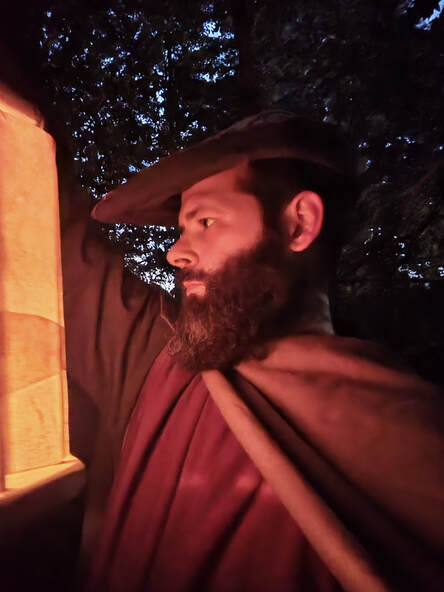
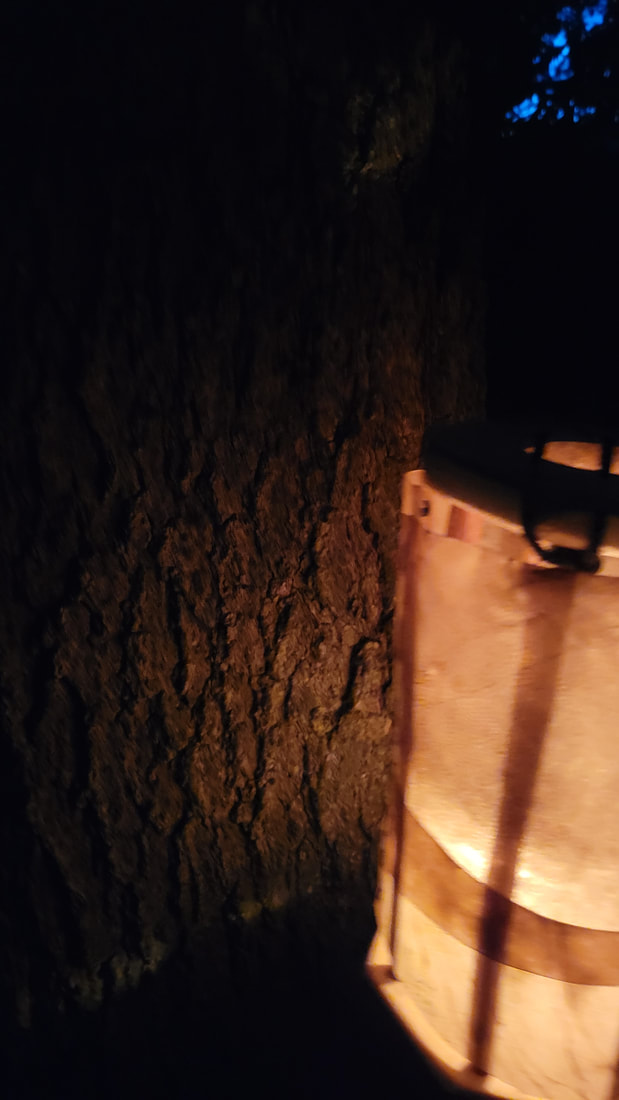
The way I have the leather straps configured, I can carry the lantern in hand, tie it to a rafter piece or hang it from a hook. I can also set it on a table or the ground because I added the feet.
Like I said, if you are carrying this around and don’t live in a dry, fire-prone area, it’s fine to use a candle on the base. If you want to hang it up in a tent or set it down in a camp site where it might be getting bumped, or are in a fire-prone area, I recommend using an artificial candle. You will get the same flickering aesthetic but not risk burning the campsite down.
I’m no woodworker by any means and my wood projects always end up having finish issues or being less than perfect. Nevertheless, this item is a nice addition to my collection and I’m happy I made it.
This is a fun project and a cool item to have. It’s also a bit of a necessity at late night events – not that I’ve gone to any recently, but still. The windscreen is an off white, and this light color helps to actually reflect the light which helps make even a small candle produce a good amount of illumination. It’s not as bright as a single flame would be, but the reflection from the windscreen make it illuminate more, if that makes sense.
The way I have the leather straps configured, I can carry the lantern in hand, tie it to a rafter piece or hang it from a hook. I can also set it on a table or the ground because I added the feet.
Like I said, if you are carrying this around and don’t live in a dry, fire-prone area, it’s fine to use a candle on the base. If you want to hang it up in a tent or set it down in a camp site where it might be getting bumped, or are in a fire-prone area, I recommend using an artificial candle. You will get the same flickering aesthetic but not risk burning the campsite down.
I’m no woodworker by any means and my wood projects always end up having finish issues or being less than perfect. Nevertheless, this item is a nice addition to my collection and I’m happy I made it.
|
|
