How to Make a Fourteenth Century Doublet
The Garment:
The doublet first gained popularity in the 1340s and continued to develop and change over the rest of the medieval period. The early fashionable doublet was likely inspired by the military garb of the day and is similar in shape and structure to gambesons and other quilted arming garments.
The early doublet had a low, or no collar. Over time, the collar became more ornate and had more structure. This tutorial is for an early doublet with no collar. The early doublet extended to the hips while later period doublets could be shorter, especially as joined hose come into fashion. However, the long doublet remained popular through the period.
The doublet had long, tight fitting sleeves with cloth buttons. The number of buttons is initially a clear sign of quality and social status, with 10-20 buttons spaced only 1-2 cm apart not uncommon. Later doublets in the late 14th and 15th century would have fewer buttons on the sleeves regardless of status. 15th century doublets could be sleeveless or have detachable sleeves. Because it was a foundation garment, if the cote or outer garment was long sleeved, this would make sense to prevent buttons on the sleeves from becoming cumbersome.
The doublet was laced up the front through eyelets. Again, the number of eyelets is an indicator of quality and status, but over time there seem to be fewer eyelets in general. These, too, are placed very close to each other early on when many eyelets are used.
Overall, the garment is meant to be a foundation garment and is close fitting. It is always lined – hence doublet, a double layer of fabric. Properly, it should be lined with white linen or possibly black linen. The garment itself is usually made from a lightweight but quality worsted wool or a suiting weight linen. Silk can be used for a fine doublet, especially if it is patterned or brocaded.
In the 1340s, the garment tends to be worn under a cotehardie or surcote with short sleeves. Thus, the sleeves of the doublet and the buttons are exposed while the lacing up the front is not. Later period doublets are more commonly seen without an outer cote, but are still often worn under a gown, surcote, or cotehardie.
Another development is the use of padding in the doublet to create a fashionable body line. In the 1340-50s, the fashion is to follow the natural contours of the body. In the 1360s, the doublet has padding added to the belly to give the effect of a large belly and an arched, curved back. In the 1370s-80s, the fashionable line was a large, padded chest with a narrow waist. The artwork is probably exaggerated in proportion to make these fashionable lines obvious, but there is a clear trend. Also take note that the placement of the belt changes through this period from being close to the waist or lowering to the hips.
Related to the issue of padding was that the doublet would later develop to have puffed sleeves around the shoulder. However, this tutorial is for an earlier doublet with straight sleeves.
Finally, the doublet was designed to point or tie to the hose. Instead of tying the hose to the girdle on the braies, men began to tie the hose to the doublet. This means that hose need to be fitted to work with the doublet.
The 14th century style split hose often had eyelets while the doublet would have hanging ties. Expect to have 8-10 pairs of eyelets on the hose and to stitch the points into the doublet. Another common feature of doublets and hose was that the back most point would join in the middle – making it 9 points on the doublet. Also, discussed more on the advanced hose page, the back most point was not an eyelet, it could be a button or ring which would tie higher up on the back of the doublet. This allows for some extra range of movement and worked perfectly for my doublet and hose. You also often see men undo the back most point during strenuous activity because this spot will pull the most.
Pourpoints and paltoks are a version of the doublet that is quilted and padded similar to a gambeson. These became popular in the late 1360s and through the rest of the 14th century. The pourpoint or paltok would not be worn under any other garment and should therefore be made of fine material. The pourpoint of Charles de Blois is perhaps the finest example of such a richly ornamented garment.
|
|
|
First Thing:
Before making this garment, make sure that you have made an under linen shirt. If you have a very baggy under linen shirt, consider making a tighter fitting shirt to keep it from bunching up under the doublet. I made a new linen shirt specifically for the doublet.
You will also need to make a pair of hose in conjunction with the doublet.
Because the hose point to the doublet, you will need both garments to be nearly completed to fit them to each other to make sure that both fit well together.
The Pattern:
The good news is that if you have made a personal block based on the Making a Medieval Garment Pattern page, then you essentially have your pattern for the doublet with little or no alteration.
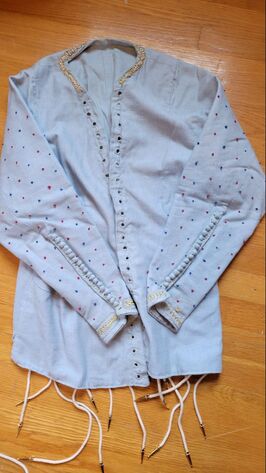
My doublet was a plain collar and has back and side vents along the buttock and hips. The sleeves are narrow and button up to the elbow, so I made sure that my toile was well fitted in the arms and narrowed below the elbow.
Make the adjustments to your personal block as needed, but it will essentially follow the same measurements. You can add a small collar band if you wish.
Before making this garment, make sure that you have made an under linen shirt. If you have a very baggy under linen shirt, consider making a tighter fitting shirt to keep it from bunching up under the doublet. I made a new linen shirt specifically for the doublet.
You will also need to make a pair of hose in conjunction with the doublet.
Because the hose point to the doublet, you will need both garments to be nearly completed to fit them to each other to make sure that both fit well together.
The Pattern:
The good news is that if you have made a personal block based on the Making a Medieval Garment Pattern page, then you essentially have your pattern for the doublet with little or no alteration.
My doublet was a plain collar and has back and side vents along the buttock and hips. The sleeves are narrow and button up to the elbow, so I made sure that my toile was well fitted in the arms and narrowed below the elbow.
Make the adjustments to your personal block as needed, but it will essentially follow the same measurements. You can add a small collar band if you wish.
Making up:
I used two layers of high weight suiting linen and my doublet has a good structure as a result. If I had used a lighter linen or gabardine wool, I would have interlined the doublet to add a third layer. You can interline by sewing linen or canvas depending on how stiff and sturdy you want the doublet to be. Remember to consider your outer and lining fabric when making that decision. To interline, sew the interlining to the wrong side of the outer material.
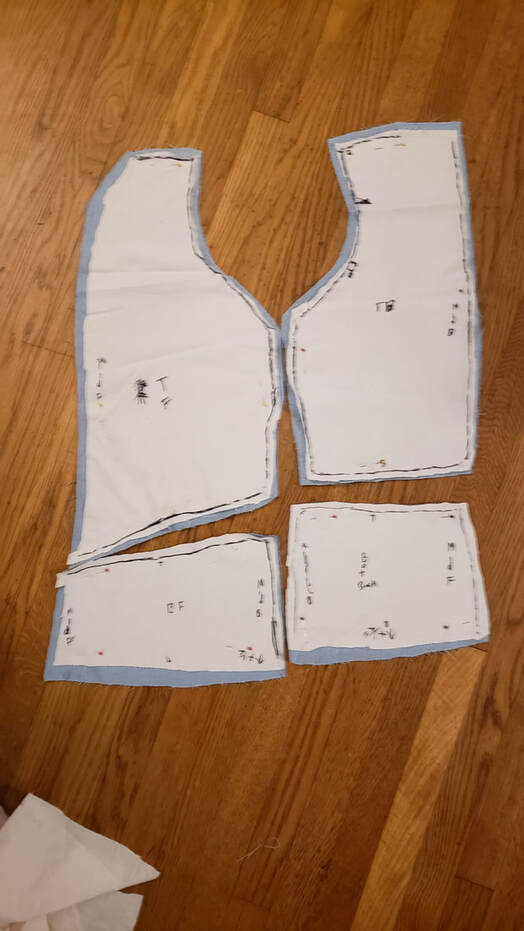
Bodice:
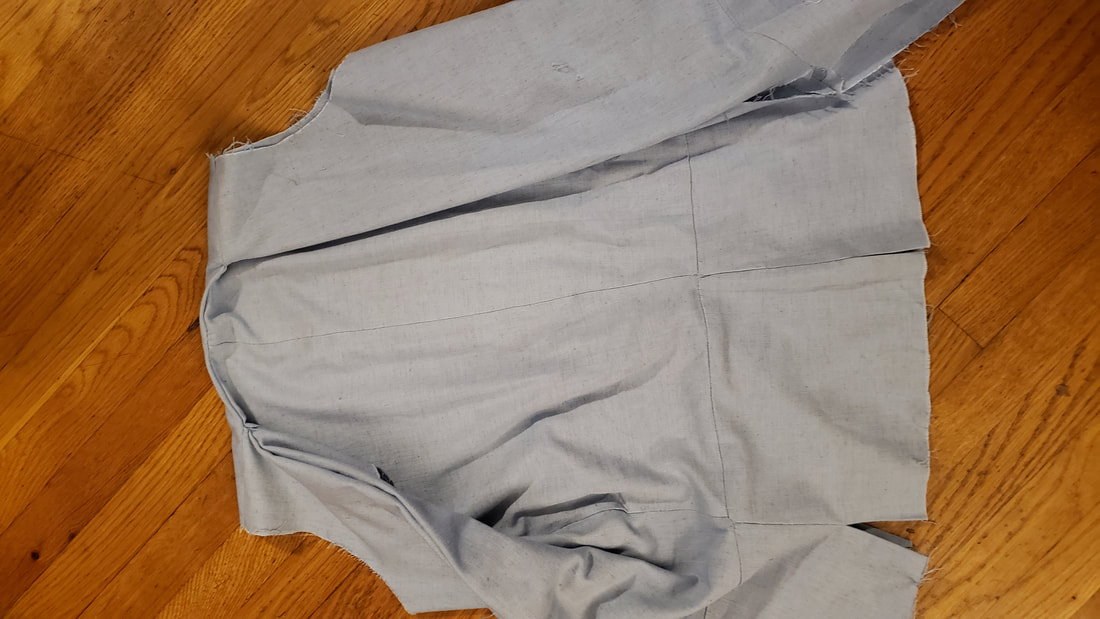
To make up, start by sewing the bodice pieces together, back to back, side to side, and then add the bottom panels. Like I said, I had vents on my doublet on the sides and back, and therefore did not sew the bottom panels all the way to the end of the seam. This gives some extra freedom of movement which is helpful on a long doublet.
Similarly, make the bodice lining and make sure the two pieces will work well together.
I used two layers of high weight suiting linen and my doublet has a good structure as a result. If I had used a lighter linen or gabardine wool, I would have interlined the doublet to add a third layer. You can interline by sewing linen or canvas depending on how stiff and sturdy you want the doublet to be. Remember to consider your outer and lining fabric when making that decision. To interline, sew the interlining to the wrong side of the outer material.
Bodice:
To make up, start by sewing the bodice pieces together, back to back, side to side, and then add the bottom panels. Like I said, I had vents on my doublet on the sides and back, and therefore did not sew the bottom panels all the way to the end of the seam. This gives some extra freedom of movement which is helpful on a long doublet.
Similarly, make the bodice lining and make sure the two pieces will work well together.
|
|
|
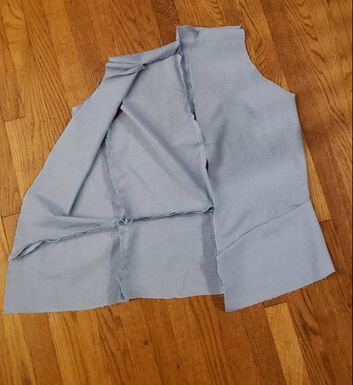
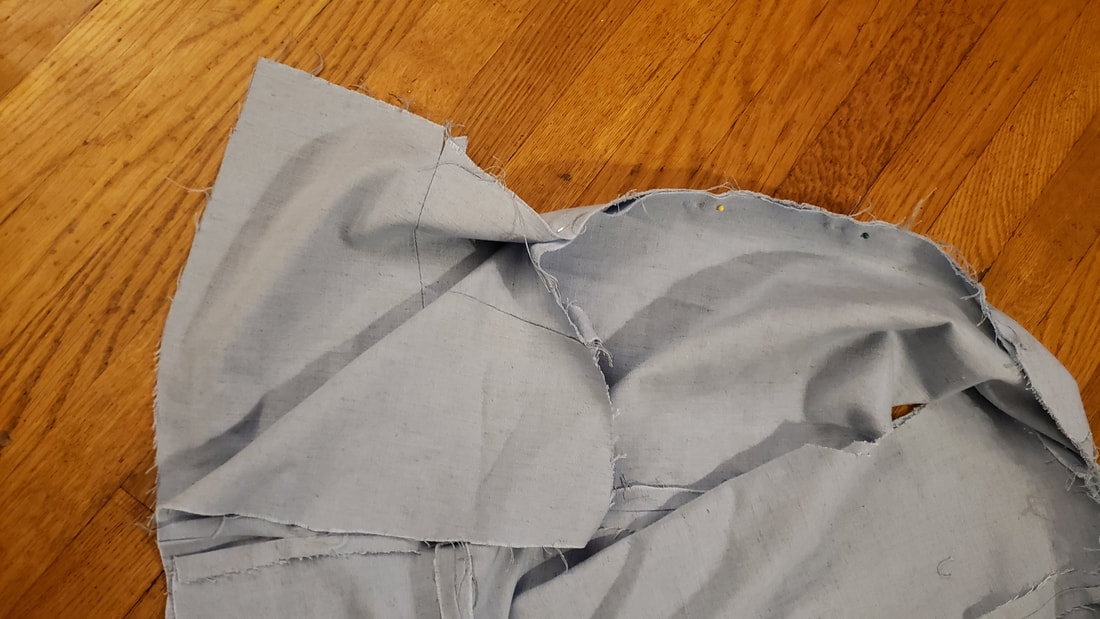
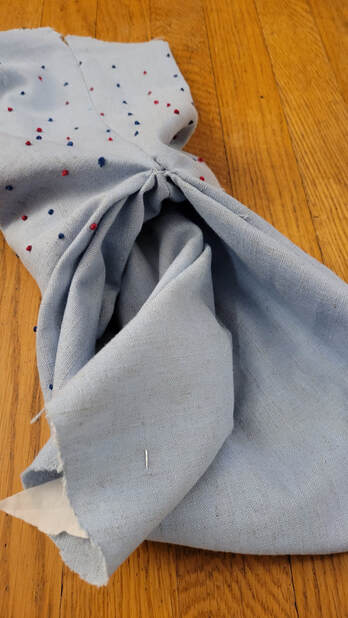
 The bodice with lining tacked on and ready to sew in place. Right sides together for flipping later.
Lining the bodice:
At this point, you have a few options for lining. I put the bodice lining in at this time before setting in the sleeves at all. Whether this is a historically attested method for lining or not, I don’t know. However, I felt that it made lining easier to do in stages like this.
To accomplish this well, I put my wrong sides together and joined the neck first and then the sides. I did nothing to the sleeves at this step. After this, I turned it right side out and had a decently lined doublet.
As a note, I do slightly regret lining the doublet with the same blue fabric as the outerfabric because I do not think this is historically attested anywhere. I only ever see white or black doublet linings in artwork. That said, once the doublet is on, you can’t see the lining anyway and the extra weight of the suiting linen gave a good structure to the piece without having to interline it.
As an alternative lining method, you can set in the sleeves to the outer fabric, make up the lining with sleeves attached, and tack the whole piece together in that way.

Eyelets:
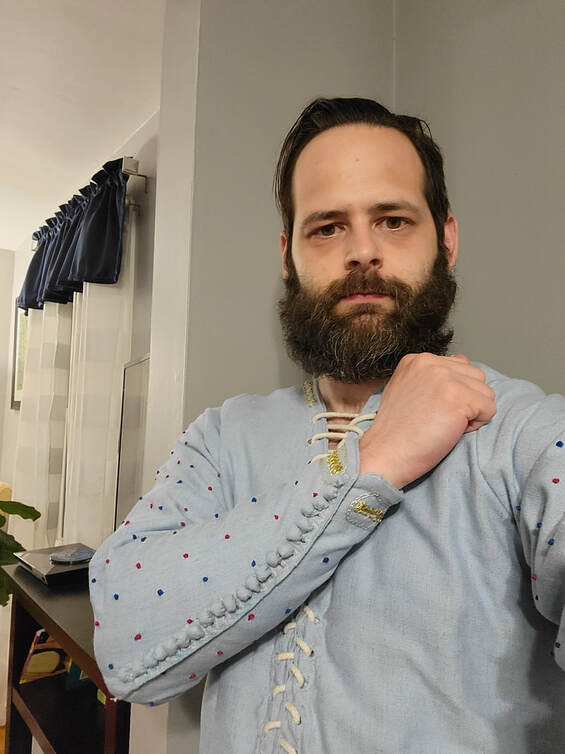
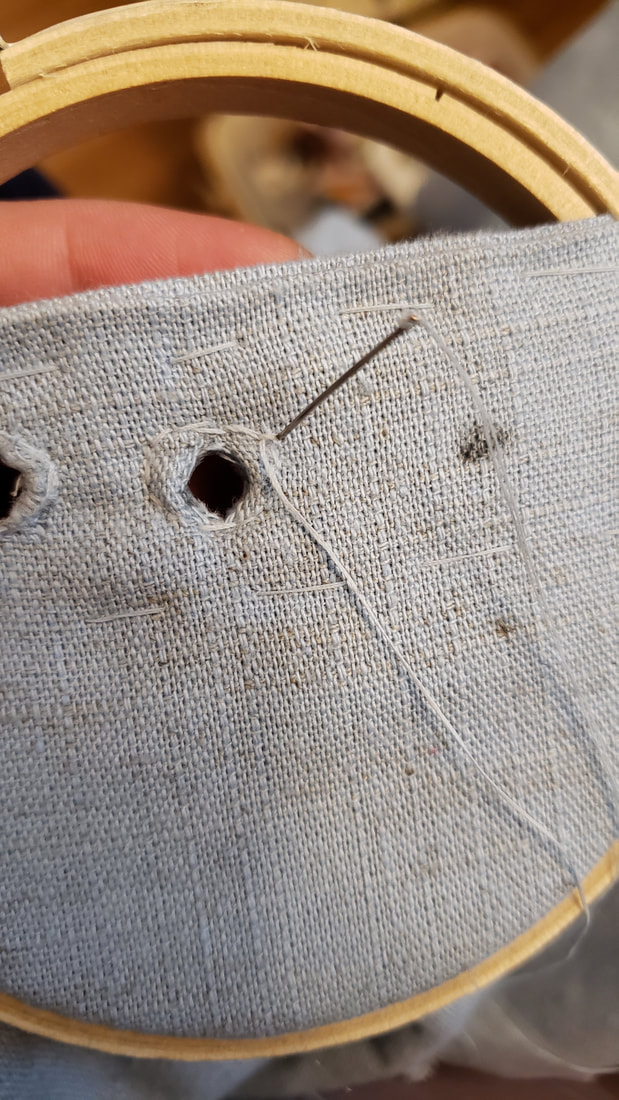
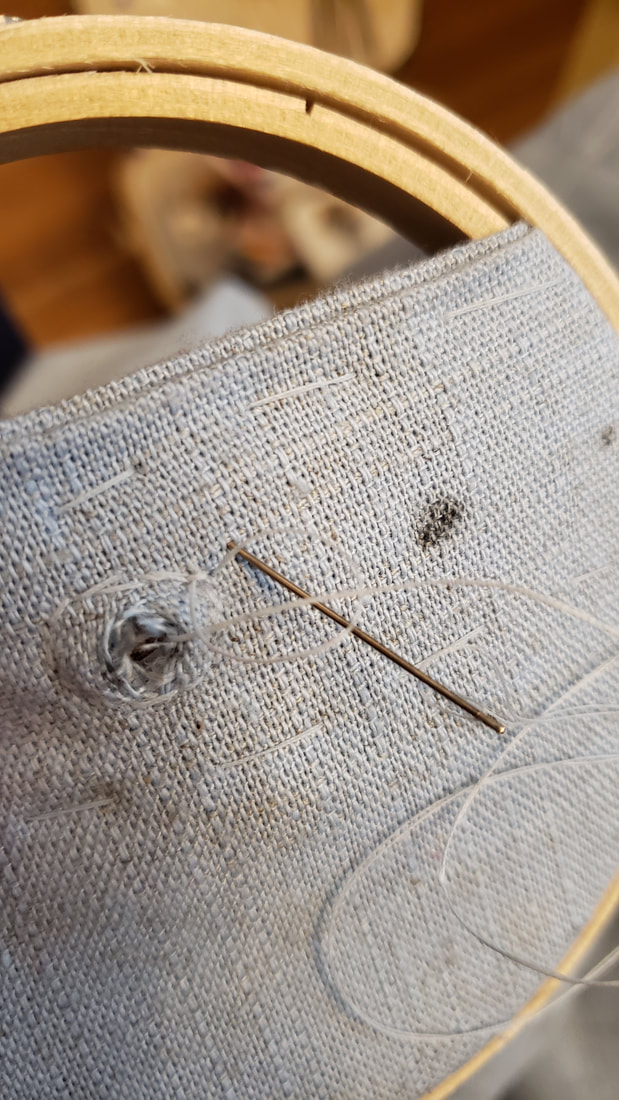
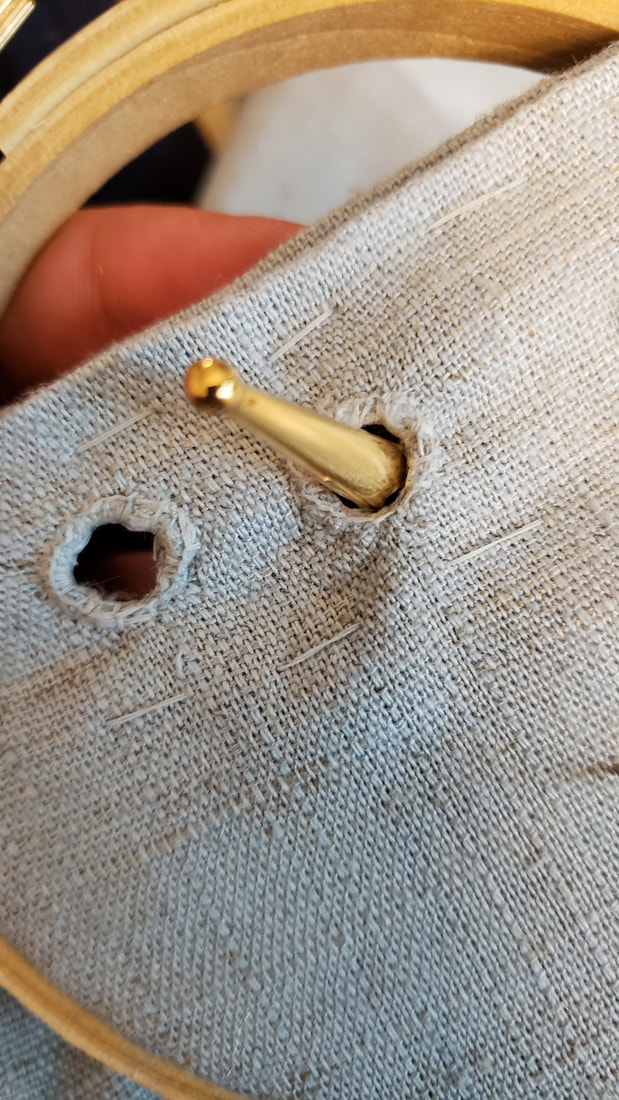
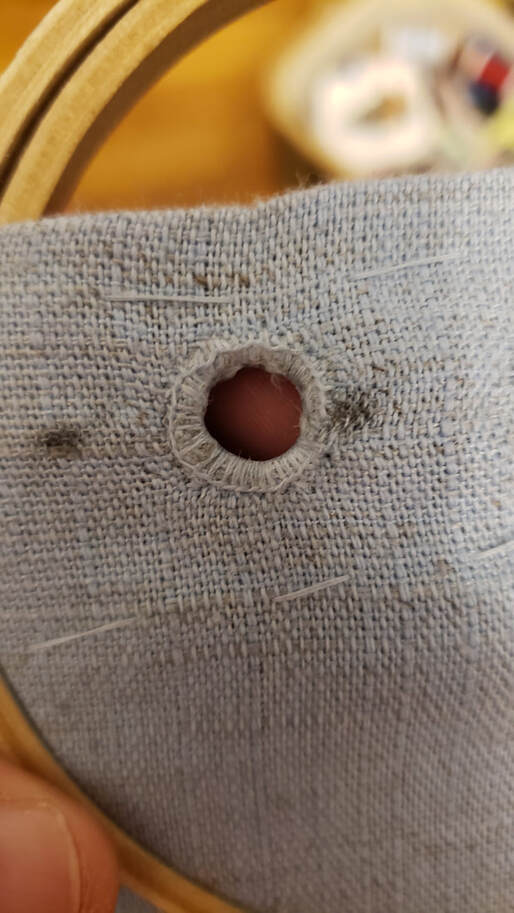
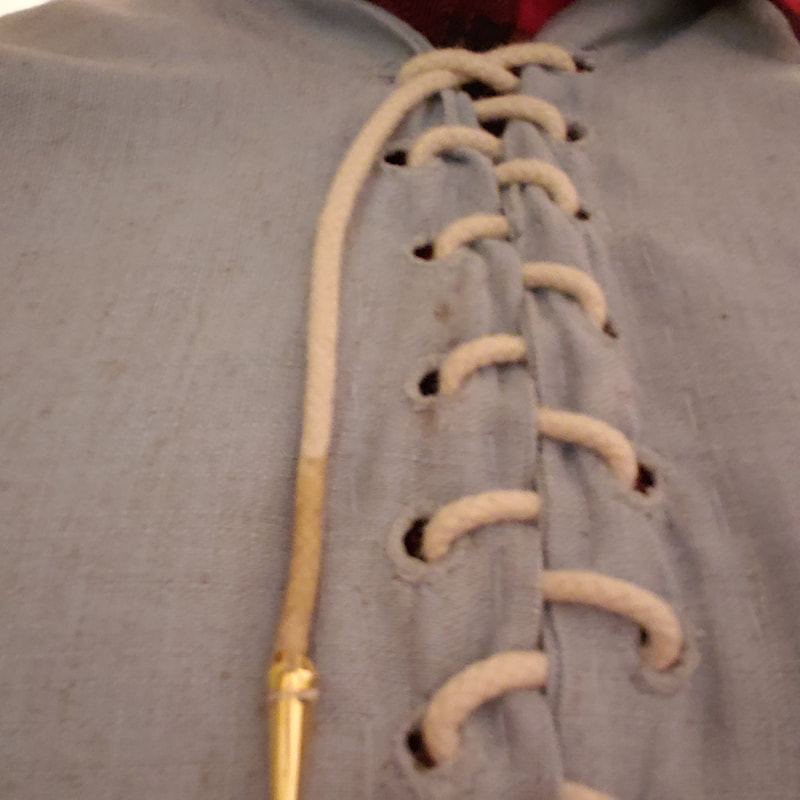
With the lining in place, the next step is to make the eyelets for the front lacing. Try to have the eyelets slightly staggered on each side so the fabric doesn’t bunch as much as the lacing ladders up the bodice. My eyelets are about 2 cm apart and 2-3 cm from the edge of the body. I have 48 eyelets total, 24 on each side of the body.
To make the eyelets, I measured the location of all the eyelets and then marked where they would be located to make sure everything was even and placed appropriately. I then used a small embroidery hoop on the edge of the doublet to stretch the fabric taut. I outlined the circumference of the eyelet with row of thread and then used an awl to punch a hole. I then used a blanket stitch around the edge of the eyelet until it was secure. Use a good quality buttonhole thread or upholstery thread. Finally, I made sure the hole was the right size by putting the aglet I was using for the lacing through the hole. I did this 47 more times.
I bought a white cotton rope from Joann’s for the lacing and bought bolo ties to use as aglets. I used the same cording for pointing the hose at the bottom. The bolo ties actually worked great, and I would recommend using them. Before attaching the aglets, I dipped the lacing into melted beeswax to keep the ends from fraying and to improve their longevity.
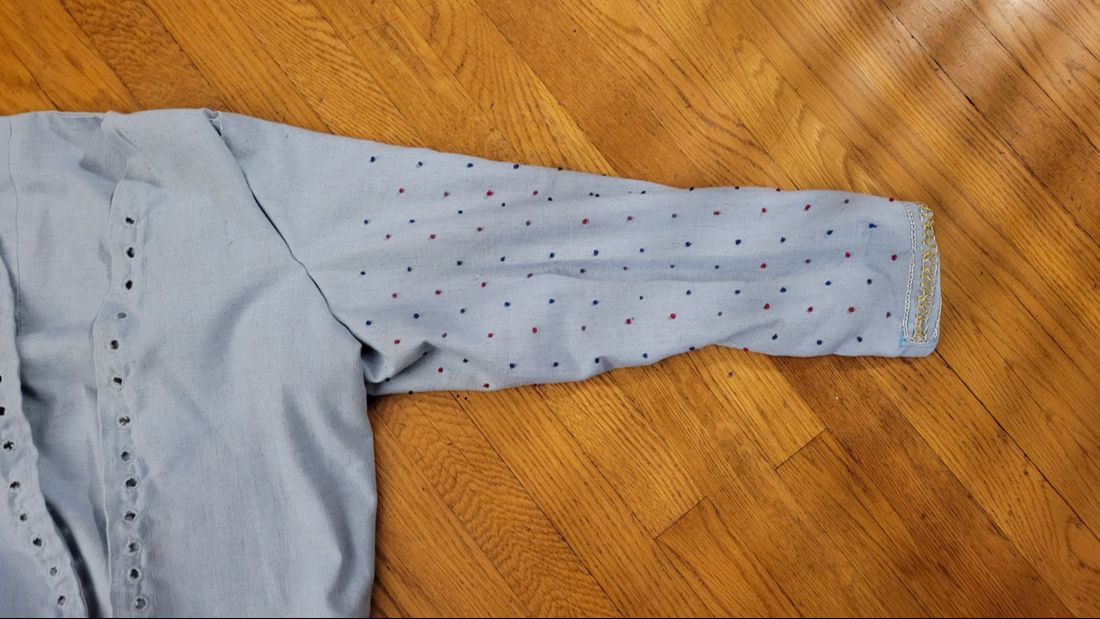
 The embroidered sleeves with lining attached at the elbow and in the process of turning.
Sleeves:
Before setting my sleeves in, I decided to decorate them. I determined where I would place the buttons and buttonholes and how the wrist would lay once lined. Making these determinations was important so I could plan the embroidery.
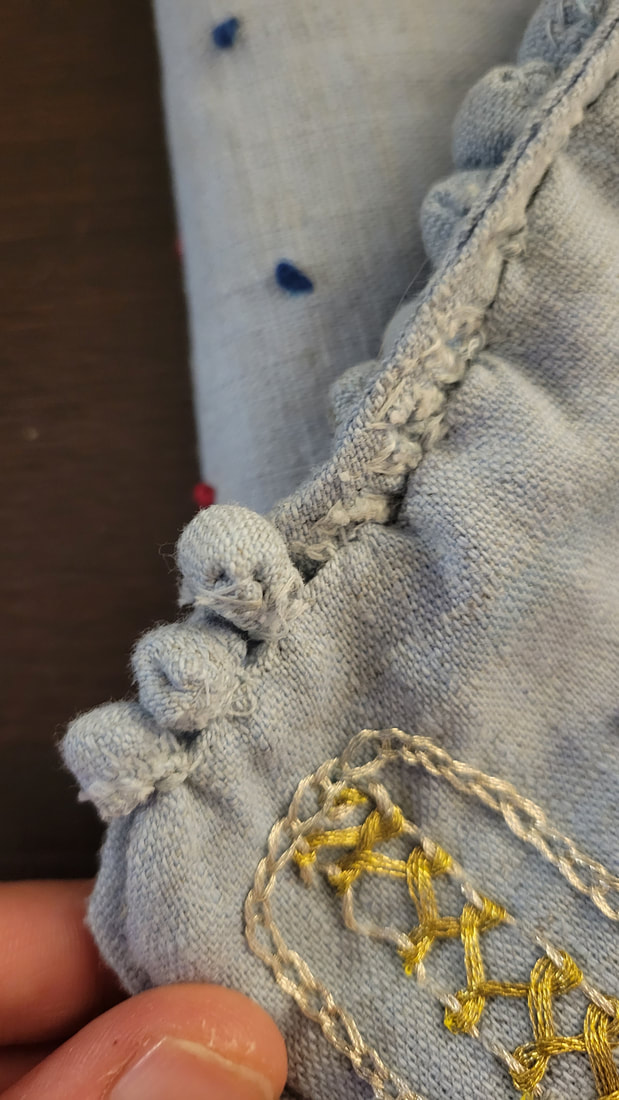
The doublet sleeve is the most visible part of the doublet, so I wanted to make sure it looked good. I did red and blue French knots that matched the red and blue of my cotehardie fabric. I planned and measured out where to put the knots and tried to keep the pattern as consistent as possible. Frankly, this was extremely time consuming as I had over 100 French knots per sleeve, but totally worth it. I also did a small, embroidered border and internal design on the wrists. A few of my French knots ended up being removed for the buttonholes, but this wasn’t a big deal to do.
Be careful with how you line your sleeves, as you will have a right sleeve and a left sleeve if you do what I did and decorated or embroidered the sleeves. Make sure you don’t treat them as interchangeable and reversible, because they won’t be.
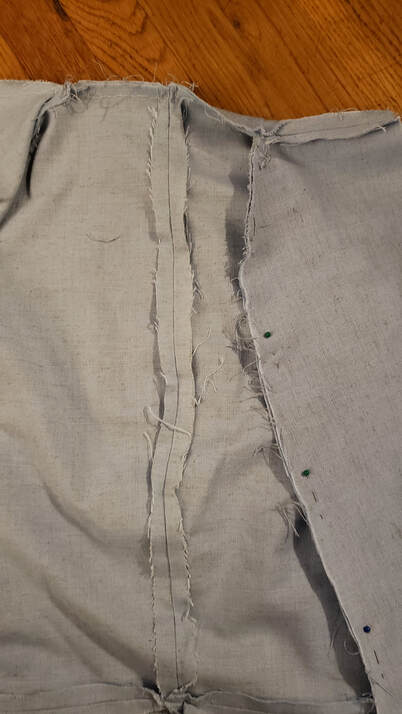
After the time-consuming task of embroidery, I then set in the sleeves. To finish the lining of the sleeves, I used a hem and fell stitch on the exposed fabric of the sleeves. With two layers of sleeves and two layers of the bodice all meeting together, I trimmed back the seam allowance on three of them and then hemmed over the long remaining seam allowance to give a clean and finished look on the lining.
Before setting my sleeves in, I decided to decorate them. I determined where I would place the buttons and buttonholes and how the wrist would lay once lined. Making these determinations was important so I could plan the embroidery.
The doublet sleeve is the most visible part of the doublet, so I wanted to make sure it looked good. I did red and blue French knots that matched the red and blue of my cotehardie fabric. I planned and measured out where to put the knots and tried to keep the pattern as consistent as possible. Frankly, this was extremely time consuming as I had over 100 French knots per sleeve, but totally worth it. I also did a small, embroidered border and internal design on the wrists. A few of my French knots ended up being removed for the buttonholes, but this wasn’t a big deal to do.
Be careful with how you line your sleeves, as you will have a right sleeve and a left sleeve if you do what I did and decorated or embroidered the sleeves. Make sure you don’t treat them as interchangeable and reversible, because they won’t be.
After the time-consuming task of embroidery, I then set in the sleeves. To finish the lining of the sleeves, I used a hem and fell stitch on the exposed fabric of the sleeves. With two layers of sleeves and two layers of the bodice all meeting together, I trimmed back the seam allowance on three of them and then hemmed over the long remaining seam allowance to give a clean and finished look on the lining.
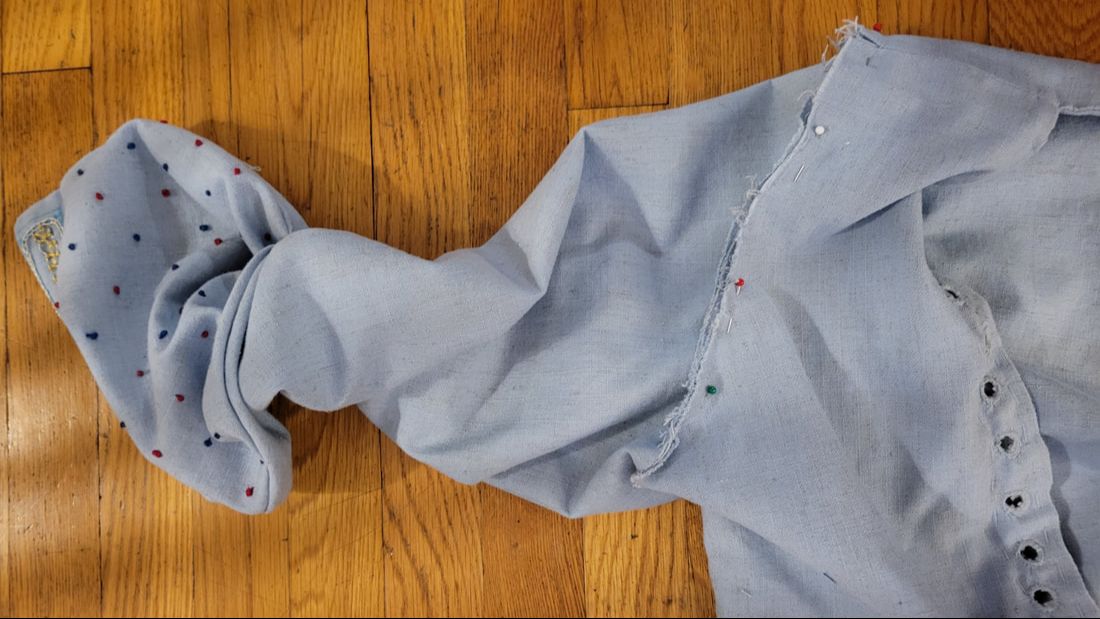
This photo shows the inside out sleeve pinned to the inside of the bodice and ready to set in.
Still with the pins, but showing how the sleeve will turn once set in.
Buttons:
For the buttons and buttonholes, I left the sleeve open from the elbow to the wrist. The buttons are only 1-2 cm apart and I ended up with 21 buttons per sleeve for 42 total buttons. Try to make some mockups with test buttons and button holes of different sizes and different intervals. Decide what looks good and is doable before cutting into your garment.
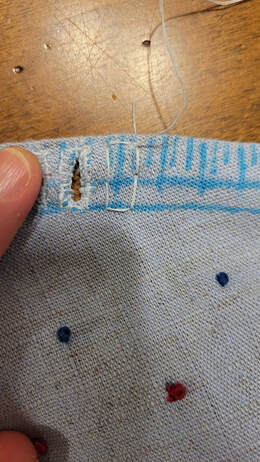
After you’ve determined your size and spacing, mark the buttonholes on the fabric. I used a washable fabric marker that comes off when it gets wet. This was better than chalk for this step because I needed the lines to stay in place for a long time and while rubbing and moving the fabric as I worked.
For the buttons and buttonholes, I left the sleeve open from the elbow to the wrist. The buttons are only 1-2 cm apart and I ended up with 21 buttons per sleeve for 42 total buttons. Try to make some mockups with test buttons and button holes of different sizes and different intervals. Decide what looks good and is doable before cutting into your garment.
After you’ve determined your size and spacing, mark the buttonholes on the fabric. I used a washable fabric marker that comes off when it gets wet. This was better than chalk for this step because I needed the lines to stay in place for a long time and while rubbing and moving the fabric as I worked.
To make the buttonholes, you have a few options. The most historically attested way to do this would be to use a chisel to cut the buttonhole and then oversew the edges to prevent fraying or tearing. You can buy such chisels and supposedly you will get a better-looking buttonhole. Also, apparently medieval buttonholes were not terribly well oversewn on the edges and were not as sturdily made as the buttonholes we expect to see.
I did not have a chisel and I wanted a well secured buttonhole that would never give out, so…
I did not have a chisel and I wanted a well secured buttonhole that would never give out, so…
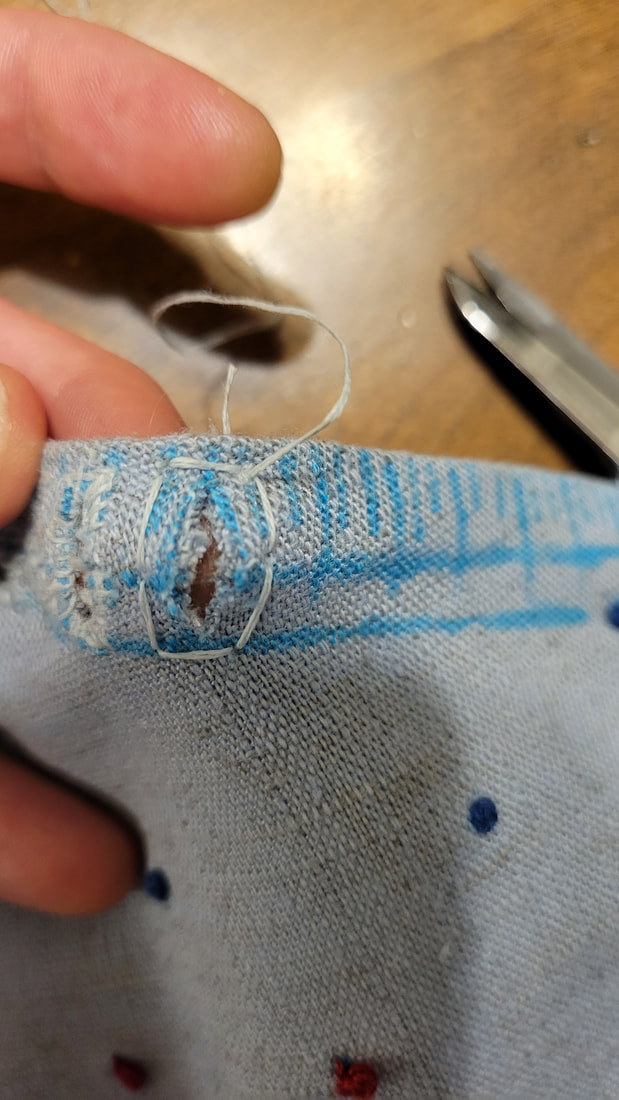
Anyway, I outlined my buttonhole, used an x-acto knife to cut the hole and then used a blanket stitch to oversew the edges.
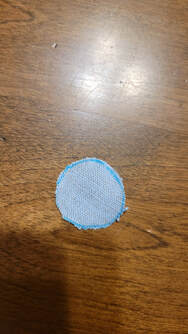
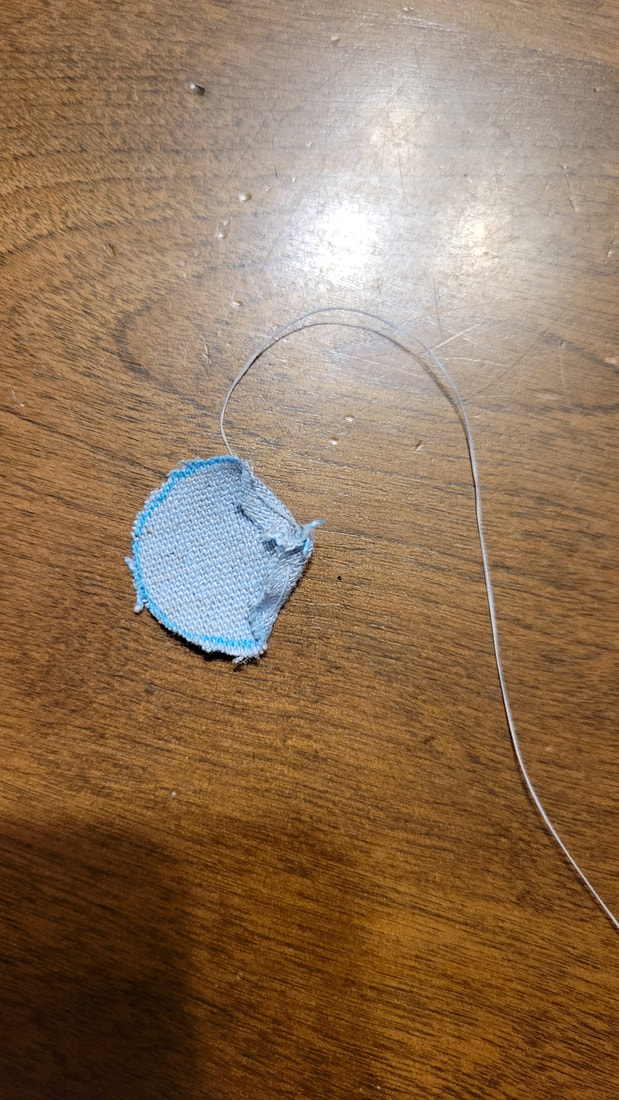
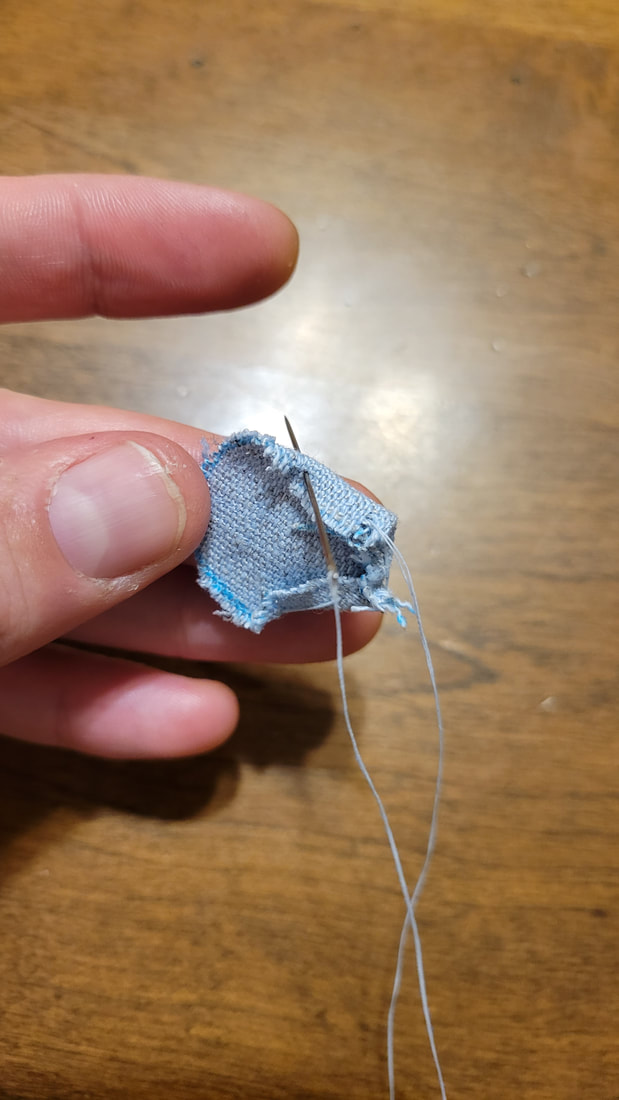
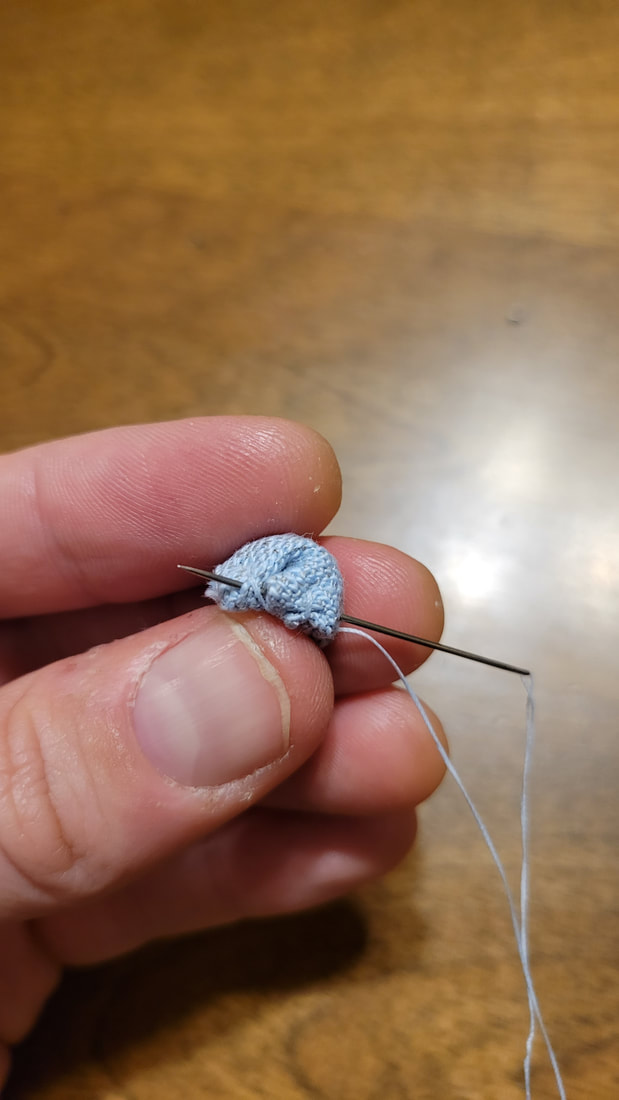
To make the buttons I cut out circles of the doublet fabric and then stuffed them with extra bits of fabric. This method is good for making self-fabric ball buttons which were popular in the 14th century. I started with the circle, started stitching a running stitching through a stitch at a time. As I did that, I turned the edge of the button in and pulled the thread so the button would start to “collapse” in on itself. I filled it with scrap fabric and then puled the thread tight so the button enclosed the scrap.
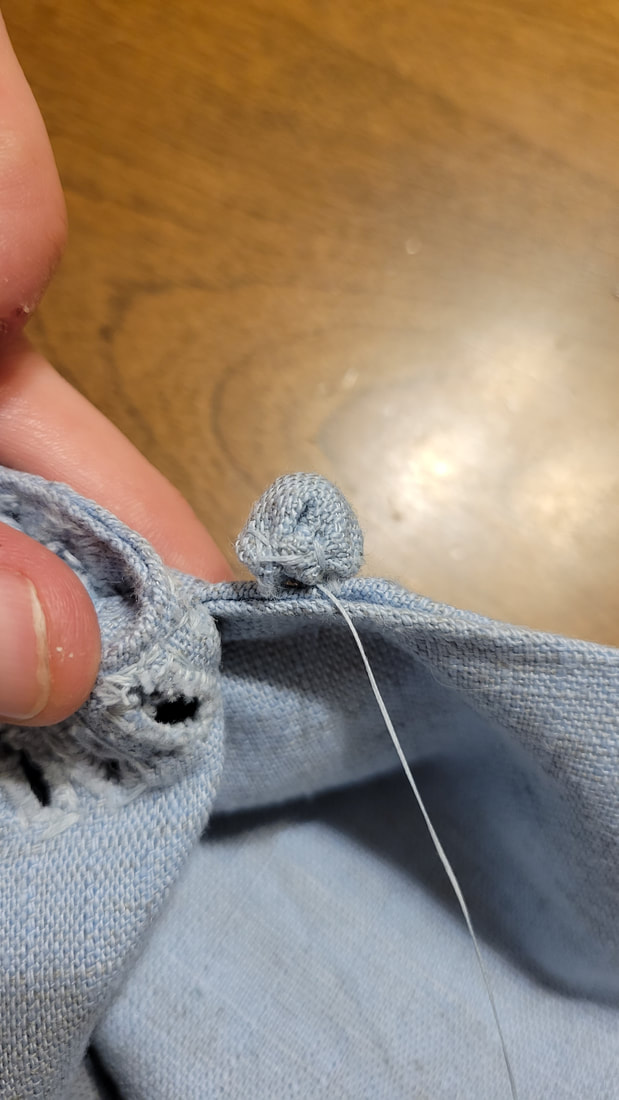
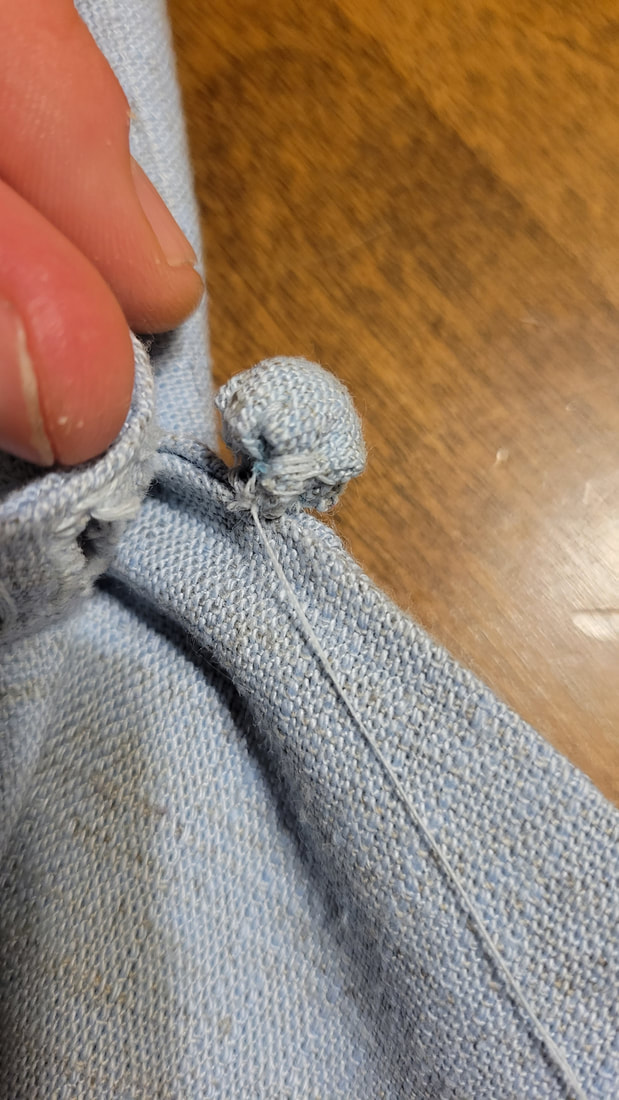
From here, I had a ball button on a piece of thread. So, I immediately put the button in place on the sleeve. To attach the button put it directly in line with a buttonhole. The button itself actually goes on the edge of the fabric, not offset onto the sleeve at all. Use a few stitches to tack the button down I tried to do a stitch straight down, then one or two to each side to get the button secure. Make sure you create a shank of thread as you go. To do this whip the thread around the anchor points and then stitch back through the button. Repeat this process a few times until the button is secure.
To make the buttons I cut out circles of the doublet fabric and then stuffed them with extra bits of fabric. This method is good for making self-fabric ball buttons which were popular in the 14th century. I started with the circle, started stitching a running stitching through a stitch at a time. As I did that, I turned the edge of the button in and pulled the thread so the button would start to “collapse” in on itself. I filled it with scrap fabric and then puled the thread tight so the button enclosed the scrap.
From here, I had a ball button on a piece of thread. So, I immediately put the button in place on the sleeve. To attach the button put it directly in line with a buttonhole. The button itself actually goes on the edge of the fabric, not offset onto the sleeve at all. Use a few stitches to tack the button down I tried to do a stitch straight down, then one or two to each side to get the button secure. Make sure you create a shank of thread as you go. To do this whip the thread around the anchor points and then stitch back through the button. Repeat this process a few times until the button is secure.

Hose Points:
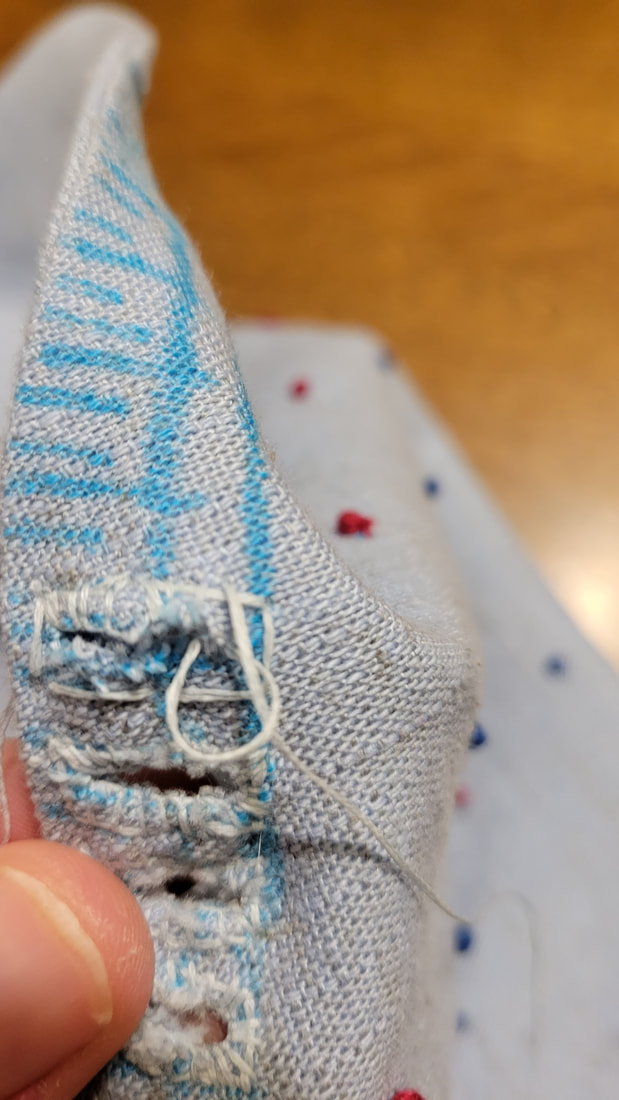
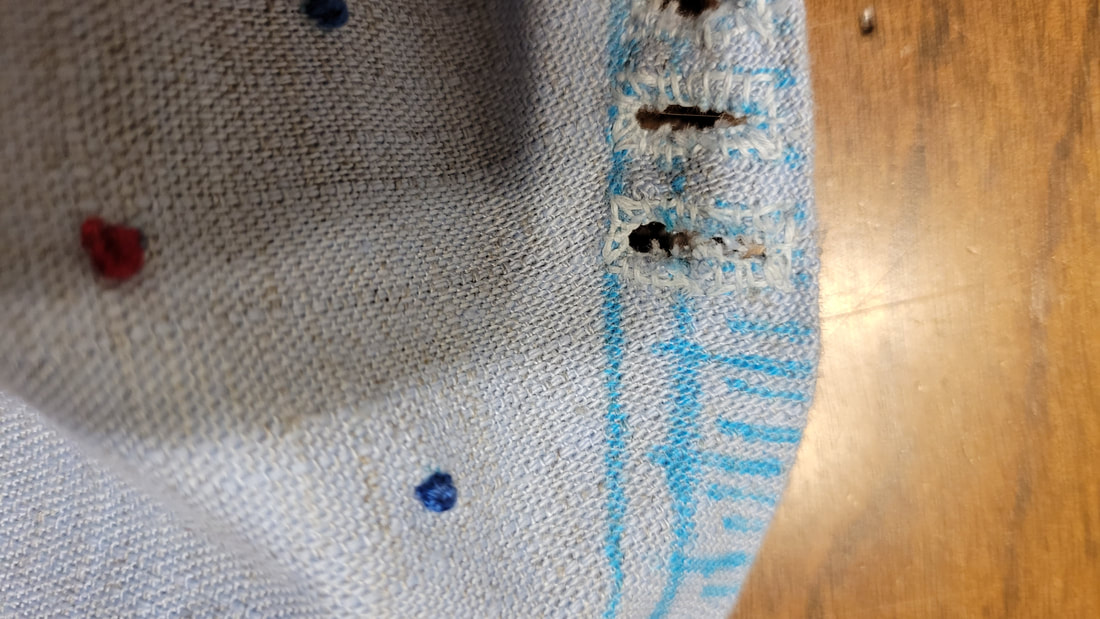
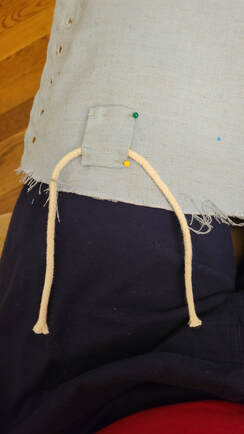
After the buttons and buttonholes are finished, you still have one more step. To point the hose to the doublet, you can stitch the lacing directly into the doublet. I chose to make little square panels. The panels hold the lacing in place but also allow for easy removal or replacement. For this step, you should have a set of split hose already made up and then you need to determine where the two garments will meet.
There should be a slight amount of overlap between the doublet and the hose, but not much. I positioned the lacing anchor points around the doublet. I ended up making 10 points with the back most two raised up a little higher and almost directly in the middle of the doublet. This gave me five points for each leg to point the hose to.
I attached the anchor points, put the lacing in, put the aglets on and the fit was good. The hose and the doublet work perfectly together and are very comfortable.
Concluding Impressions:
I have no idea how many hours I put into the doublet. I know that I cut the fabric in December and didn’t finish until April. There were a lot of moving parts in making this piece. You need to have a personal block, then you need to line the doublet, make the eyelets, do the embroidery, attach the sleeves, make the buttons, make hose tha fit to the doublet, and arrange for the points to line up well.
Of all the garments I have made, this was the most difficult, but also the one I am most pleased with. There are a few issues with some of the buttons not being as perfect as I wish the would be, and like I said I wish I would have done a white linen lining. But other than that, this turned out great.
