Making an Advanced Costrel
The Item:
If you are comfortable with simple leatherwork and stitching, it might be worth the effort to make a more advanced piece. You can do this by making a more complicated bottle design and also by embellishing your piece with decoration and designs.
When I bought the leather for the costrel, I had enough to make a second piece and decided to do something more interesting. I modeled mine after one piece from the 16th century. There are few leather vessels that survive, but that does not suggest they were not widely used. In fact, many ceramic vessels that do survive from the medieval period imitate leather forms including stitched seams. This would suggest that leather vessels were quite common. (The Medieval Household, 238-239).
Material: I used 3mm veg tanned leather. If I were to do this project again, I would buy a 5mm leather to make it a little studier. However, the 3mm worked fine.
|
|
|
 The Medieval Household at 239. Egan, Geoff
The Pattern:
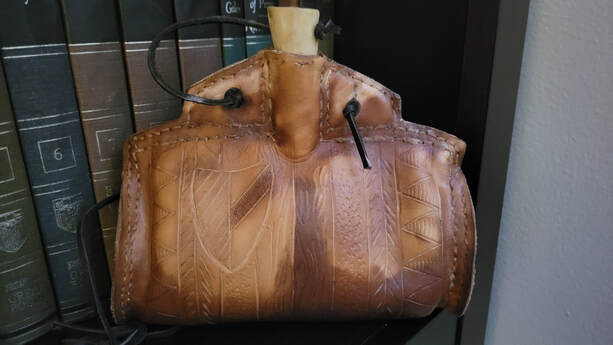
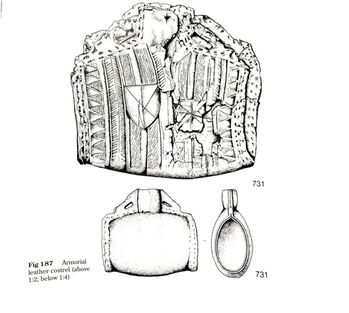
The piece I modeled mine after is in the general design of a barrel with a spout on the top and two oval shaped inserts on the sides. This gives a barrel shape and increase the volume of the vessel. It has a capacity of about 500 ml or 16 oz. I have seen people selling similar items which actually look more barrel shaped than the original, so if you are going for that specific look, it can be done.
I followed the original dimensions of the costrel which were 200mm long, 195mm tall, and an estimated diameter at the ends of 90mm. The original leather is believed to be approximately 7mm thick. The costrel has double lines of stitching and protruding pieces of leather next to the spout with holes punched into them for a place to attach a strap.
The piece has a series of designs carved into it which are done in strips. The outer strips match the opposite end of the vessel and meet in the middle. It also contains a shield with generic coat of arms as a decoration on the front of the piece.
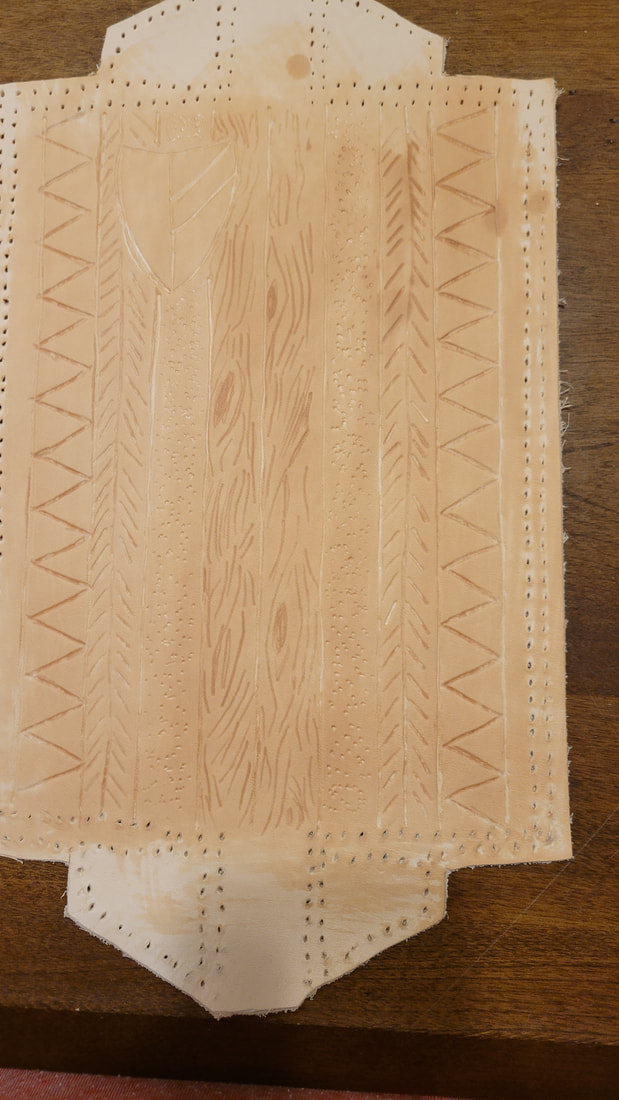
Although I modified my designs slightly, it is essentially modelled after that piece. Mine has the zig zag pattern with alternating plain and etched triangles, hatched sections, mottled sections, and woodgrain sections. I made a simple shield design that I decorated.
Making up:
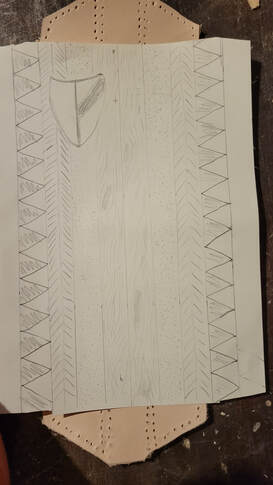
I started by making a pattern following the above dimensions. I used a big 9x12” manilla envelope to cut out the pattern. The material is thick enough to use and even to shape to dry run the sizing of the costrel. However, I did not finalize the size of the end pieces until later when I could dry fit a few test pieces of the pattern paper on the partially assembled leather costrel. I was glad I did this because it gave me a better feel for the exact size I needed to cut out.
I also wanted to add a bit of thickness to the top of the costrel to make it a little heftier and to expand the barrel shape out. To do this I cut out two additional pieces of leather to attach to the top of the bottle. These pieces only connect around the spout and the top of the barrel shape, not the entire perimeter of the costrel.
Making up:
I started by making a pattern following the above dimensions. I used a big 9x12” manilla envelope to cut out the pattern. The material is thick enough to use and even to shape to dry run the sizing of the costrel. However, I did not finalize the size of the end pieces until later when I could dry fit a few test pieces of the pattern paper on the partially assembled leather costrel. I was glad I did this because it gave me a better feel for the exact size I needed to cut out.
I also wanted to add a bit of thickness to the top of the costrel to make it a little heftier and to expand the barrel shape out. To do this I cut out two additional pieces of leather to attach to the top of the bottle. These pieces only connect around the spout and the top of the barrel shape, not the entire perimeter of the costrel.
|
|
|
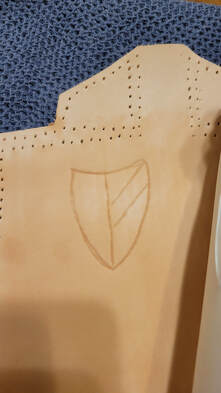
With the pattern cut out, I used the janky leather tools I had lying around – a salad fork and an awl – and I punched two lines of holes around the perimeter.
Before stitching, I made the designs and carving. First, I used a piece of construction paper and cut it to fit the pattern of the costrel. I then drew the designs as I envisioned it onto the paper. Next, I wet the leather slightly with a damp cloth. The leather was only wet enough to be moldable but not wet enough to dampen the paper. I then laid the paper pattern over the damp leather and used a non-sharp tool (in my case a blunt knitting needle) to trace over the paper pattern and etch into the leather. When the leather dries, it leaves the impression you etched into it. After this I went through and used a knife to score into the fleshy part of the leather and then used an awl to open the cuts up into the grain but not all the way through the leather.
I also used several other tools to get desired patterns or effects. In the textured portion of the triangles, I used a rotary sewing wheel to gently score the leather and make a pattern. For the textured portion on the shield, I used the knurled grip of a punch I had laying around. Obviously if you have leather working tools and dies, this would be easier, but it can be done without them.
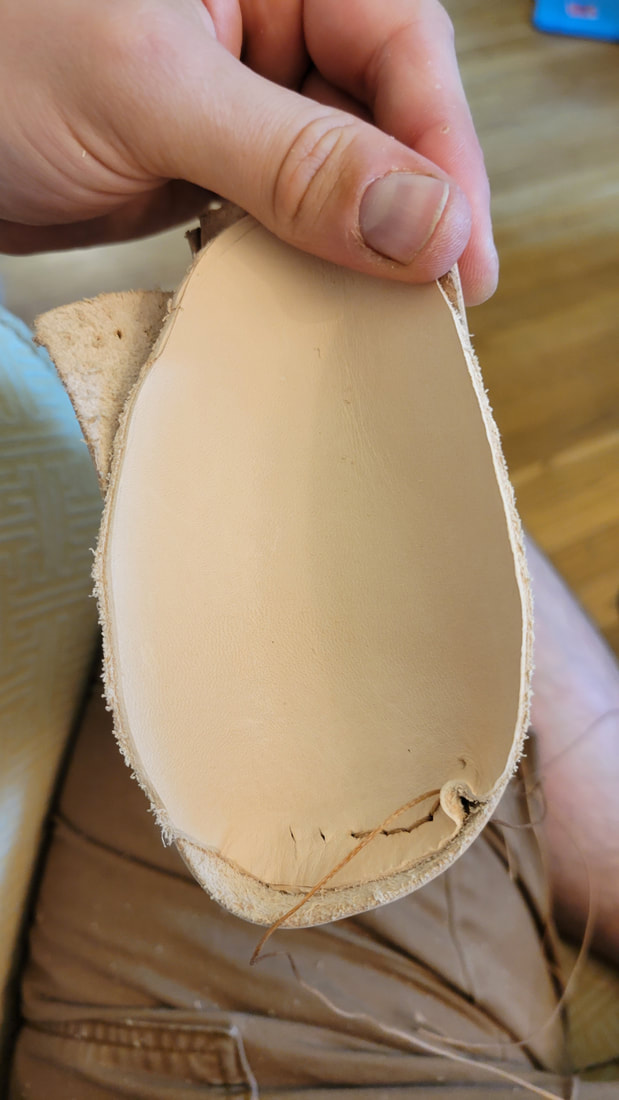
After this, I began on the stitching. I used a saddle stitch throughout and started with the inner set of stitches first. I did not punch holes into the extra insert pieces before starting to stich. I instead waited to punch those holes until I began to stitch them in. This helped make it easier to line up the holes because otherwise I would have needed to make sure four holes lines up perfectly. This way I just manually punched as I needed, and the holes lined up well.
After stitching the top portion of the costrel and forming the basic shape of the costrel, I modified the side pieces to make sure they fit well, cut those out, and stitched them in.
I then completed the outer set of stitches. After that, I trimmed the piece to give nice clean lines and to make sure the pieces lined up evenly.


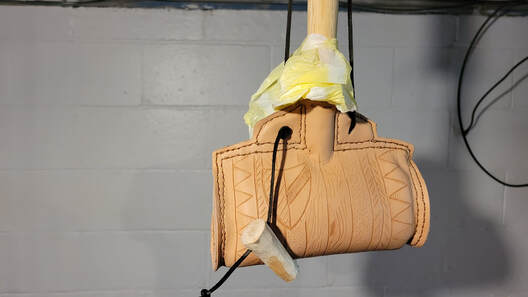
I then used a branch from a tree I cut down and shaped it to appropriately fit in the mouth of the costrel. I also drilled a small hole in the plug so I can tie it to the costrel. This will prevent it from falling off and getting lost. Next, I punched the holes in for the straps.
I then then soaked the piece. With it wet, veg tanned leather is moldable and will retain the shape you gave it when it dries. I used a thin, long tool to shape the piece and then I filled it with water to balloon it to size. However, I had some trouble forming the shape of the costrel with a tool because it is wider than it is tall. What I did was stuff a small plastic bag into the costrel and then filled it with water while the costrel dried. This formed it into the shape I wanted, and it stayed ballooned while it dried. I suppose you could also do this with beads or marbles or something of that sort.
After it dried, I emptied the bag, and the piece retained the shape I wanted. However, it will still be soft and liable to crushing or smushing out of shape, so be careful with it.
Next, I put my oven on the warm setting. Beeswax melts at about 165F; by warming the costrel before applying the wax, it soaks in easier and does not harden before it has a chance to soak in.
After warming the costrel in the oven for about ten minutes, I then melted beeswax pellets in the microwave. I first coated the outside of the costrel with the wax and once fully coated, I melted more wax and poured it into the costrel. I did my best to let the wax run over the entire inside of the costrel and gave special attention to the seams. After pouring the wax inside and swirling it around, pour it out and reheat the wax or add more and re-swirl at least one or two more times.
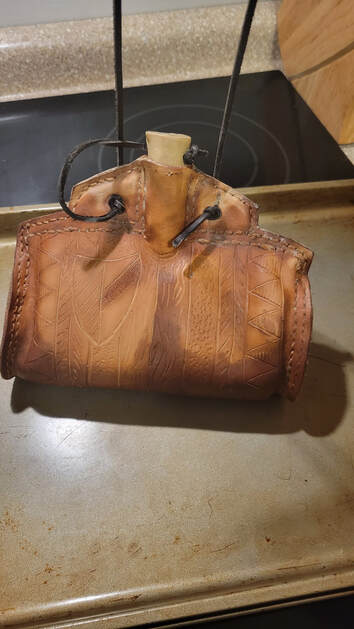
I then let the costrel cool and tested if it was watertight. Luckily it was and I was ready to drink.
Alternative sealing method:
As an alternative to beeswax, you can also use brewer’s pitch, also known as pine resin crystals. I know that Townsends sells some on their website which would be good to use. Brewers pitch is applied in much the same was as beeswax and can also be used to coat the costrel.
Care and maintenance:
Because this is a leather item, do your best to keep it dry between uses. This will help keep the wax coating intact and prevent mold growth in the costrel. Let it dry upside on a wire rack and to fully air dry before storing.
Concluding Impressions:
I had a lot of fun with this project, and I was very pleased that my designs turned out as well as they did. My kids are impressed at how the wood grain sections turned out in particular. This is one of my favorite kit pieces because it is so highly personalized. I also really like it because it serves such a useful practical purpose. I had gone to events in the past and never really had a good period way to drink and carry water. Usually, I was either thirsty or made my wife carry the plastic water bottle. Now I don’t need to worry about looking good when I take a drink.
